Posted on

Prepare a Quilt for Machine Quilting? Let’s Use Plywood!

Are you preparing a Quilt for Machine Quilting? Let’s use plywood! Are you tired of bending over, taping to the floor to prepare a quilt for domestic machine quilting? Do you dread preparing your quilt for machine quilting that you have a stack of nicely folded unfinished quilt tops laying around? Would you rather spend more money on fabric than on paying a long arm quilter to machine quilt your unfinished quilt tops? Do you have a quilt that needs to immediately get quilted because your long arm quilter can’t quilt it for several months and the gifting of the quilt needs to happen now?

Well I have a fast, non back breaking alternative for YOU!

What you will need to get started

You may already have all of the supplies listed laying around your home and can get to layering that quilt right now!

1. Plywood Thin 1/4″ thick (ideal if pre-sanded)

Get yourself a thin piece of plywood from your local hardware store! I promise it will fit in your vehicle and if not then take some old blankets and tie it to the top of your car! I have done it so many times! A standard piece of plywood is 4 by 8 feet. I get it thin because it is easier to manage within your home and pick up and move around without you breaking your back.

Sanded Plywood used to prepare a quilt for machine quilting by safety pinning the quilt layers together

Now you are probably going to say where do I keep a piece of plywood in my home! I have had the same piece of plywood for many years and no one ever sees it. I have stored mine under a rug, behind a large piece of furniture or under a bed. Sometimes it even has been in the garage. Your plywood can be multipurpose, for example my kids have painted on it, used it as a dance floor and more!

2. Painter’s Tape approximate 2 inches wide

I like to use Painter’s Tape that is almost 2 inches wide. With 2 inches wide you can get a good grip on the fabric and the plywood without tape residue sticking to your fabric. You can purchase quality painters tape below from my Amazon Affliate Link.

3. Binder Clips 1 1/4″ wide

I actually get Binder Clips that are medium sized 1 1/4″ Wide, 5/8″ Capacity. They usually come in black and can be purchased in a pack of 24. You can purchase them below from my Amazon Affliate Link.


4. Small table of any kind

Now any small table can work, but this is the one I use. First of all, I love this table because it is light and made of plastic. The table legs are adjustable in height. Maybe you want to sit in a chair and pin your quilt layers together while watching a favorite movie or evening news. Perhaps you want to stand up and pin. This table is very affordable, the last time I looked on Amazon it was only $34.00 and if you have an Amazon Prime account not only do you get free movies… but this item comes with free shipping! Just think you can order this table with my Amazon Affliate Link and not have to load it into your car to get it to your home. I also use this table to sew in different places around my home such as in front of the TV while my family is watching a movie together. My husband and kids use the table all the time and is perfect if entertaining in your home; we constantly vary the height of the table with the adjustable legs based on its usage.


5. Safety Pins

You will pin together your quilt with safety pins.  To purchase your pins from Stitches Quilting click the images below.

Quilter's Safety Pins Size 1 150 Count

Dritz Curved Safety Pins Size 2 Quanity 40


I used to tape it to the floor but sometimes I didn’t feel like my floor was clean enough and put off the preparation?  I got tired of asking my kids not to walk on my quilt taped to the floor.  My back and knees ached after pinning a quilt that was taped to a floor.  I got tired of finding a place to tape the quilt on the floor that wouldn’t be in the way as we use our home. I used to do this technique on my dining room table but I got tired of clearing the dining room table and then not being about to use the dining room table until my quilt was completely pinned.

What’s nice about this method is if you need to go prepare dinner and serve it then you just get to it.  I can set it all up and start pinning, then pick up kids from school, run errands and come back to it a day later with my quilt preparation untouched or dirty.  One time when we had company over, I picked up the piece of plywood with the quilt attached and put it into another room, took down the folding table and everything was back to normal.  You might have a surprise quilt gift for a family member and this method gives you a chance to prepare the quilt without them seeing or knowing what you are doing.

What do you think about this technique to prepare a quilt for domestic quilting?  How do you prepare your quilt for domestic machine quilting?  What do you think about this method?

Best Wishes for Happy Stitches!

Deanna Wall Stitches Quilting Stitching Through Life

Posted on

About Stitches Quilting

Stitches Quilting Your Neighborhood Online Quilt Store

As the owner of Stitches Quilting, Your Neighborhood Online Quilt Store, I opened my first brick and mortar store back in 2002. It was a thrill and dream come true. There was so much excitement in just touching all the glorious fabrics, threads and samples.

I loved being able to inspire young and more mature quilters to work with such beautiful materials. The shop was always open to anyone that just simply wanted to come and sew. I loved having it busy with lots of people to inspire each other. We even had a children’s area with a custom built cottage for them to play in with lots of toys to occupy their sweet minds as their mothers were distracted.

Now with Stitches Quilting being an exclusive online store, I want to create a feeling that we are your Neighborhood Quilt Store just right around the corner and at your fingertips when you need us.

Let us help you find just the right fabrics, supplies, ideas and teach you the skills if needed to execute your projects.  We are here to personally assist you with anything like determining how much fabric is needed, combining fabric colors or altering the size of a pattern. Just as we want to inspire you, we want you to inspire us with what you are working on. We want to personally get to know each one of you!

If there are special fabrics/supplies that you are looking for we can special order items or put together custom kits just for you!

We want you to feel valued and important!  Please let us know if there is a video lesson that you would appreciate in a particular project with particular tools.  We can make it all happen just for you!  Enjoy looking through the shoppe, be inspired by the product idea gallery and blog, glance at the lessons and free video tutorials that we have so that you can execute your special creation just perfectly with pleasure! 

We want to hear your delight in receiving your package and your progress in making the creation you have set out to do!  You may just be looking for that final fabric to complete an UFO or projects that just isn’t quite complete.  We have downloadable patterns that you can download after the purchase of your products and in every package I always send just a bit of something extra to delight you!  

My hope is that you enjoy the online store and contact us if you have any questions. I will also sell patterns that I have designed from quilts I made for those I love.

Happy Stitching and please don’t hesitate to email or call if you have any questions.

Deanna

(801) 918-8792

deanna@stitchesquilting.com

Stitches Quilting Your Neighborhood Online Quilt Store

Posted on 3 Comments

Vintage Swimming Suit Quilt Block Tutorial Part 2 Womens Suit

Quilt Block Vintage Swimming Suits


Let’s start the tutorial on how to construct the Women’s Vintage Swimsuit part of this 12.5 inch block.

Vintage Womans Swimming Suit Quilt Block
Vintage Womans Swimming Suit Quilt Block. This side measures 6.5 inches wide by 12.5 inches wide.

Click Here, if you missed the first half of the tutorial constructing the Vintage Men’s Swimming Suit

Part 2: Women’s Vintage Swimsuit

To understand which sections we are referring to in the tutorial, below is a friendly diagram of the quilt block.

Vintage Swimming Suits Quilt Block Pattern


Download Vintage Swimming Suit Quilt Block Pattern NOW

Free pattern download, as seen in the 2017 Quilters Planner by Deanna from Stitches Quilting.

Construct Women's Section EE - Bottom Section of the Women's Bathing Suit

  • Cut 1 - Women's Bathing Suit Bottom from the Bordeaux Fabric
  • Cut - 13 Peach Sand templates provided in the Women's Bathing Suit printable.  The 13 Peach Sand Pattern Pieces are labeled WOMEN-L,M,N,O,P,Q,R,S,T,U,V,W,X, to reference where to stitch them.

Vintage Womans Swimming Suit Bottom

  • Stitch the Peach Sand WOMEN-M & N triangle pieces to the lower left and right edges of the Bordeaux Women's Bathing Suit Bottom.
  • Stitch the Peach Sand WOMEN-O & P triangle pieces to the upper left and right edges of the Bordeaux Women's Bathing Suit Bottom.
  • That completes Women's Bathing Suit Section FF.  Carefully press and Set Aside.

Construct Women's Section FF - White Belt Section of the Women's Bathing Suit

  • Cut 1 -  1.5 inches x 4.5 inches White Fabric for Waist White Belt
  • Cut 2 - 1.5 inches x 1.5 inches Peach Sand Fabric (Representing Q & R)
  • Stitch Peach Sand Women- Q & R Square pieces (2 Peach Sand cut 1.5 inches by 1/5 inches) to either side of the White Women's Bathing Suit Waist Belt.

Womans Bottom and Waist Swimming Suit Quilt Block

  • Section FF is complete.   This section needs to be squared up prior to attaching the white belt.  In this example I only square the top on the bottom piece before attaching the white belt.  Carefully press.
  • Join Women's Section EE to section FF.  Carefully press and set aside.

Womans Bottom Pieced with Waist Vintage Swimming Suit

Construct Women's Section GG - Bodice Section of the Women's Bathing Suit

  • Cut 1 - Lower Bodice from pattern piece out of the Daydream Blue Fabric
  • Cut 1 - Upper Bodice from pattern piece out of the White Fabric

Vintage Womens Bodice Straps Ready to Piece Quilt Block

  • Stitch Peach Sand Triangles S & T to the left and right lower corners of the Lower Bodice Daydream Blue.
  • Stitch the Upper White and Lower Daydream Blue Bodice pieces together.
  • Stitch the Peach Sand Triangles U & V to the left and right top corners of the Upper Bodice of White Fabric and part of the Lower Bodice of Daydream Blue Fabric.
  • Section Bodice GG is complete. Carefully press and set aside


Construct Women's Section HH - Straps Section of the Women's Bathing Suit

  • Cut 2 - 1.5 inches x 3 inches for left and right Women's Straps from White Fabric
  • Cut 1 -  2 7/8 inches x 3 inches for the center square between the two white straps from Peach Sand Fabric
  • Cut 2 -  2 inches x 3 inches for the left and right rectangles of either side of the two white straps from Peach Sand Fabric
  • Cut 1 - 3 inch x 3 inch square of Peach Sand Fabric to represent template @
  • Stitch the Peach Sand Square Women's W (3 inch x 3 inch square of Peach Sand Fabric) to the center of the two straps
  • Stitch the Peach Sand Rectangles Women's W & X to the left and right sides of the straps.

Vintage Womans Swim Suit Top Pieced

  • Section Swimming Suit Straps HH is complete.  Carefully press and set aside.

Finish Joining the Women's sections together in the following order

  • Join Women's Section FF to section GG. Carefully press
  • Join Women's Section GG to section HH.  Carefully press.
  • The Women's Bathing Suit part of the block is now complete and will need to be carefully squared up to 6.5 inches by 12.5 inches.

Vintage Womans Swimming Suit Quilt Block

Final Step:

Join the Women's Bathing Suit to the Men's Bathing Suit by stitching together after carefully pinning using a 1/4 inch seam.

Quilt Block Vintage Swimming Men & Womens Suits Attached together
Quilt Block Vintage Swimming Men & Womens Suits attached together 12.5 inches x 12.5 inches

Carefully press block.  Sit back and admire.  You have done a great job!

Click Here, if you missed the first half of the tutorial constructing the Vintage Men's Swimming Suit

Please comment below, I can't wait to hear from all of you!  Where have you enjoyed an ocean sunrise or sunset.  All of the blocks from the entire group are AMAZING!  Can't you imagine one of these blocks extra large size as one quilt?  Want to see more Vintage Bathing Suits and Ocean Quilt Blocks?  I will be posting more - sign up for Stitches Quilting email list to have them delivered to your inbox!  Which blocks from the entire 2016 Paintbrush Studio Blog Hop do you think would pair up great with the Vintage Bathing Suits?  Can you image this block with other colors or fabric selection?  I can't wait to hear your creative ideas?

Now don't stop here.... there are many more innovative Ocean Sunrise quilt blocks and full tutorials to see on the 2016 Paintbrush Studio Blog Hop!  . To view the blocks visually and quickly you can use the Stitches Quilting Pinterest Board I created below for the Blog Hop.


WEDNESDAY MARCH 30TH

MONDAY MARCH 28TH

Host: Yvonne @Quilting Jetgirl

Jess @Quilty Habit, Silvia @A Stranger View, Cristy @Love You Sew, Kelly @Quilting It Out, Renee @Quilts of a Feather, Bernie @Needle and Foot, Terri Ann @Childlike Fascination, Chelsea @Patch the Giraffe, Mary @Quilting is in my Blood, Diana @Red Delicious Life, Sarah @123 Quilt

TUESDAY MARCH 29TH

Host: Cheryl @Meadow Mist Designs

Kim @Leland Ave Studios; Andrea @The Sewing Fools; Cassandra @The (not so) Dramatic Life; Stephanie @Quilt’n Party; Irene @Patchwork and Pastry; Tish @Tish’s Adventures in Wonderland; Abby @Hashtag Quilt; Sarah @Smiles Too Loudly; Carrie @The Zen Quilter; Wanda @Wanda’s Life Sampler

2016 Paintbrush Studio New Block Blog Hop
Many thanks to Paintbrush Studio, our great sponsors and Blog Hop Organizers!
Deanna Wall Stitches Quilting Fall Sale 40 percent OFF your entire shopping cart
Posted on 18 Comments

Vintage Swimming Suit Quilt Block Tutorial Part 1 Mens Suit

Quilt Block Vintage Swimming Suits

When watching an ocean sunrise, we relish and hopefully memorize every moment! It’s intoxicating to feel the cool breeze with your toes in the sand, while deeply breathing the salty air.  It is mind boggling to reflect on how the land, sea and sky can be both powerful and peaceful at the same time.  We can only quietly watch as the evolving timed colorful masterpiece quietly disappears as quickly as it appeared. Don’t you just love to quietly sit there enjoying the live beauty and allow our minds to break from the hustle of worldly needs?

2016 Paintbrush Studio New Block Blog HopWe don’t all have the privilege to live by the ocean, but when I am by the ocean, I try to memorize these moments in my heart. Ever since there have been people on the earth by the sea, I am certain that the ritual we enjoy and feel from ocean sunrises and sunsets are similar. It is mystifying to think we are relishing things that have been experienced by many different civilizations, cultures, people and times.  That quiet private therapeutic moment with nature can make us realize how small we are in scale to the civilizations that came before us.

Paintbrush Studio is sharing an Ocean Sunrise color palette from their new line Painters Palette solids for us to use our imagination to celebrate these moments.  As you surf the World Wide Web, you will notice over 30 quilt bloggers creating new quilt blocks to try to express their joy through fabric providing full tutorials to inspire you.

2016 Paintbrush Studio New Block Blog Hop
Ocean Sunrise Colors (L to R): Midnight Blue, Daydream Blue, White, Peach Sand, Coral, Bordeaux

I can picture generations and different eras dressed in their ever evolving clothing styles enjoying these moments.   The one item consistent with people enjoying a sunset or sunrise is clothing and the fabric they are wearing.  Don’t we just love fabric?  Some of the fashions, style, fabric come and go with the ebb and flo of our cultures.

I love modern twists on vintage items.  For my block, I thought I would celebrate the modest vintage swimsuits that perhaps people were dressed in ready to leisurely enjoy the day along the sandy beaches.  I designed a modest man and woman’s swimsuit sitting next to each other on the sandy beach.  Perhaps watching the early morning sunrise or evening sunset, they would not only have their swimsuits but also a quilt to stay warm. (wink)

As stitching this block together we can think about and appreciate the civilizations before us that have enjoyed ocean sunrises and sunsets during daily life, times of war, contemplation, anticipation and peace.

To create this block I used the Painters Palette Midnight Blue, Daydream Blue, White, Peach Sand and Bordeaux Solids.  The methods used to create this block are piecing and strip piecing with a consistent 1/4 inch seam.  I love the striped vintage men’s swimsuit in Midnight Navy Blue and Daydream Blue.  The women’s swimsuit gives a nautical feel with the Bordeaux, White and Daydream Blue along with the white buttons to embellish the suit.

Quilt Block Vintage Swimming Suits


Part One Tutorial – Men’s Vintage Swimming Suit for an Ocean Sunrise 

1.  Read through the entire tutorial and instructions.  Stitch everything together with a 1/4  inch seam.

2. Here is a friendly layout of the Vintage Bathing Suits and the sections we will be working on.

Vintage Swimming Suits Quilt Block Pattern


Download Vintage Swimming Suit Quilt Block Pattern NOW

Free pattern download, as seen in the 2017 Quilters Planner by Deanna from Stitches Quilting.


3. Cut the fabric carefully according to the instructions and specifications provided in the tutorial.

4 .  To create this 12.5 inch block we are going to break the block into manageable pieces working on Part One: Men's vintage bathing suit section and  Part Two: Women's vintage bathing suit.

Part 1: Men's Vintage Bathing Suit

Construct Men's Section BB - Center Section of Men's Bathing Suit

  • Cut 3 - Midnight Navy Blue strips 1.5 inches by 7 inches
  • Cut 4 - Daydream Blue strips 1.5 inches by 7 inches
  • Sew 7 strips together alternating the Daydream Blue Strips with the Midnight Navy Blue strips.  Since you are working with 4 Daydream Blue strips and 3 Midnight Navy Blue strips each section will begin and start with a Daydream Blue strip.

Mens Swimming Suit Striped

  • Square up this section so it is 6.5 inches wide and 7.5 inches tall.  This will be the center body portion of the men's vintage bathing suit section MEN-BB.  Carefully Press and set aside.


Construct Men's Section AA - Men's Bottom Section for legs 


  • Cut 2 - Midnight Navy Blue Strip 1.5 inches by 3.5 inches
  • Cut - the 8 Peach Sand templates provided in the Men's Bathing Suit printable.  The 8 Peach Sand Pieces are labeled MEN-A, B, C, D, E, F, G, H, I, J to reference where to stitch them.  Use the 8 templates to cut pattern pieces from the Peach Sand fabric.
  • To ensure that the sizing is just right there is a special pattern piece labeled Men's Swimsuit Polygon Pattern Piece.  Be sure to trim the fabric of this connected section to the size of the Men's Swimsuit Polygon Pattern Piece.

Vintage Mens Shorts Swimming Suit Pieces

  • Arrange the 2 - 1.5 inch by 3.5 inch Midnight Navy Blue side by side lengthwise.
  • Stitch the Men's Peach Sand A & B small triangle pattern pieces individually to each center ends of the 2 - 1.5 inch by 3.5 inch Midnight Navy Blue pieces.  Stitch the two pieces together lengthwise.  Carefully Press and set aside.

Vintage Mens Swim Suit Legs Pieced

Join Men's Sections AA to BB 

Join Men's Vintage Swimming Suit Section AA to Men's Vintage Swimming Suit Section BB. This is the lower portion of the Men's Vintage Swimming Suit with the center Peach Sand triangle as the bottom.

Vintage Mens Swim Suit Join Body to Legs

Stitch Men's Peach Sand C & D long triangle pattern pieces to the bottom left and right sections of the lower portion of the Men's Vintage Swimming Suit (Combined sections just stitched together of Section MEN-AA and MEN-BB).  Carefully Press and set aside.


Construct Men's Section CC - Men's V Neckline 

  • Cut 2 - Midnight Navy Blue Strips 1.25 inches by 7 inches
  • Cut 1 - Daydream Blue Strip 1.25 inches by 7 inches.
  • Alternating 3 of the 1.25 inch by 7 inch blue strips, stitch together 2 Midnight Navy Blue Strips with 1 Daydream Blue Strip in the center.
  • Cut this set of strips in half and stitch Peach Sand Pattern Piece E & F

Vintage Mens Swim Suit Neck Line

  • Sew the set of strips back together along the long side of the triangles E & F.  Attach the Men's V Neck Line section to the Men's Main Swim Suit Section.

Mens Swim Suit Neck attach to Body web

  • Stitch the Peach Sand Pattern pieces G & H to the left and right edges of the Polygon Pattern Piece.
  • Men's Vintage Swimming Suit Section CC is now complete.  Carefully Press and set aside.


Join Men's Section CC to BB together.

Complete shape of Men's Swimming Suit Section by sewing both Peach Sand Pattern Pieces F & G to the left and right top sides of Section CC combined with Section BB.  Carefully Press and set aside.


Construct Men's Section DD - Men's Upper Straps to Suit

  • Cut 2 - Midnight Navy Blue Squares 1.25 inches by 1.5 inches
  • Cut 4 - Daydream Blue Squares 1.25 inches by 1.5 inches
  • The 2 bathing suit straps are constructed by sewing 2 Daydream Blue Squares with 1 Midnight Navy Blue Square in the center.   The final size of the bathing suit straps will be 3.25 tall by 1.5 inches wide.  Be careful on this step to stitch the bathing suit straps so the stripes when finished will be 1.5 inches wide and 3.25 tall.
  • Join the two Upper Straps of  Suit with Peach Sand Pattern Square Piece H (2.5 inches x 2 7/8 inches) to either side of the 3.25 strap length.

Mens Swim Suit Straps web

  • Stitch Peach Sand Pattern Pieces of I & J (1.5 inches by 2.5 inches)to either side of the bathing suit  straps.  Carefully Press and set aside.


Join Men's Section CC & DD together.

  • Finishing the Men's Bathing Suit Block Section

Mens Swim Suit Join Straps to Body web

Now that the Men's Bathing Suit is constructed, carefully press. The block needs to be carefully squared to the dimensions of 6.5 inches by 12.5 inches.

Mens Vintage Swim Suit Quilt Pattern

Click HERE - For the second half of the tutorial - Part 2: Women's Vintage Swimsuit

Please comment below, I can't wait to hear from all of you!  Where have you enjoyed an ocean sunrise or sunset.  All of the blocks from the entire group are AMAZING!  Can't you imagine one a these blocks extra large size as one quilt?  Want to see more Vintage Bathing Suits and Ocean Quilt Blocks?  I will be posting more - sign up for Stitches Quilting email list to have them delivered to your inbox!  Which blocks from the entire 2016 Paintbrush Studio Blog Hop do you think would pair up great with the Vintage Bathing Suits?

Now don't stop here.... there are many more innovative quilt blocks and full tutorials to see on the 2016 Paintbrush Studio Blog Hop! To view the blocks visually and quickly you can use the Stitches Quilting Pinterest Board I created below for the Blog Hop.


WEDNESDAY MARCH 30TH


MONDAY MARCH 28TH

Host: Yvonne @Quilting Jetgirl

Jess @Quilty Habit, Silvia @A Stranger View, Cristy @Love You Sew, Kelly @Quilting It Out, Renee @Quilts of a Feather, Bernie @Needle and Foot, Terri Ann @Childlike Fascination, Chelsea @Patch the Giraffe, Mary @Quilting is in my Blood, Diana @Red Delicious Life, Sarah @123 Quilt

TUESDAY MARCH 29TH

Host: Cheryl @Meadow Mist Designs

Kim @Leland Ave Studios; Andrea @The Sewing Fools; Cassandra @The (not so) Dramatic Life; Stephanie @Quilt’n Party; Irene @Patchwork and Pastry; Tish @Tish’s Adventures in Wonderland; Abby @Hashtag Quilt; Sarah @Smiles Too Loudly; Carrie @The Zen Quilter; Wanda @Wanda’s Life Sampler

 Many thanks to 2016 Paintbrush Studio Ocean Sunrise sponsors and blog hop organizers!
Deanna Wall Stitches Quilting Fall Sale 40 percent OFF your entire shopping cart


Posted on

Unique Personal Holiday Gift Guide for Creative Women

Buying a gift for a creative mother, wife, daughter or special someone that has her family at the center of her heart is sometimes difficult. With these women always thinking of others or their families first are often hard to find a gift for.

Unique Personal Holiday Gift Guide for Creative Mothers

Unique Personal Holiday Gift Guide for Creative Mothers. Buying a gift for a creative mother, wife, daughter or special someone that has her family at the center of her heart is sometimes difficult.  With these women always thinking of others or their families first are often hard to find a gift for.

We have put together a collection of 10 very unique gifts that you won’t find in a box store but that your special someone will appreciate!  And a special giveaway for there to be 10 lucky winners.  Enter the giveaway at the end of the post through Rafflecopter.

I Love You Forever Infinity Necklace Sterling Silver
  • Like your never-ending love, the words ‘I love you forever’ repeat themselves endlessly on this elegant infinity pendant.  This elegant ‘I love you’ necklace makes a beautiful gift for your wife, mother, girlfriend or special someone.  Comes with an 18 inch chain with spring ring closure for $38.99.  Made of pure sterling silver. Woot & Hammy – silver infinity necklace is an excellent gift but if this isn’t just the right item be sure to visit their website in search of just the right personal item.


DIY Soap Making Kit
DIY Soap Making Kit

Make gorgeous sweet smelling soap flats with this kit. Comes with enough soap to make 4 soap flat bars. The holiday fragrances make for a lovely handmade gift, or a great activity for your creative loved one that wants to made a simple luxurious soap to indulge in! Kit includes: Melt and pour soap, Soap flat mold, 3 fragrant botanical additions (cranberry, cinnamon, pine), Ribbon, Gift tags.  If this kit doesn’t seem to fit the need of your loved one please visit DIY Happy Kits website to view Citrus Bath Salts Kit, Stamped Scarf Kit, DIY Valet Kit, and MORE.  You will not be disappointed.

Set of 4 Chickadee Espresso Cups

Look at the birds of the air, that they do not sow, nor reap nor gather into barns, and yet your heavenly Father feeds them.  Are you not worth much more than they?   Matthew 6:26  Let this set of chickadee espresso cups remind your loved one that the Lord is faithful to tenderly care for His people and fear not.  This set of four espresso cups has an image has been fired on and will never fade or scratch off.  Made of fully vitrified porcelain which means that your espresso cups are chip and crack resistant.  3 oz. capacity; 2-1/4″ High; 2″ diameter $19.95 and if this item isn’t just what you need be sure to browse Heavenly Home Cooking to find the perfect personal gift from their selection of cookbook stickers, bowls, plates, mug and more.  Includes an inspirational gift insert.

A handy travel tea wallet bistro

How about a handy travel tea wallet bistro for your special lady to always have her favorite tea handy to sip when there is a break in the day no matter where she might be.  Steeping Secrets – has a lovely handy travel tea wallet made from 100% cotton fabric in 5 different styles to choose from.  The wallet stays securely tucked away until tea is needed.  If a handy travel tea wallet doesn’t seem to fit the needs be sure to visit their website for other tea related personal items that include tea cup rugs, tea pot cozies and more.


Utterly Hot Mamma Nursing Top

You loved one with a newborn will feel like the sophisticated, hot mama when she slips on a Whimsical Wrap.  This is an excellent gift for the holiday or baby showers!  This strategically designed nursing top highlights your décolletage while keeping everything else covered up in a classy way. The sash and gathered fabric beautifully define your waist and make you forget you’re postpartum.When it’s time to breastfeed or pump, simply loosen the sash. The inside flap, in every Udderly Hot Mama® nursing top, provides extra privacy during a feeding or pumping session. When baby’s weaned, you can snap it right out and add your top to your everyday wardrobe. The pumping bra is not included.  Check out the colors this top comes in of black, brown, seafoam, purple and coral at Udderly Hot Mama website and if this Nursing Wrap Top isn’t what you need, I think you will find some other unique gifts for your loved one.

Curiosity Pack - Letter Games and Activities for Early Readers
Curiosity Pack – Letter Games and Activities for Early Readers

A mother, grandmother or teacher that puts her kids first are always thinking about ways to teach those children in more effective ways.  How about a Curiosity Pack which includes letter games and activities for early readers.  This unique approach will get kids excited about learning their letters.  There is an inquisitive activity book, alphabet card game, poster and hidden alphabet letters in a laminated creative illustration for kids to search and circle those alphabet letters!   Be sure to visit Curiosity Pack – with letter games and activities for early readers!  They are a creative bunch of people with lots of resources that might interest your special someone.


Book Living Simple Free and Happy

These inspiring books may be just the perfect gift for women that appreciate Living, Simple, Free and Happy. This book features 10 upcycling tutorials and 5 DIY projects for your home. Keep in mind, this is not a book full of “neat” projects. This is a lifestyle course, where you will learn to create with the purpose of clearing out the debt, clutter and maintenance that is weighing you down. Simple techniques that eliminate clutter and keep it from returning.  A personalized plan to help you reclaim your time. Practical (and profitable) ways to sell unused items in your home. Tips to eliminate debt and curb consumption. Step-by-step upcycling projects that transform old, unwanted furniture into beautiful, customized organizing systems. Dozens of exercises that help you identify and honor your talents, values, and goals.  Not only is this book available at Eve of Reduction but there are several more brilliant books Rooms Repurposed and Creative Cashflow.

Box full of Designer Product Teacher Gifts
Pampered Teacher Box full of Designer Product Teacher Gifts

Want a special teacher gift that’s sure to brighten your favorite teacher’s day? Well, you’ve come to the right place! The Pampered Teacher gift box is full of fashion and classroom accessories for female teachers! We handpick quality items to enhance a teacher’s style and give her useful supplies for her classroom.
A one month care package of teacher gifts will arrive right to your doorstep or can be sent directly to her with a special note from you.  You customize the package by answering a set of optional questions when you purchase the gift.  Sometimes it’s hard to think of a way to show your appreciation for hard working teachers.  Be sure to visit the Pampered Teacher great product carefully researched to be enjoyed by all teachers.

Olfa Rotary Cutter 45 MM

Is your gal a creative that needs precision?  The Olfa Rotary Cutter Ergonomic 45mm Blade with Locking mechanism is an indispensable tool to get precise cutting of fabric, paper, foam core and more! The blade is reversible, making the cutter a true left or right hand product. The cutter will accept the pinking/wave/standard blades. A safety button can be used to lock cutter in closed position and it ergonomic handle makes it easier to use for repetitive cutting.  She might already have one but needs new blades, fresh self-healing new cutting mat or 6×24 inch see through non-slip ruler.  Stitches Quilting offers quality items with affordable prices.  You loved one may be wanting to start a new hobby in a season of life that she would need a set of these or just a fresh new cutter.

Be sure to enter the Rafflecopter Holiday Giveaway Roundup to win one of these excellent items! a Rafflecopter giveaway
This Holiday Giveaway Roundup is being brought to you by the following list of participants and each of their products! This is one talented group of women that can help you purchase unique personal items for those you care about!  Support small businesses and get some meaningful gifts this year for your loved one. Participants and Products 1. Curiosity Pack – letter games and activities for early readers 2. Steeping Secrets – tea wallet 3. Woot & Hammy – silver infinity necklace 4. Stitches Quilting – Olfa Rotary Cutter 5. DIY Happy Kits – soap making kit 6. Udderly Hot Mama Nursing Wrap Top 7. Heavenly Home Cooking – set of 4 espresso cups 8. Pampered Teacher – box of teacher gifts 9. Eve of Reduction – signed copy of “Living Simple, Free & Happy”

Posted on 27 Comments

Stitches Quilting AUTUMN FABRIC Giveaway Pre Black Friday

Black Friday Stitches Quilting Fabric Giveaway

Stitches Quilting Autumn Fabric Giveaway Pre Black Friday

It’s time for another giveaway to celebrate the season!  So before Black Friday, Stitches Quilting has some Autumn Fabric to giveaway.  There are several ways to enter the giveaway and you can enter more than once.

There will be 5 Autumn Giveaway Winners Stitches Quilting
There will be 5 Autumn Giveaway Winners

There will be 5 Stitches Quilting Autumn Giveaway Winners that will receive a package of Autumn Fabric in the mail!  The giveaway will be open from November 17 to 23, 2015.Stitches Quilting Love Autumn

Please share Stitches Quilting Autumn Giveaway.  I am trying to get this blog and quilt store soaring to bring you the brilliant ideas, incredible fabrics, free patterns, tutorials, ideas and more.  All you creatives out there, please leave comments and let me know what you like to see in creative blogs or online stores

a Rafflecopter giveaway


Stitches Quilting Autumn Giveaway Black Friday Fabric


I promise to notice if you share or pin this Giveaway Post with others… Just use #stitchesquiltingfall giveaway#stitchesquiltingfall when you share and I will find it!

I will also host 4 fantastic giveaways in the next two months.  Please follow me as I will have lots to offer.

I am generous at heart and love to share my enthusiasm for quilting, sewing, being smartly frugal, fantastic parenting, home décor, crafting, DIY and more!  I love FABRIC, threads and want to help all of you find the best way to get and use those things.  I’m also a dreamer of becoming a fabric designer and working on that too!  Dreams…. I bet you have those too!  What dreams do you have?  What dreams are you working towards?  What style of quilting or sewing are you drawn to?

Choose one or all the ways to enter the giveaway!  If you are the kind of person that just likes to enter a giveaway once then please do so as all entries are equal just doing more increases your odds as I can use all the extra love and time you can offer but…. I know time is a precious commodity too so let’s get practical!

The 5 winners will be randomly selected.  Due to laws in other countries, only individuals in the US can enter.  No purchase is necessary to enter the giveaway.  You must be 18 years of age or older to participate.

40% OFF Quilting Stitches FALL SALE Storewide

Right now everything in the Stitches Quilting Store is 40% off and free shipping!  That is like cost to ME!  Isn’t that a giveaway too?

We just remodeled our creative shop and studio!  We shampooed carpets, moved heavy antique cabinets, shelving, displays, long arm quilting machine, sewing machines, inventory and more!  That was a lot of stuff.  I don’t have everything set back up but I can’t wait for you to see our new space and inspire you with lots of ideas to showcase your things!  So buy as much as you can so I don’t have to move or arrange more inventory than I have to!

Thank you everyone for entering…  I have wonderful plans of free ornament patterns, free quilt patterns, free Christmas Tree Skirt patterns, Traditional Holiday Decorating, Grinchy Holiday Decorating, Affordable Personal Gifts to Make, DIY projects, Sales, Giveaways and Inspiration to Keep You Motivated and going!  Let me know what you would like help in and I will deliver it!

If you have a creative idea, blog or business and think we might be a good fit, let me know if you would like to collaborate on something.  I’m always looking for other creative friends!  Email me at deanna@stitchesquilting.com

Lots of happy thoughts being sent your way!


Deanna Wall Stitches Quilting Fall Sale 40 percent OFF your entire shopping cart

Posted on 1 Comment

40% Off Storewide Thank YOU at Stitches Quilting Online Store

40% OFF Quilting Stitches FALL SALE Storewide

We would like to thank you for the many fantastic years with a 40% off Storewide Thank YOU Sale at Stitches Quilting Online Store!  This is for all items in your shopping cart and also includes FREE shipping within the United States.  If you are an international customer, the shipping rate would be a flat rate of $19.95 per order.  Load up your shopping cart with unlimited fabric in stock, notions, books, patterns and MORE!

We have remodeled, shampooed the carpets and please save me from moving more fabric!  We moved the long arm, sewing machines, cabinets, shelving, furniture and more!  I just don’t want to have to keep moving things… please buy as much as you can!

I want to get the displays up and new materials planned for blog posts without having to keep moving inventory!  My body is aching from all the work we have done so far and I want to get back to the creative energy to give to all of YOU! This is our “thank” you before Black Friday!

40% Off Stitches Quilting

I am only 15 minutes from the Riley Blake Warehouse in Salt Lake City, Utah so if there is something you are in need of just email me at deanna@stitchesquilting.com or call me at (801)918-8792


Deanna Wall Stitches Quilting Fall Sale 40 percent OFF your entire shopping cart

Posted on 2 Comments

Thanksgiving Fall Décor Ideas the Simple Quilty Sewing Way

Easy Fast Fall Table Runner to make fast and use those scraps

Its that time of the year welcoming guests into your home for the holidays. Are you starting to get your home ready and planning food? We are and enjoying the process. I have lots of recipes that I would like to share along with simple Fall décor and easy sewing quilting projects to fit in before the holiday comes.

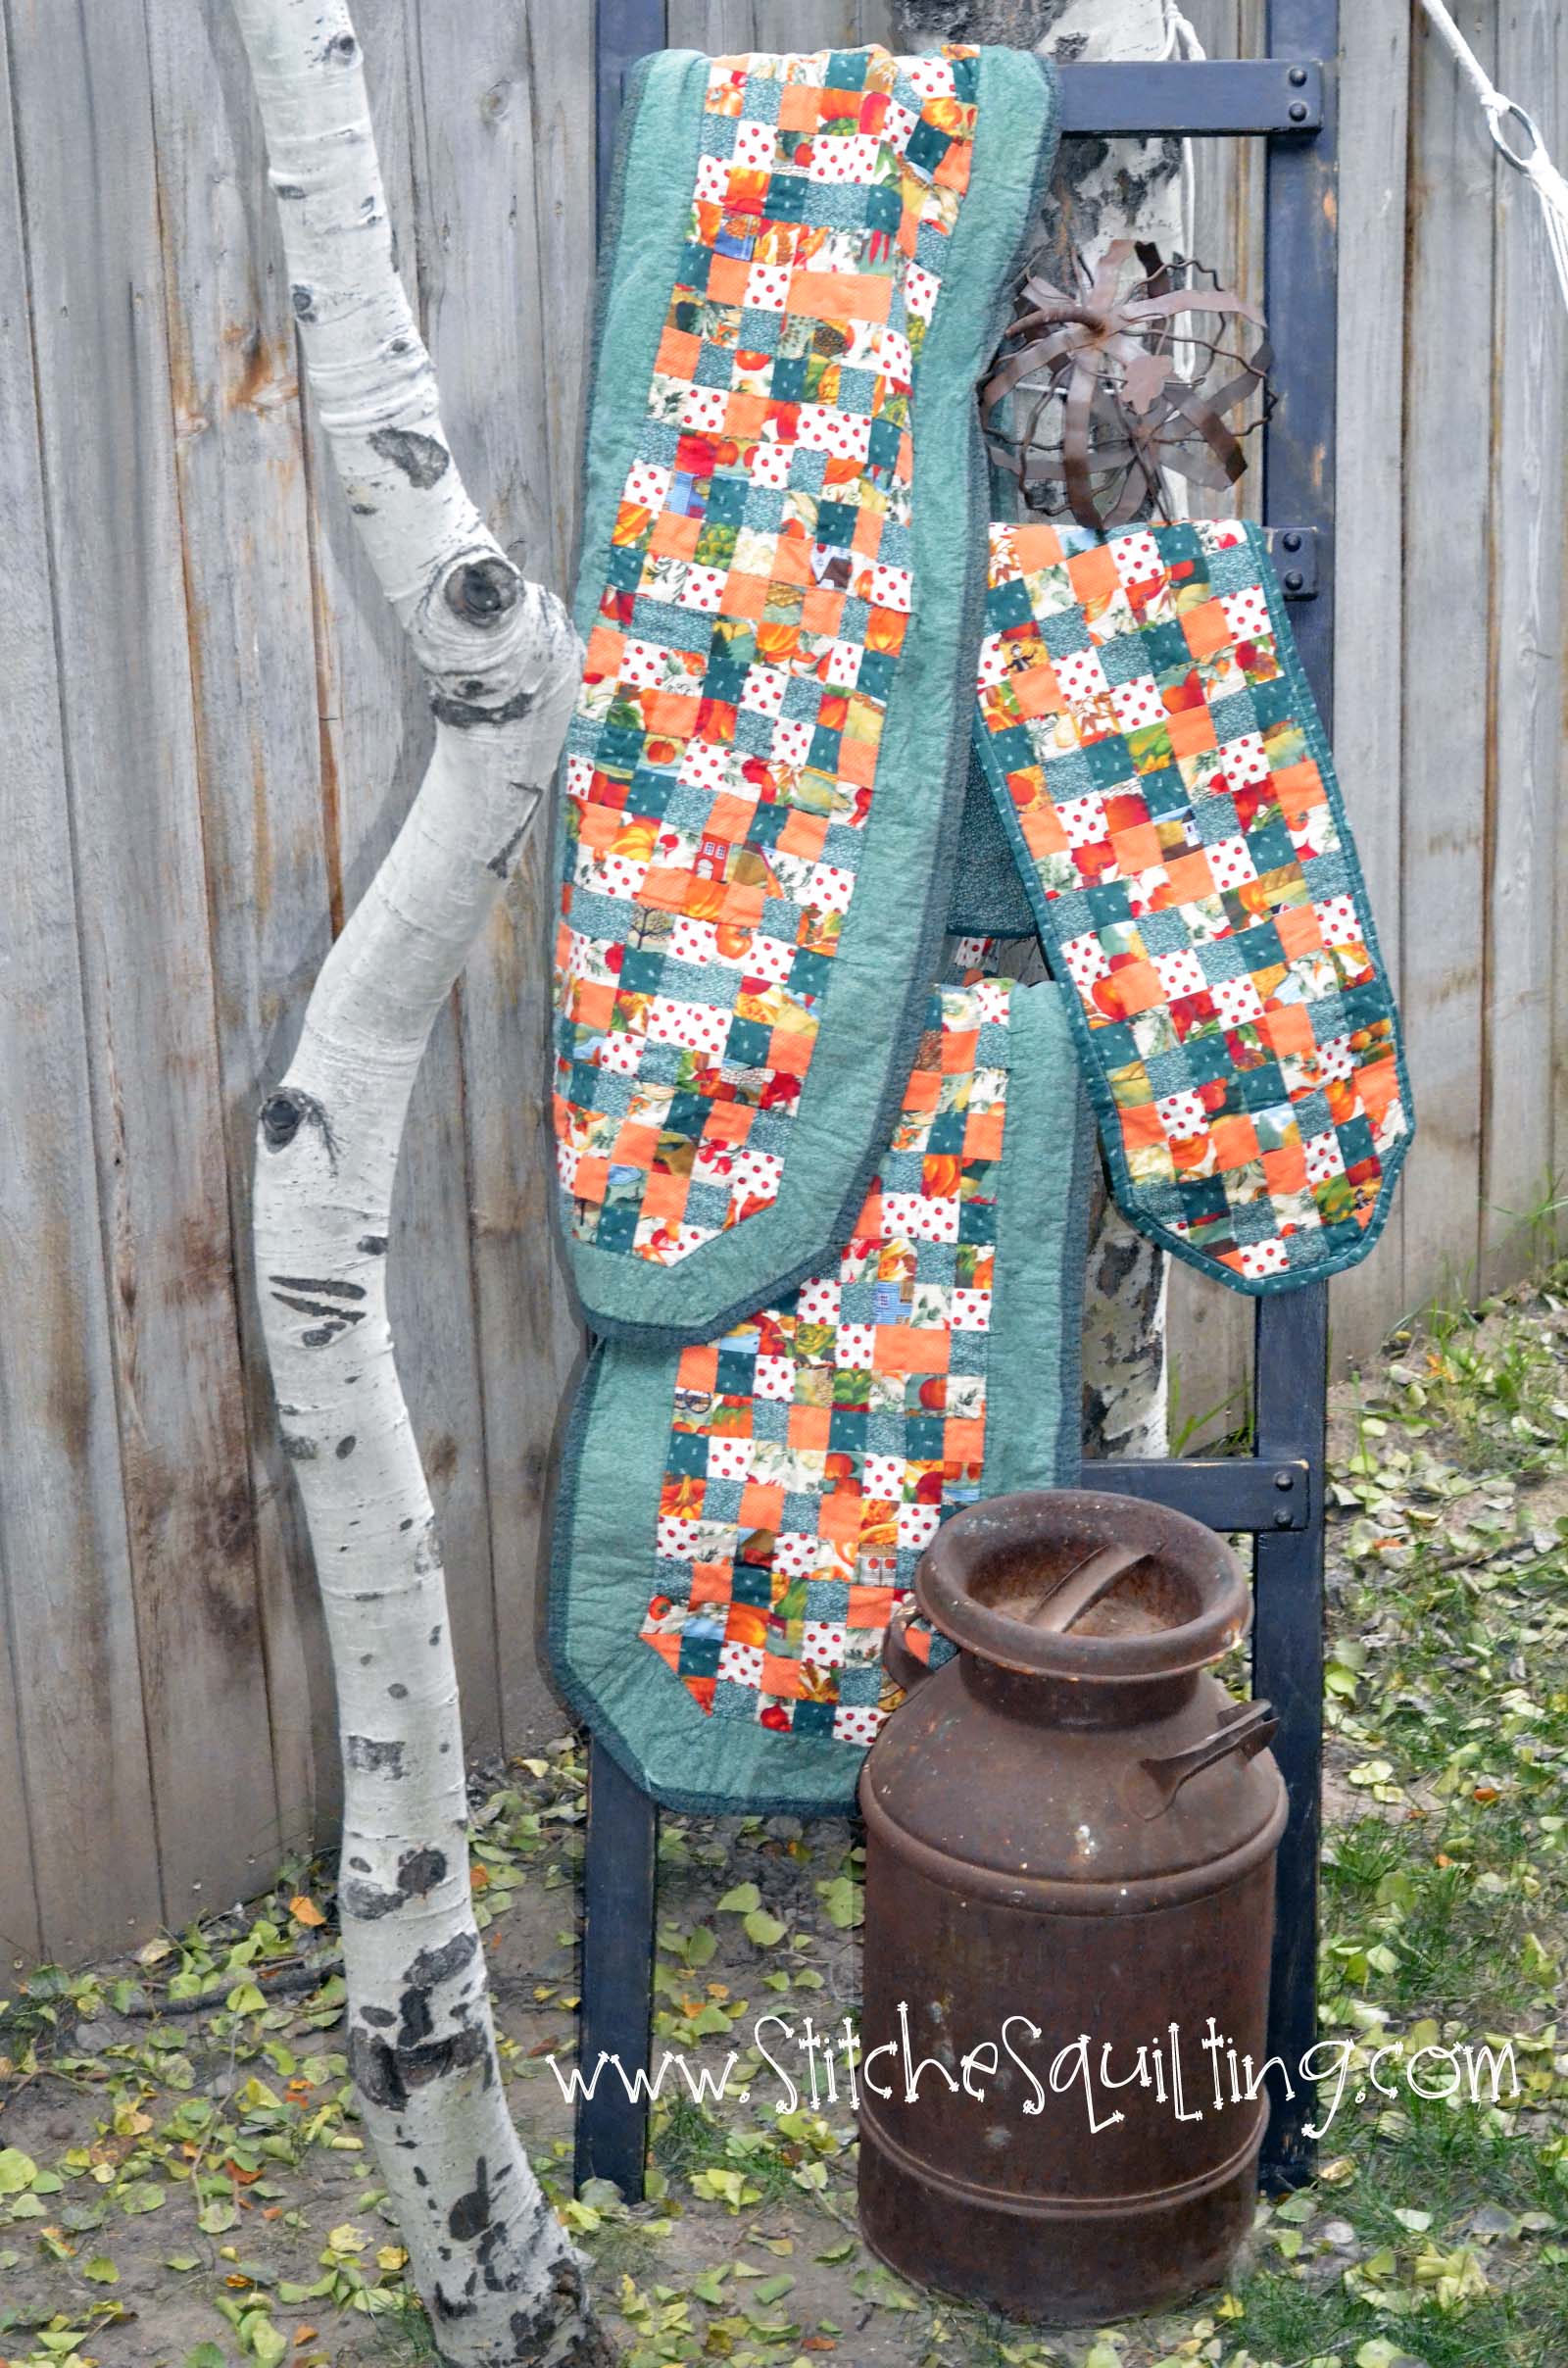
These are very simple table runners that I made just out of scraps of fabric.  I used a strip quilting method and how it went together so very fast.  I enjoy setting these around during the fall months to bring a bit of Thanksgiving and Fall décor without making too strong of a statement.  Here you will see the shorter table runner on my cedar chest.  This is a special little spot in the dining room for us to reflect upon those things that we are most grateful for.  Making your home ready for Thanksgiving or Fall Festivities doesn’t need to be stressful just lay out some simple items to celebrate the season.

Simple Fall Table Runner

This is our narrow long farm house dining room table, that I made this table runner extra long for.  Gathering together just a few items with the table runner is just enough to set the tone.  I tend to purchase through the years metal holiday décor and one thing that I really love about it is that it just doesn’t break!  I gathered clumps of sunflowers to brighten up the table with a couple acorn salt and pepper shakers and I am certain you probably have a fantastic turkey or holiday platter that rarely comes out of the closet that you can use on a metal easel to make that Fall Thanksgiving mood.  When I pieced this table runner together by strip quilting, I just didn’t fuss about what fabric was touching which one and there are a couple of the same fabrics touching each other.  I like to not have to spend so much time thinking through something, get a project done and enjoy it!  What do you think?

Fall Dining Room Table Decor with Quilted Table Runner

These quilted fall Thanksgiving Pillows are perfect to toss around for your family and guests, especially after eating that turkey dinner!  These pillows are so fun to make with just four cream squares in the center, leaves blanket stitched appliqued after a couple borders.  What another great way to use scrappy fabrics laying around just begging to be used.  I am going to make some more pillows this week with feathers reminding of the First Thanksgiving and the generosity of the Indians!  May those pillows remind us to always be accepting of those around us and know that by uniting we have much that we can share and enrich each others lives.  The feather pillows will be a full tutorial with downloadable pattern for you.

Toss around some Fall Thanksgiving Quilted Pillows for people to nap with

For anyone that has been entertained at our home they know that I love to make guests feel welcome.  One of the things I do is having inviting places for people to sit and visit.  Our backyard patio is really an extension of our home with pillows, tablecloths and holiday décor to greet all.  We spend lots of time on the back patio entertaining, so I keep the table cloths and decorative table squares always on the tables.  The couches and chairs are full of bright pillows to cozy up to and of course there are quilts to wrap up in to stay warm if it is a little breezy.  I love pops of color!  You will notice that I have used Riley Blake’s home dec fabric to create matching fabric squares and table runners for the tables.  I just used a 1 1/2 yards of fabrics for a table square and then just hemmed the edge.  They are outside all year long and wash very well!  I throw placemats to add color for the different seasons.  Easy way to create warmth for you and your guests.  The fabric is available in the online store to ship immediately.

Outdoor Patio Fall Table Squares to invite your guests to

I’ll even stitch together a quick table runner for the coffee table of the coordinating Riley Blake Home Dec fabric with a bit of their extra wide ric rac stitched down the center.  I just love the yellow fall aspen tree leaves that are falling everywhere.

Riley Blake Home Dec Fabric used for Table Squares and Table Runner

Our family loves to separate our pumpkin seeds from the pumpkin to bake and nibble on.  It is a tradition that goes back a long way, that my great nieces and nephews along with my own children look forward too.  Notice the fabric I’m planning to use for the feather fall pillow tutorial later this week!  I can’t wait!

Fun in the Kitchen with Pumpkin Seeds and cooking up plans for those new quilted pillows!

Now remember that the pumpkins we buy are not just for decoration or pumpkin carving.  We always buy small pumpkins that we slice open the top and then microwave until the sides are soft and then use that raw pumpkin for real homemade pumpkin pies.  The challenge is worth it along with the full your children and family members will have watching a small pumpkin become a pumpkin pie.  I don’t save these pumpkins for Thanksgiving Day but cook these up so the kids can do it with me and marvel at how simple it is to make pumpkin pie!  When we make ours this week, I will take lots of pictures and post our recipe with complete instructions online!

Don't forget to cook up your small pumpkins for pumpkin pie
Don’t forget to cook up your small pumpkins for pumpkin pie

We have a very wide fireplace mantle.  This is just some simple classy decorating of the fireplace mantle.  Dried gourds that I have kept through the years, our two small pumpkins for pumpkin pie, sunflowers, metal pumpkin and a cornucopia basket.  These are the things that have lasted through the years.  After I set it up and thought – I didn’t use any burlap that I have so much of but I think it looks simple and clean.  I think I might just use that burlap to create a fresh wreath for the front door that can be versatile from holiday to holiday.  I’ll keep you updated.  I would love to see all of your fantastic ideas and thoughts.  What have you used this holiday season?

Thanksgiving Fall Fireplace Mantle Ideas

One thing our family does enjoy is lighting the fireplace and feeling that cozy feeling.  There are lots of quilts folded on the edges of the couches and chairs waiting for people to get comfortable and cozy!  Enjoy your family and focus on your blessings this season.  Remembering our bounty can take away the feeling that we just don’t have enough!

Happy Stitching!

Deanna Stitching Through Life

Posted on

Beginning of a Grinch Christmas

Our Quilted Grinch Tree Skirt that I longarmed Grinch stuff creatures to it! Tutorial coming later this week.

The Beginnings of a Glammy Grinch Christmas

The Beginnings of a Glammy Grinch Christmas – My husband absolutely loves the story of How the Grinch Stole Christmas.  I was one that didn’t really relate to that story and focused on other ones.  When we play the DVD of the Jim Carrey movie of How The Grinch Stole Christmas, will bring my husband to gravitate to the couch and then invariably start laughing so much that we see his sparkly white teeth.  The children just get a kick out of watching my husband do this and they start the movie to just watch the phenomena and start quoting Grinch quotes from memory.  I’m adding a link to the book and movie because I actually had someone message me from another country not familiar with the story of How the Grinch Stole Christmas.

Our two dogs get involved in the movie watching too by barking at poor Max while we watch the movie.  Since my husband’s birthday is November 22, the kids and I would always buy my husband Grinch things and we dedicated a corner, then a room and now most of the house to decorating Christmas Grinchy.  I now have the dining room for my angel tree and all the nativity displays.  Funny isn’t?  We do a lot of spiritual things during Christmas but I have to say by embracing the Grinch everyone is certainly having a lot more fun helping me decorate the house (which is good).  Each year the family comes up with some more great ideas that we need to execute – including my husband.

Our 1st Grinch Christmas Tree with Grinchy Quilted Tree Skirt

I don’t have the BEST Grinchy Christmas decorations PHOTOS but we will be getting our Grinch bins out soon to start getting up to enjoy a long time and share with all of you.  I will post regularly on how to make all this stuff yourself with many easy ideas coming soon.  I recommend signing up for the Stitches Quilting newsletter so you don’t miss a single post.  There will be free downloads, printables, instruction by photograph and video that you just won’t want to miss!

I never understood the message of the Grinch book but now I have a better idea.  The message brings in family discussions of character, compassion, sharing, acceptance, respect, positive thinking, increasing love in our life and more.  I will not only provide tons of big or small ways to bring a bit a the Grinch into your Christmas traditions.

If you are ever facing a hard Christmas from either a loss or financial distress – then the things I will teach you are easy practical fun things to implement as a family and really embrace the spirit of Christmas in a playful way.  We still decorate in a traditional way but use some of our things in a Glammy Grinchy way too.

My husband used to dread the Christmas season with extra financial stress of buying things that we might not need but buy for the sake of holiday gift giving.  My husband is a family law attorney and not many people are hiring divorce attorneys in the month of December, so being the conscientious man that he is – he just doesn’t feel passionate about spending when he is feeling the flow pull back.  People usually put off the paperwork of filing a divorce until after the holiday season.  So with my extra resourceful nature along with my deep belief in repurposing; pulling together a bit of a Grinchy decorated Christmas is practically brilliant.

Here are a few photographs for you to get a hint of what we did last year, I took these photographs just right before we packed everything back up.  May they inspire you to do something just a little different this year!

Our 2014 Grinch Christmas Tree
Our 2014 Grinch Christmas Tree. Notice the quilted Grinch Tree Skirt.
Our Quilted Grinch Tree Skirt that I longarmed Grinch stuff creatures to it! Tutorial coming later this week.
Our Quilted Grinch Tree Skirt that I long armed quilted Grinch stuffed creatures to it! Tutorial coming later this week.

Let’s take a closer look at some of the ornaments that we are using on our Grinch Christmas tree.

Look at these simple Grinch Christmas Tree Ornaments

I got a large FREE used artificial Christmas Tree and we will have a post on how to take a traditional looking tree to looking like a Glammy Grinch Tree.  Tutorial coming soon!

Now let’s take a peak at what we did to Grinch Glam up our Christmas Fireplace Mantle.  Do you notice the green directional lighting?  My husband does the green lighting.  I never really noticed it until years later when someone was visiting us and asked if that was a green light bulb and I answered, “Well yes it is.”


Let's Glam Grinch out our Christmas Fireplace Mantle! We even use green directional lighting!
Let’s Glam Grinch out our Christmas Fireplace Mantle! We even use green directional lighting!

Start looking at your online classified ads in your area to see if people are selling their Grinch décor items really inexpensive.  The stuffed Grinch hanging out on the left of the mantle we actually picked up for $10.  You never know what you can find.

Here are more details of how we decorated the Glammed out Grinch Fireplace Mantle.

Tulle Grinch Ball at end of mantel. Here are more details of how we decorated the Glammed out Grinch Fireplace Mantle.


Corner of Grinch Mantel. Here are more details of how we decorated the Glammed out Grinch Fireplace Mantle.
Grinch Decor Mantle Glittery Sprigs and Peppermint Candy. Here are more details of how we decorated the Glammed out Grinch Fireplace Mantle.
Grinch Decor Mantle Glittery Fanned Out Sprigs. Here are more details of how we decorated the Glammed out Grinch Fireplace Mantle.

What ideas do you have?  What traditions do you celebrate? Well more Glammy Grinchy Christmas ideas and instructions coming to you, so sign up for the Stitches Quilting Newsletter!  We will see you tomorrow – this is only the beginning!

Deanna Stitching Through Life

 
I have officially as of today become an affiliate blogger to point readers to items that they might want to purchase. I do this as a service to you and may be paid for the link but I do not recommend items that I do not have confidence in.

Posted on

Tutorial for Rosie the Zombie Doll learn basic sewing techniques the FUN way!

Easy Sewing Tutorial with lots of photos and video to learn basic skills while sewing something as fun Rosie the Zombie Pattern by Emily Taylor Designs with Zombie Love fabric!

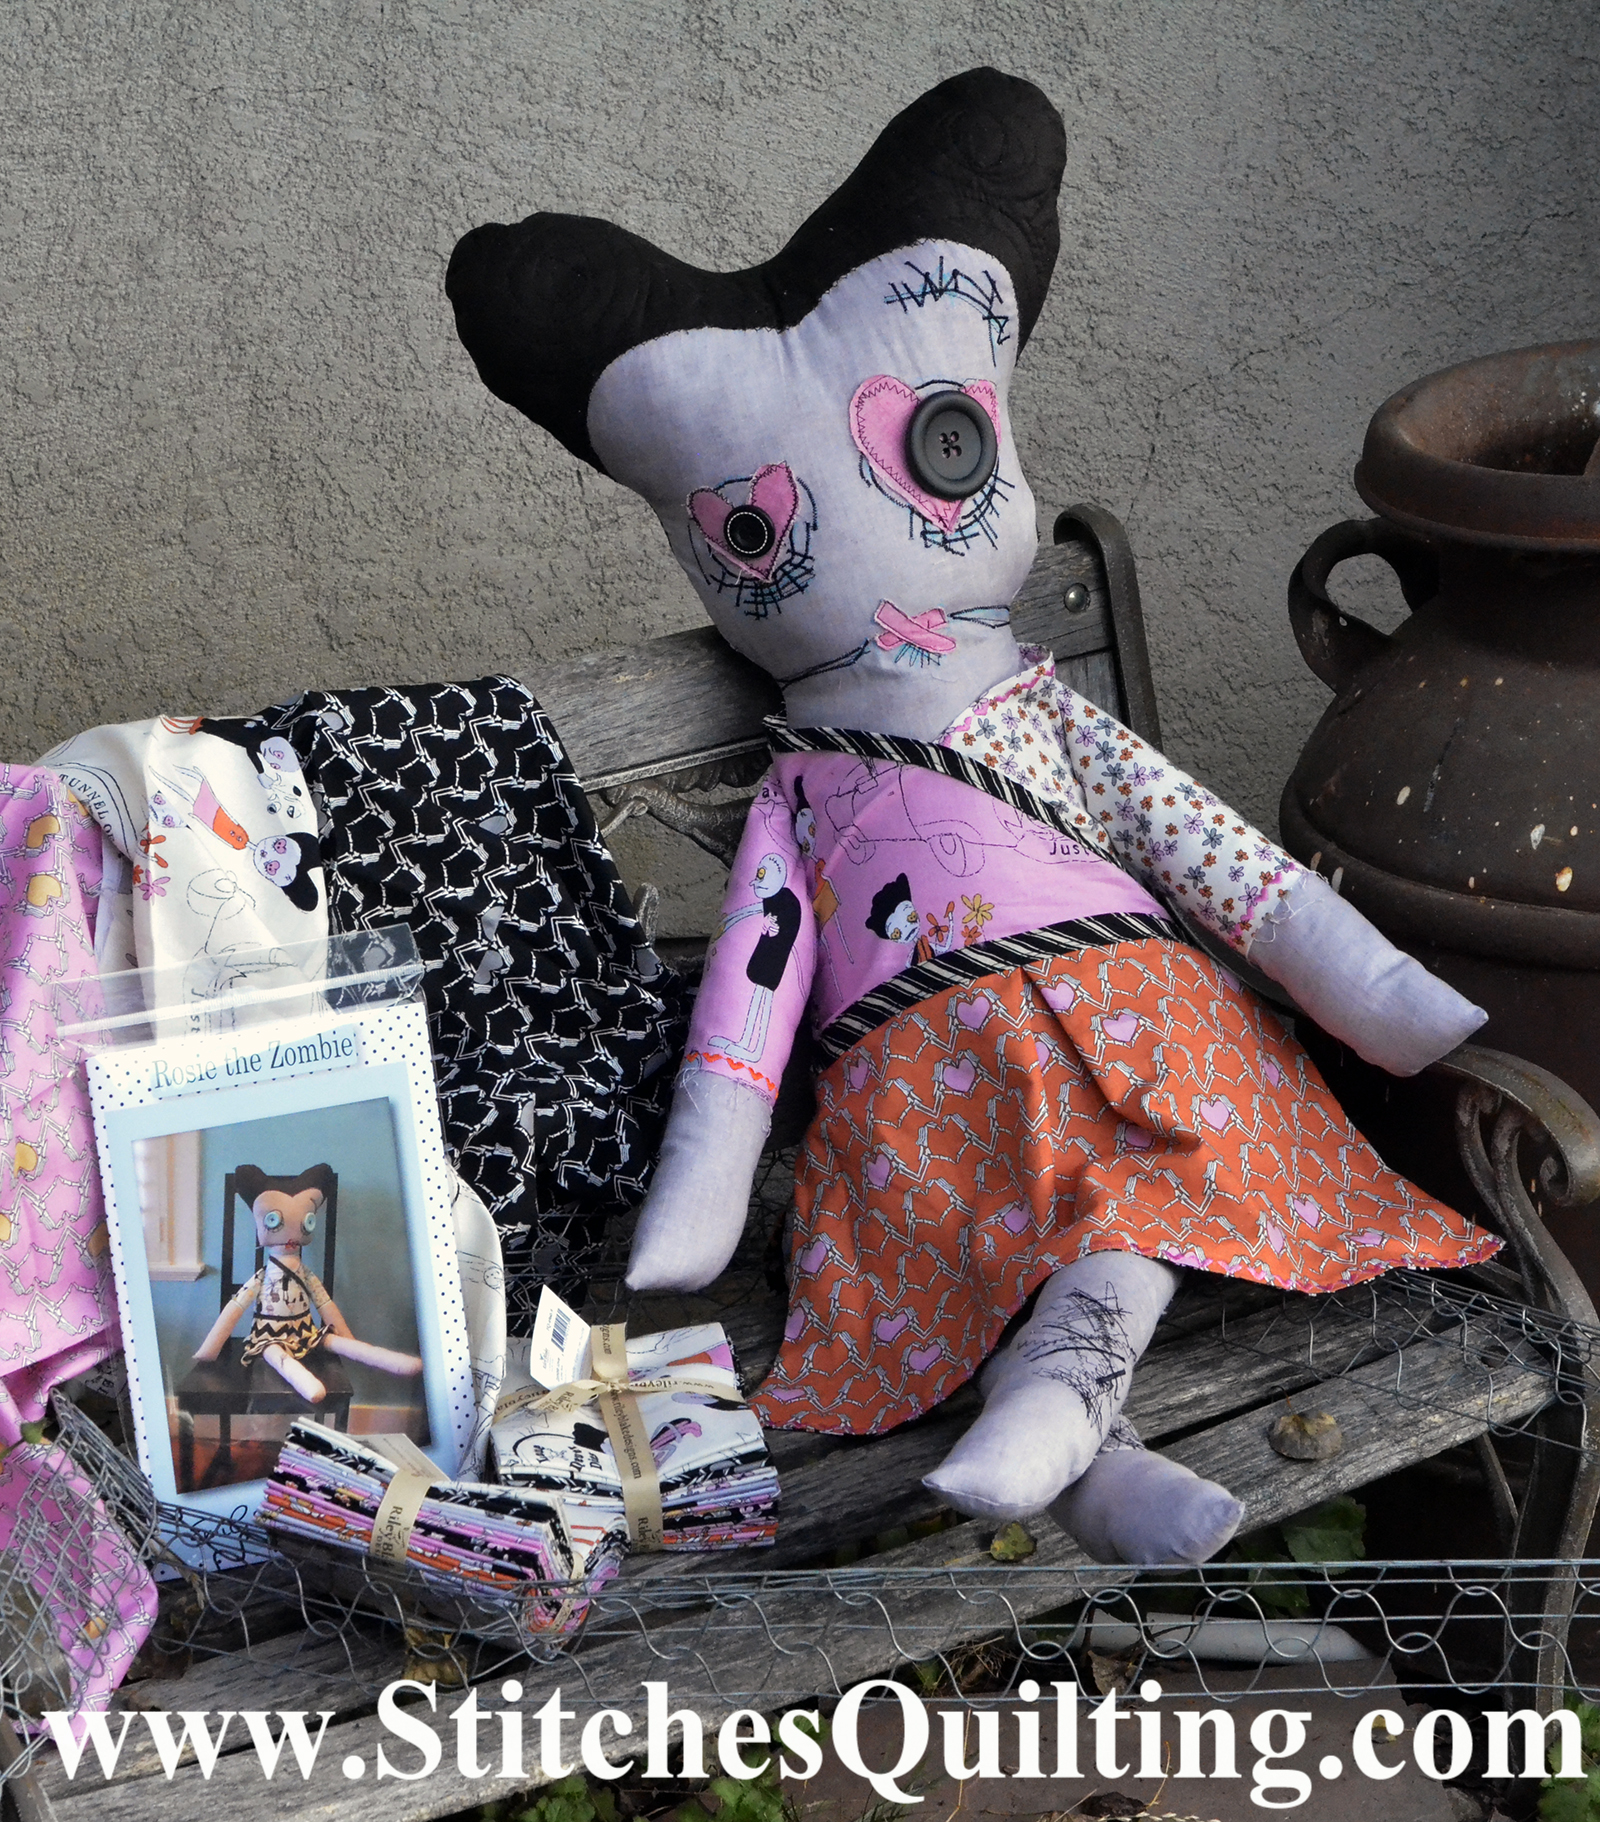
I was able to construct Rosie from only one Fat Quarter collection of Zombie Love Fabrics and Riley Blake’s Slate Gray Shade.  If you would like a kit with the pattern and all the extra pieces it is available for sale (click this link).

Rosie Zombie Doll Pattern by Emily Taylor

Rosie Zombie Doll Supplies

Before cutting out the paper pattern completely for Rosie’s body front and back, I cut out the pattern construction markings and taped them to the front of  the pattern within the cutting line.  Cut the Body Front and Back out of a gray fabric.

Before cutting out the paper pattern completely for Rosie’s body front and back, I cut out the pattern construction markings and taped them to the front of the pattern within the cutting line. Cut the Body Front and Back out of a gray fabric.

Cut 2 pieces each of the arm and leg following the fabric grainline on a gray fabric.  Here I used Riley Blake’s Gray marble.   Set the legs aside because you are going to stitch on the legs with black thread the “scratches”.

Cut 2 pieces each of the arm and leg following the fabric grainline on a gray fabric. Here I used Riley Blake's Gray marble. Set the legs aside because you are going to stitch on the legs with black thread the "scratches".

Cut out Rosie’s Front of Hair and Back of Hair in a black fabric.  At the same time of cutting out the hair, I also cut out batting to match and set these aside.

Cut out Rosie’s Front of Hair and Back of Hair in a black fabric. At the same time of cutting out the hair, I also cut out batting to match and set these aside.

For the Pink Main Zombie Love Fat Quarter, cut out the Front of blouse A, Back of Blouse and cut 1 Sleeve because the sleeves will be two different fabrics.  Please note, we are laying the pattern pieces with the grain line of the Fat Quarter which is parallel to the selvedge.  I also tried to lay out the pattern pieces to capture the Zombie scenes on the fabric.

For the Pink Main Zombie Love Fat Quarter, cut out the Front of blouse A, Back of Blouse and cut 1 Sleeve because the sleeves will be two different fabrics. Please note, we are laying the pattern pieces with the grain line of the Fat Quarter which is parallel to the selvedge. I also tried to lay out the pattern pieces to capture the Zombie scenes on the fabric.

We are now cutting out Rosie’s shirt accent color pieces with a contrasting sleeve  and shirt front.

We are now cutting out Rosie’s shirt accent color pieces with a contrasting sleeve and shirt front.

I thought the orange skeleton hands with hearts would be perfect for Rosie’s skirt.  If you are making Rosie more for a Valentine project perhaps you would like the pink skeleton hands fabric.  A fat quarter is the perfect size to cut the skirt front and back.  Be certain to line of the top and bottom of the skirt with the pattern of “lines/stripes” of the fabric while cutting with the grain line.

I thought the orange skeleton hands with hearts would be perfect for Rosie’s skirt. If you are making Rosie more for a Valentine project perhaps you would like the pink skeleton hands fabric. A fat quarter is the perfect size to cut the skirt front and back. Be certain to line of the top and bottom of the skirt with the pattern of “lines/stripes” of the fabric while cutting with the grain line.

Notice that I am now cutting a lining for Rosie’s skirt from the black flower pattern in the Zombie Love Fat Quarter Collection.  You can see a bit of the orange skeleton fabric peeking out below.

Notice that I am now cutting a lining for Rosie’s skirt from the black flower pattern in the Zombie Love Fat Quarter Collection. You can see a bit of the orange skeleton fabric peeking out below.

Here are all the pieces of Rosie laid out so you can get an idea of how the pieces work together.  Notice the accent stitches along the sleeves and that the homemade bias is not yet sewn to the skirt back.

Here are all the pieces of Rosie laid out so you can get an idea of how the pieces work together.

Here are the clothing pieces sewn together for Rosie the Zombie.  Can you see it starting to come together?  Here Rosie’s clothing is now pinned to the body pieces getting ready to be stitched together.

Here are the clothing pieces sewn together for Rosie the Zombie. Can you see it starting to come together? Notice the accent stitches along the sleeves and that the homemade bias is not yet sewn to the skirt back.

You can notice that I layered Rosie’s Hair with batting and quilted hair designs to give Rosie more texture.

You can notice that I layered Rosie’s Hair with batting and quilted hair designs to give Rosie more texture.

Notice the stitching on Rosie’s face.  First I transferred the face pattern to the gray fabric with a disappearing fabric pen.  Then we stitched away with a variety of satin and zig zap stitches.  I also added 2 pink heart for her eyes.

Notice the stitching on Rosie's face. First I transferred the face pattern to the gray fabric with a disappearing fabric pen. Then we stitched away with a variety of satin and zig zap stitches. I also added 2 pink heart for her eyes.

Now you assemble the Rosie the Zombie according to the pattern instructions by Emily Taylor Designs.  A couple tips would include to be sure to match up certain points like her head, neck, bias tap for skirt front and back etc..   I also customized the pattern by added some bloomers sewn into her using the extra fat quarter pieces.

Rosie is almost three feet tall including her skinny legs.  She isn’t too big but definitely a fun accent piece to have in your home to bring some delight!

I am attaching some video that I did when periscoping this tutorial and you might find it helpful but video from Periscoping isn’t ideal because you are filming live and just awkward things happen.   To follow me on periscope my handle is @stitchesquiltin

Easy Sewing Tutorial of Rosie the Zombie to learn lots of techniques

Please let me know if you have any further questions.

Deanna Stitching Through Life