Posted on 1 Comment

Lets Bake Sew Along Quilt Organization

Let's Bake Sew Along Organization Tools

Lets Bake Sew Along Quilt Organization

Lets Bake Sew Along Quilt Organization is needed to manage all the many pieces and things to do for this baking quilt!

At Stitches Quilting, we designed Let’s Bake Sew Along Quilt Custom Organization sheets just for YOU!  This way you won’t lose all those adorable pieces of fabric and supplies!

Let's Bale Sew Along Binder Organization

So… download the printable and get organized with a 3 ring binder and sheet protectors!

Check out the 1st page of the 33 page download to help you feel progress as you make your Let’s Bake Sew Along Blocks

Let's Bale Sew Along Quilt Block Progress

There are 33 pages in the download and here is an example of a Let’s Bake Sew Along Block Summary Sheet where you can take notes and mark in the pink box what shapes you will need to use.

Let's Bake Sew along Organizer Lori Holt Bee In My Bonnet


Click here for the Lori Holt Bee In My Bonnet –  Let’s Bake Sew Along pattern and first post about the quilt is here!

Lets Bake Quilt Information

Let’s Bake Sew Along Accordion Organizer to carry everything else that you need to create your blocks!  Don’t ever lose carefully cut out and embroidered items again!

Let's Bale Sew Along Accordion Suitcase Organizer

In a Scrappy Happy way we decked out a Let’s Bake Sew Along accordion suitcase!  In this fabric covered accordion suitcase, I store ric rac, Let’s Bake Sew Simple Shapes, extra fabric, glue and MORE!  Our next blog post and live video will have complete instructions on how to make your own Let’s Bake Sew Along Accordion Suitcase!  Next thing I’m doing is going to relabel the sections with my labeler!  What would you organize in here?  Can you imagine wanting to work on your Let’s Bake Quilt and only have a few things to look in for all of your supplies and instructions?

Buy Now at Stitches Quilting

Sewing-Tins-Organization-Bee-In-My-Bonnet-web

Use Bee In My Bonnet Sewing Tins available at Stitches Quilting to store your Chunky Thread.  Select from five different colors for your sewing tins to organization in vintage style!

Buy Now at Stitches Quilting

Aurifil-Thread-organized-in-Sewing-Tins-web

All your Aurifil thread and Aurifil Floss can also be organized in your sewing tins too!  Remember there is now Aurifil thread in 50 wt. for machine piecing or machine embroidery or your Let’s Bake Quilt Blocks.  Aurifil has a selection of 80 wt. thread for your hand embroidery stitching that is thinner and just beyond smooth!  Of course the Aurifil Embroidery Floss comes in an assortment of 20 or 10 spools.  All these collections are especially curated to coordinate with Lori Holt’s fabrics and patterns.  The Aurifil thread runs like butter through my sewing machine.  I can truly tell a difference.  Aurifil is a luxury like candy that has no calories and lasts for just almost forever whether on the spool or embedded in my quilts.  Yum!

Buy Now at Stitches Quilting

Organize Let's Bake-Quilt Blocks on Your-Design Board


Pull together all the Let’s Bake Quilt Blocks supplies on your Design Board as you construct the happy fun!

Buy Now at Stitches Quilting

Nifty Needles Color-coded for each purpose available at Stitches Quilting

Nifty Needles are something that I am enormously enjoying this sew along as we are working with so many different types of thread.  The color coded needles make stitching easy as I can easily identify the uniquely needed needles for each task.  AND…. best of all I know exactly where to put that needle back and never have to be confused which type of needle I am using!  This Nifty Needle Case fits perfectly inside your binder ready and waiting for when you need them.

Don’t forget to download your 31 page Let’s Bake Sew Along Organization Sheet to put in your very own binder with sheet protectors!   Organization coming your way!


Let’s Bake Video Tutorial Week 3 from Facebook!  Be sure to follow Stitches Quilting on Facebook and YouTube too!

Well I have so much more to still share with YOU!  A blog post with instructions to make your very own Accordion Suitcase and more organization tips and tricks!  How do you organize all your goodies?

Deanna Wall Stitches Quilting Stitching Through LifeDeanna Wall Stitches QuiltingStitches Quilting Online Neighborhood Quilt Store & Blog

Posted on

You Are Loved Heart Quilt

You-Are-Loved-Heart-Quilt-Kit-Close-Up

You Are Loved Heart Quilt


This is the layout of the You Are Loved Quilt Pattern.  Recognize the half square triangles and full squares in the pattern below.

You Are Loved Heart Quilt Digital Pattern

Here is everything that will be included in your quilt kit.

What items will be in your kit of You Are Loved Heart Quilt Pattern

Let’s make those half square triangles

How to Make You Are Loved Half Square Triangle Quilt Block

Arrange your blocks and rows of squares.  Take a photograph on your smart phone.  Use the photograph as a reference as you are stitching your blocks into rows at a 1/4 inch seam allowance.  Join your rows together by carefully pinning and nesting your seams together.

How to lay out your You Are Loved Heart Quilt pattern

Remember you want to place your black word search block towards the center of your quilt.  Use embroidery floss with a chenille or large eye needle to circle the positive words on your word search block.

Crossword Puzzle embroidery floss You Are Loved Heart Quilt pattern

Press your quilt top carefully and then join us for the next live video to learn how to quilt your You Are Loved quilt on your domestic sewing machine!  Where to find the video tutorials for You Are Loved Heart Quilt Pattern

Be sure to check out our Live Well Live Strong Quilt Sew Along about Women’s Health & Wellness!


Please follow on social media so you do not miss out on any of the tutorials.  We work hard to bring you great content!

Deanna Wall Stitches Quilting Stitching Through LifeDeanna Wall Stitches QuiltingStitches Quilting Online Neighborhood Quilt Store & Blog

Posted on

Mae Flowers Lattice Spring Quilt

Mae Flowers Lattice Quilt Draped Lindsay Wilkes Cottage Mama Penny Rose Fabric

Mae Flowers Lattice Spring Quilt

Spring showers bring Mae Flowers and this fabric collection has a bright hopeful spring feel!  These fabrics complement each other with all the flowers, patterns and color!

April Showers brings Mae Flowers complementary patterns, prints and colors

Mae Flowers Penny Rose Fabric collection seemed to say make me into a lattice quilt!

Free Pattern Mae Flowers Lattice Quilt Kit Lindsay Wilkes The Cottage Mama Penny Rose Fabrics

In fact, Stitches Quilting has the Mae Flower Lattice Spring Quilt handy and available in a quilt kit just for you! 

Buy Now at Stitches QuiltingFree Pattern Mae Flowers Lattice Quilt Kit Lindsay Wilkes The Cottage Mama Penny Rose Fabrics Free Pattern

Mae Flowers Lattice Spring Quilt Kit starts with a 5 inch square!  The quilt is laid out with 6 horizontal rows and 6 vertical rows of white sashed squares together needing 36 – 5 inch squares!  

Mae Flowers Lattice Quilt It All Starts With A Square

Below you can get an idea of the pattern of how the quilt is laid out and pieced together using 2 x 5 inch white rectangles and 2 x 2 inch yellow squares.  

How to piece lattice quilt pattern for Mae Flowers Lattice Quilt.  Free pattern available.  Piece the quilt together using a 1/4 inch seam.  Does this give you an idea of how the pattern is pieced together?

How to Piece Mae Flowers Lattice Quilt

The quilt looks light and airy with the sunshine streaming through it!  What would you use for the backing fabric?  AND how would you quilt it too?  We will do another blog post with tutorial of how to quilt this sweet quilt on your domestic sewing machine.

Spring Lattice Quilt design is perfect for a baby quilt with an approximate finished size is 42″x 42″.

Mae Flowers Fabric Collection Brilliant Colors, Patterns and Prints by Lindsay Wilkes of The Cottage Mama

Isn’t the Mae Flowers main print absolutely delightful?  Should we use this fabric as the backing of the quilt?  The main print also comes in a pink or green background.

Mae Flowers Blue Main Print Penny Rose Fabrics C6910-Blue_Mae_Main-72dpi-wruler

Stitches Quilting has a free pattern for the Mae Flowers Lattice Quilt to download that accompanies the Mae Flowers Lattice Quilt kit available in stock.

Buy Now at Stitches Quilting

Free Pattern Mae Flowers Lattice Quilt Kit Lindsay Wilkes The Cottage Mama Penny Rose Fabrics Free Pattern

What would you make with the Mae Flowers Fabric collection designed by Lindsey Wilkes of The Cottage Mama for Penny Rose Fabrics?

Can’t wait to hear about your quilty daydreams and let us know if there is anything we can do to help your dreams come true!

Deanna Wall Stitches Quilting Stitching Through Life

Deanna Wall Stitches QuiltingStitches Quilting Online Neighborhood Store

Spring Lattice Baby Quilt Pattern Layout from Stitches Quilting

Spring Lattice Quilt Layout is a sashed 6 x 6 rows

Spring Lattice Baby Quilt Row by Row Layout Pattern by Deanna Wall of  Stitches Quilting

Stitch your 13 rows together from the following layout using a 1/4 inch seam. Nest your seams when stitching the rows together. Add your 4 inch border around the four sides of the quilt! Square up and you are finished!

Posted on 1 Comment

Onpoint Square Layer Cake Quilt Tutorial Free Pattern

On Point 10 Inch Layer Cake Quilt Complete Tutorial Gingham Girls Fabric Amy Smart Quilt designed by Stitches Quilting Deanna Wall

On Point Square Layer Cake Quilt

Selecting you fabric for your On Point Square Layer Cake Quilt.

You will need a Gingham Girls 10 inch square Layer Cake and 2 – Solid White Fabric 10 inch square Layer Cakes to make this 68 x 95 inch twin size quilt.

On Point 10 Inch Layer Cake Quilt Fabric Needs Gingham Girls Amy Smart by Stitches Quilting
On Point Layer Cake Quilt needs the Gingham Girls Quilt Kit in either the 10 inch Layer Cake size or 5 inch charm pack size.

Buy Now at Stitches Quilting

On Point 5 inch Square Charm Pack Quilt Kit
On Point 10 inch Layer Cake or 5 inch Square Charm Pack Quilt Kit for Gingham Girls Fabric Collection by Amy Smart in Stock at Stitches Quilting

Cut Your 10 inch Layer Cake to the Correct Size of Triangles Needed for On Point 10 Inch Layer Cake Quilt Pattern
Cut Your 10 inch Layer Cake to the Correct Size of Triangles Needed for On Point 10 Inch Layer Cake Quilt Pattern.  Save those 2 inch strips that you cut from your layer cake to use in your next quilt.

Stitch the Top and Bottom Triangle on the Square. Then sew the Left and Right Triangle on the Square.

How to sew together an square to be on point with triangles. First sew the top and bottom triangles to the square block of fabric.

How to sew together an square to be on point with triangles. First sew the left C and right D triangles to the square block of fabric.

Square Up Your Onpoint Square Quilt Block with a 1/4 inch seam tutorial
Square Up Your Onpoint Square Quilt Block with a 1/4 inch seam.

How to modify the Twin Size On Point 10 inch Layer Cake Square Quilt to a Baby Size using 5 inch charm packs.

Using a precut quilt but not using precut fabrics use this guide to cut your fabrics.

Build your quilt by sewing your quilt rows together one by one and matching your quarter inch seam.

Sew your rows together to build your quilt top into one piece matching your block points.

Add a border to your quilt top with these step by step instructions.

Buy Now at Stitches Quilting

On Point 5 inch Square Charm Pack Quilt Kit
On Point 10 inch Layer Cake or  5 inch Square Charm Pack Quilt Kit

If you have any questions, please ask below.  I’m creating this quilt with complete tutorial online Live with Facebook, YouTube and Instagram.  You can turn on following and live post notifications on each platform so you don’t miss out.  Be sure to follow Stitches Quilting Deanna Wall online because we just love to cheer you on and YOU motivate us to keep creating too!   Can’t wait to see what you create!  Please post pictures online and tag Stitches Quilting!

Deanna Wall Stitches Quilting Stitching Through LifeDeanna Wall Stitches QuiltingStitches Quilting Online Neighborhood Quilt Store & Blog

Posted on

DIY Fitted Sheet Hack – Stay Put

01 Do your sheets crawl off your bed waking you up

DIY Fitted Sheet Hack – Stay Put

You need 2 yards of Elastic for one set of sheets.

Buy Now at Stitches Quilting

Elastic 1 inch wideStretchrite Elastic 1 inch wide Polyester


DIY Fitted Sheet Hack – Stay Put Instructions

01 Do your sheets crawl off your bed waking you up

2 DIY SHEET HACK Fix your sheets for a good night sleep

3 All You Need is ELASTIC

5 Mark sheet 12 inches stretched from center

6 Mark your sheet 12 inches stretched from center corner seam

7 Mark on the left side 12 inches stretched from center corner seam of sheet

8 Both sides of corner sheet seam are marked with green sharpie

9 - 1 inch wide by 18 inches long elastic will stretch up to 24 inches
9 – 1 inch wide by 18 inches long elastic will stretch up to 24 inches

10 Pin the 1 inch Elastic to the Green Sharpie Mark

11 Left Green Sharpie Marker Point is pinned to the 1 inch elastic end

12 Mark the right Sharpie Green Marker point to the opposite end of the 1 inch wide elastic

13 Right Green Sharpie Marker Point is pinned to the 1 inch elastic end

14 Each end of the 18 inch elastic is pin to both corners of the fitted sheet

15 Use a Zig Zag Stitch to sew the 1 inch wide elastic to the thin elastic on the fitted sheet

16 Reverse Zig Zag Stitch back and forth to secure the elastic on the fitted sheet

17 Looks very sturdy - I used red thread so you can see my stitches
17 Looks very sturdy – I used red thread so you can see my stitches

18 Get ready to stitch the right side elastic to the sheet

19 Notice the Elastic is matched up to the Green Sharpie Mark

20 Repeat your zig zag stitching for the right side of the corner of the fitted sheet

21 Both side of the sheet corner are secured with elastic - Now Repeat on the remaining corners of the sheet
21 Both side of the sheet corner are secured with elastic – Now Repeat on the remaining corners of the sheet

22 Repeat the steps on the remaining corners of the sheet

23 DIY SHEET HACK - Your Favorite Sheet Will Not STAY PUT
23 DIY SHEET HACK – Your Favorite Sheet Will Not STAY PUT

24 DIY Sheet Hack full tutorial at Stitches Quilting

25 For More Sewing and Quilting Tutorials Follow Stitches Quilting

Please comment below with questions.

Deanna Wall Stitches Quilting Stitching Through LifeDeanna Wall Stitches QuiltingStitches Quilting Online Neighborhood Quilt Store & Blog

Posted on

Let’s Bake Sew Along Quilt

Let's Bake Quilt Lori Holt Bee In My Bonnet

Let’s Bake Sew Along Quilt – Join Us to make this quilt!

Learn how to quilt, sew, applique, embroidery, chicken scratch on gingham, cut fabric while sewalonging for the Let’s Bake Quilt designed by Lori Holt of Bee In My Bonnet!

Let's Bake 2 Fabric Fat Quarter Bundle

I will be using Lori Holt’s newest fabric collection Bake Sale 2 to make the quilt!  But don’t forget that you can use all your favorite fabrics in your stash!  Here is the Let’s Bake Sew Along Schedule!  Remember if you get behind you can easily catch up!

Lets Bake SewAlong Schedule

Here is the list of ingredients or supplies one would need for the Let’s Bake Sew Along Quilt.  Remember you can always make substitutions!

Lets Bake Quilt Supplies Needed

You will definitely need a set of the Let’s Bake Sew Simple Shapes to make all the darling blocks!

Let's Bake Sew Simple Shapes

Sampler Pack of the Chunky Thread will also be needed for the Chicken Scratch Embroidery on the Gingham Blocks.

Lori Holt - Chunky Thread Sampler Package

A great applique glue for placing your baked goods in place on your quilt is Sue Daley’s Applique Glue.  

Sue Daley Applique Glue

To make the applique baking shapes you will need Lori Holt Pellon Sew In Interfacing

Sew In Interfacing Pellon Lori Holt

The Clover Press Perfect Point to Point Turner is so handy to shape your applique pieces just perfectly!

Clover 7803 Point 2 Point Turner

Aurifil 10 Spool Thread Collection Happy Colors or Sew Cherry 2 are great colors to machine piece and applique.

Sew Cherry 2 Aurifil Thread by Lori Holt 10 Spools

Aurifil Bee Happy Limited Edition Thread Collection by Lori Holt of Bee in My Bonnet with 45 spools of thread.  Includes 27 small spools 50 wt. thread or machine piecing and applique with 220 yards each.  Also includes 18 small spools of 80 wt. thread for hand applique.  

Lori Holt Bee Basic Aurifil Quilting and Applique Thread

Aurifil Embroidery Thread Aurifloss by Lori Holt of Bee In My Bonnet 10 spools.   

Aurifil Floss Aurifloss Lori Holt Bee In My Bonnet Happy Colors

Bee in My Bonnet Design Boards by Lori Holt

Design Boards Lori Holt Bee In My Bonnet

Let’s Bake Free Pattern Download HERE!  22 pages of FUN!

Let's Bake Quilt Lori Holt Bee In My Bonnet

Get Organized for the Let’s Bake Sew Along Quilt with a free printable published first at Stitches Quilting!  
Let's Bale Sew Along Binder Organization
Let’s Bake Tutorial from Facebook


There will be live videos each week with Deanna so we can stitch together on the Let’s Bake Sew Along!  I can’t wait to create with YOU!

Deanna Wall Stitches Quilting Stitching Through LifeDeanna Wall Stitches Quilting Stitches Quilting Online Neighborhood Quilt Store & Blog


Posted on

Easy Modern Half Square Triangle Quilt

Free Pattern for Easy Modern Half Square Triangle Quilting Bee Basics Fabric Lori Holt Bee In My Bonnet Riley Blake Fabrics

Easy Modern Half Square Triangle Quilt

Easy Modern Half Square Triangle Quilt for a beginning quilter to learn basic quilting techniques.  The Easy Modern Half Square Triangle Quilt is perfect for the experienced quilter wanting to make something colorful, modern & fast while featuring favorite fabrics.  When seeing this quilt, on Riley Blake Designs Blog post by Julia Frazier, I knew it was the perfect quilt to teach a basic week long start to finish beginning quilting course!  So here we GO!

Free Pattern for Easy Modern Half Square Triangle Quilting Bee Basics Fabric Lori Holt Bee In My Bonnet Riley Blake Fabrics

There are 6 video tutorials to take you step by step learning how to make this quilt!  I want everyone to make the quilt but learn how to quilt it on their domestic machine.  So the tutorial takes you through how to cut fabric with a rotary cutter, piece fabric together with a 1/4 inch seam, create the quilt top, square it up, layer your quilt sandwich, quilt your quilt sandwich on your domestic sewing machine, make a binding for the quilt, attach the binding then hand or machine stitch the binding to the FINISHED QUILT!  So are you ready to learn how to quilt?  Watch the videos and have some fun, because….. you know quilting is just not difficult!

Easy Giant Half Square Triangle Quilt with Color Gradient

I’m using Riley Blake Fabrics Bee Basics by Lori Holt of Bee In My Bonnet.  The bright colors and small print attract me.  There isn’t a large print featured fabric to the collection or accenting stripe so I feel like all the fabrics are weighted equally and lend to a Easy Giant Half Square Quilt.  You can see that I laid out the colors of fabric in a gradient with reds, pinks, blues, greens, yellows and gray.  Of course you are designing your own quilt and can lay out your fabrics in any way.

Design your very own Easy Modern Half Square Triangle Quilt with this Free design sheet!

Don’t hesitate to duplicate fabrics in the half square triangles or have them all be a unique fabric.  That of course is up to you.  Dip into your stash of fabrics and find something that you will love.  Design away as you are the artist of your quilt.  If you are interested in purchasing a fat quarter collection of Bee Basics by Lori Holt then click here.  The fat quarter collection of Bee Basics will give you enough fabric to make almost two quilt tops.  One for you and one for a friend possibly.

Buy NowBee Basics Lori Holt Fabric Fat Quarter BundleBee Basics Lori Holt Fat Quarter Bundle fabric for the EASY Modern Half Square Triangle Quilt

Shopping for fabric?  Remember you need a 16 inch square of fabric that can be cut into two triangles.   There are 32 triangles in this quilt.  If you want each triangle to be an unique fabric then pull 32 different pieces of fabric.  If purchasing fabric from a store, get a fat quarter of the fabric if it is available or 1/2 yard of fabric (18 inches) to be able to cut your 16 inch square.  Download and print the Easy Modern Half Square Triangle Design Sheet to cut small pieces of fabric for your layout.


Download Easy Modern Half Square Triangle Quilt Design Sheet NOW

Design Sheet download by Deanna from Stitches Quilting.

When a 16 inch square is cut in half then you will have two triangles of fabric to work with.

Easy Giant Half Square Triangle Block 15 inches


To start the quilt I will cut 32 - 16 inch squares because I want each of my triangles to be a unique fabric.  This will actually give me enough fabric to make two quilt tops of the Easy Modern Half Square Triangles.

Easy Giant Half Square Triangle Cutting Diagram

I will then piece the two triangles together using a 1/4 inch seam to from a square.

Easy Giant Half Square Triangle Block 15 inches


Lay out all of the pieced triangles in a pattern of 4 sets across in 4 rows.  This will make your quilt to be approximately 60 inches square.

Easy Giant Half Square Triangle Quilt


I will sew Row 1 of the quilt top together

Easy Giant Half Square Triangle Row 1


Sew together each row in the same fashion then we will sew each row to each other while nesting seams to ensure that all of our points match up.

Just so you have the vision,  You will learn how to quilt with straight lines about 2 inches apart on your domestic sewing machine then here's the backing fabric that I used and pieced together.

Free Pattern for Easy Modern Half Square Triangle Quilting Bee Basics Fabric Lori Holt Bee In My Bonnet Riley Blake Fabrics

Hopefully this helps you to get the concept of how to cut fabric and how to design your quilt top to begin the process.  Tomorrow we will discuss a few more techniques and tips in detail to construct your quilt.  At least this gives you a frame work to get your fabrics selected.  I will post the live video of how we are constructing this quilt after it has been posted.  Along with additional items to help you.  Follow us on Facebook where we are hosting the full tutorial and sew along at https://www.facebook.com/stitchesquilting/   The Facebook video tutorials are embedded below.

Don't forget to review 12 Hacks Every Quilter Should Know page.  12 Quilting Hacks Every Quilter Should Know

Can't wait to see you today and then see our progress tomorrow!  Please comment below with questions or clarifications that you may need.

Happy Stitching,

Deanna Wall Stitches Quilting Stitching Through LifeDeanna Wall Stitches QuiltingStitches Quilting Online Neighborhood Quilt Store & Blog

Posted on 1 Comment

12 Hacks Every Quilter Should Know

12 Quilting Hacks Every Quilter Should Know

12 Hacks Every Quilter Should Know

12 Hacks Every Quilter Should Know

12 Hacks Every Quilter Should Know – Summarized for you!

1a Quilt Hack - Piece with Neutral Thread and Use Large Spool of Thread
1a Quilt Hack – Piece with Neutral Thread and Use Large Spool of Thread

Stitches-Quilting-Memorial-Day-Quilt-Fabric-Sale

1b Quilt Hack - Use a larger spool of thread
1b Quilt Hack – Use a larger spool of thread

1c Quilt Hack - Wide Mouth Jar Behind Machine for Large Thread
1c Quilt Hack – Wide Mouth Jar Behind Machine for Large Thread

For MORE quilt hacks tips & instruction be sure to follow Deanna’s Live Video Tutorials on Facebook or YouTube.  Interact and sew along with Deanna as she takes you from the beginning of a quilt all the way through to layering and quilting the quilt on your domestic machine.

How to Follow Your Favorite Facebook pages groups

Follow Stitches Quilting Deanna Wall on You Tube

2a Quilt Hack -Fabric Everywhere

2b Quilt Hack - Use Comic Boards to Fold Fabric
2b Quilt Hack – Use Comic Boards to Fold Fabric

2c Quilt Hack - Fold Fabric Around a Comic Board
2c Quilt Hack – Fold Fabric Around a Comic Board

Stitches-Quilting-Memorial-Day-Quilt-Fabric-Sale

2d Quilt Hack -Use Comic Boards to Fold and Store Fabric

3a Quilt Hack - Press Blocks Don't Iron Them
3a Quilt Hack – Press Blocks Don’t Iron Them

3b Quilt Hack - Use Spray Fabric Starch Press Block
3b Quilt Hack – Use Spray Fabric Starch Press Block

3c Quilt Hack - Place Square Ruler over Quilt Block after Pressing
3c Quilt Hack – Place Square Ruler over Quilt Block after Pressing

3d Quilt Hack - Weight the Ruler with the End of the Iron while the Quilt Block Cools
3d Quilt Hack – Weight the Ruler with the End of the Iron while the Quilt Block Cools

4a Quilt Hack - Measure Quarter Inch Seam Allowance with Ruler
4a Quilt Hack – Measure Quarter Inch Seam Allowance with Ruler

Build your quilting skills with our Women’s Health Quilt Along and stitch together the Live Well Live Strong Quilt.  Weekly Live Video Tutorials, Blog Posts, Tips, Hacks & Inspiration.

4c Quilt Hack - Place Blue Painters tape at the Quarter Inch Seam Allowance as Guide
4c Quilt Hack – Place Blue Painters tape at the Quarter Inch Seam Allowance as Guide

5a Quilt Hack - Use a Quarter Inch Seam Quilt Foot for Piecing Use a Walking Foot for Binding and Quilting
5a Quilt Hack – Use a Quarter Inch Seam Quilt Foot for Piecing Use a Walking Foot for Binding and Quilting

6a Quilt Hack - Use Cookie Sheets to Sort Quilt Block Pieces with Flannel Fabric Under so They Don't Slip
6a Quilt Hack – Use Cookie Sheets to Sort Quilt Block Pieces with Flannel Fabric Under so They Don’t Slip

Build your quilting skills with our Women’s Health Quilt Along and stitch together the Live Well Live Strong Quilt.  Weekly Live Video Tutorials, Blog Posts, Tips, Hacks & Inspiration.

Stitches-Quilting-Memorial-Day-Quilt-Fabric-Sale

7a Quilt Hack - Arrange Quilt Block Pieces on a Felt Design Board from Foam Core so the Pieces Stay Put
7a Quilt Hack – Arrange Quilt Block Pieces on a Felt Design Board from Foam Core so the Pieces Stay Put

7b Quilt Hack - Quilt Block Arranged on a Felt Design Board Don't Fall Off
7b Quilt Hack – Quilt Block Arranged on a Felt Design Board Don’t Fall Off

Quilt Block Design Board Hack Tutorial

8a Quilt Hack - Use Washble Elmer Glue Stick to Hold Your Binding in Place
8a Quilt Hack – Use Washable Elmer Glue Stick to Hold Your Binding in Place

8b Quilt Hack - Rub a bit of Elmers Washable Glue Stick to baste binding in place for stitching down
8b Quilt Hack – Rub a bit of Elmer’s Washable Glue Stick to baste binding in place for stitching down

8c Quilt Hack - Use Clover Wonder Clips to Hold Binding in place
8c Quilt Hack – Use Clover Wonder Clips to Hold Binding in place

Build your quilting skills with our Women’s Health Quilt Along and stitch together the Live Well Live Strong Quilt.  Weekly Live Video Tutorials, Blog Posts, Tips, Hacks & Inspiration.

9a Quilt Hack - Print off ABCs 123s on Cardstock to Use as Quilt piece identifiers to keep similar shapes sorted
9a Quilt Hack – Print off ABCs 123’s on card stock to Use as Quilt piece identifiers to keep similar shapes sorted

Use Quilt Markers to Sew Quilt Blocks Accurate

9b Quilt Hack - Label Quilt Block Pieces with ABCs 123s and clamps
9b Quilt Hack – Label Quilt Block Pieces with ABCs 123’s and clamps

10a Quilt Hack - Clean Your Sewing Machine Don't Use Canned Spray Air
10a Quilt Hack – Clean Your Sewing Machine Don’t Use Canned Spray Air

10b Quilt Hack - Use a clean paint brush to Clean You Sewing Machine
10b Quilt Hack – Use a clean paint brush to Clean You Sewing Machine

10c Quilt Hacks - Use a Retractor to Get Lint Out of your Sewing Machine
10c Quilt Hacks – Use a Re-tractor to Get Lint Out of your Sewing Machine

Build your quilting skills with our Women’s Health Quilt Along and stitch together the Live Well Live Strong Quilt.  Weekly Live Video Tutorials, Blog Posts, Tips, Hacks & Inspiration.

10d Quilt Hack - Use the Cleaning Brush that came with your Sewing Machine
10d Quilt Hack – Use the Cleaning Brush that came with your Sewing Machine

10e Quilt Hack - Use a Pipe Cleaner to Clean Your Sewing Machine
10e Quilt Hack – Use a Pipe Cleaner to Clean Your Sewing Machine

10f Quilt Hack - Use a Q-tip to Clean Your Sewing Machine
10f Quilt Hack – Use a Q-tip to Clean Your Sewing Machine

11a Quilt Hack - Press your seam allowances to set seams
11a Quilt Hack – Press your seam allowances to set seams

11b Quilt Hack - Press your seam allowances to set seams
11b Quilt Hack – Press your seam allowances to set seams

12a Quilt Hack - Press Seam Allowances to the Dark Side from the back of your quilt block second
12a Quilt Hack – Press Seam Allowances to the Dark Side from the back of your quilt block second

12b Quilt Hack - Press Your Quilt Blocks up and down instead of Ironing
12b Quilt Hack – Press Your Quilt Blocks up and down instead of Ironing

13a Quilt Hack - Sew Long Strips Together
13a Quilt Hack – Sew Long Strips Together

12b Quilt Hack - Sew Sets of Strips Together
12b Quilt Hack – Sew Sets of Strips Together

12c Quilt Hack - Cut Strip Sets Into Quilt Blocks
12c Quilt Hack – Cut Strip Sets Into Quilt Blocks

12d Quilt Hack - Arrange Quilt Blocks into Patterns to Sew Together
12d Quilt Hack – Arrange Quilt Blocks into Patterns to Sew Together

13a Quilt Hack - Use Sew In Interfacig to trace Applique Designs
13a Quilt Hack – Use Sew In Interfacing to trace Applique Designs

13b Quilt Hack - Use a Shape to Trace the Applique Design
13b Quilt Hack – Use a Shape to Trace the Applique Design

13c Quilt Hack - Lay the Interfacing to the Right Side of Your Fabric then Stitch on the Trace Line
13c Quilt Hack – Lay the Interfacing to the Right Side of Your Fabric then Stitch on the Trace Line

13d Quilt Hack - After Stitching Trim the Excess Fabric about Quarter Inch from Shape Line
13d Quilt Hack – After Stitching Trim the Excess Fabric about Quarter Inch from Shape Line

13e Quilt Hack - Cut a Hole in the Interfacing to Turn it Inside Out
13e Quilt Hack – Cut a Hole in the Interfacing to Turn it Inside Out

13f Quilt Hack - The Center of the Interfacing has a small hole to turn inside out
13f Quilt Hack – The Center of the Interfacing has a small hole to turn inside out

13g Quilt Hack - Turn Inside Out so Right Side of Fabric is Showing
13g Quilt Hack – Turn Inside Out so Right Side of Fabric is Showing

Build your quilting skills with our Women’s Health Quilt Along and stitch together the Live Well Live Strong Quilt.  Weekly Live Video Tutorials, Blog Posts, Tips, Hacks & Inspiration.

13h Quilt Hack - Use a Point to Point Turner to smooth the edges of your applique
13h Quilt Hack – Use a Point to Point Turner to smooth the edges of your applique

13h Quilt Hack - Place your Pressed Applique Shape into Place then machine or hand stitch
13h Quilt Hack – Place your Pressed Applique Shape into Place then machine or hand stitch

Build your quilting skills with our Women’s Health Quilt Along and stitch together the Live Well Live Strong Quilt.  Weekly Live Video Tutorials, Blog Posts, Tips, Hacks & Inspiration.

What Quilt Hacks or Tips did you find useful?  What other Quilting Hacks or Tips can you recommend?  We need more!

Deanna Wall Stitches Quilting Stitching Through Life

Slow and Steady Fabric Tula Pink Deanna Wall Stitches Quilting

Posted on

Bunting Banner Tutorial with the Cricut Maker

Bunting Banner Tutorial with the Cricut Maker

This holiday bunting banner tutorial is simple to make, cut by hand or with a Cricut machine!  Free pattern and tutorial available with SVG cutting files.

Here is what this Valentine Bunting Banner looks like when in Cricut’s Design Space ready to cut on the Cricut.  I used the Cricut Maker to cut the fabric used in this Valentine Bunting Banner.  Below is listed all of the supplies that I used and where they are available for sale in Stitches Quilting online store.  Remember Cricut’s Design Space is free to use on your computer or as an APP on your portable handheld devices.  Make a free Cricut account at www.cricut.com and click on the upper right hand corner to access Cricut Design Space.

Valentine Love Bunting Banner Cricut Design Space LinkClick here for a direct link to Cricut Design Space LOVE Valentine Bunting Banner Cricut SVG file. All images in the cut designs are free except the font used is from a Cricut Access Membership.  If you plan to cut the bunting out by hand with scissors or a rotary cutter download the full instructions and cut files here.

Cut the Riley Blake Lost and Found Fabric in 12 inch strips or 12 inch square to get the fabric ready to place on the Cricut FabricGrip Cutting Mat.  The sample was made with 3 different fabrics; of course you can customize your bunting to be any color combination!   The letters were cut with Osnaberg Roclon Natural Fabric that has a bit of texture.  Of course you could cut this entire project out of any substrate even felt or paper!  Let your imagination crawl with the possibilities.  What ideas do you have?

Riley Blake Bunting Fabric to cut with Cricut Maker


After cutting the fabric on the Cricut Maker the six bunting pieces will look like this.  Examine the clean precise cuts!

Valentine Fabric Bunting Pieces Cut Out


Cut 7.5 inch length of 3.5 inch wide Jute Webbing for each bunting needed on your banner.  The Valentine Love Bunting Banner above needs six 7.5 inch strips cut.  After cutting the strips to length mirror the triangular cut on the fabric so it is consistent with the Jute Webbing.

Cut the webbing with Valentine bunting fabric

Valentine Bunting Jute Webbing Strips

Iron on the L-O-V-E letters and heart to the fabric with the Cricut Easy Press. Of course you can use any word expression other than “love” for your Valentine Bunting.  Personalize it and make it yours.

Cricut EasyPress with Valentine Bunting


Layer the fabric bunt over the 3.5 inch jute webbing and secure with stitching or hot glue.  I actually sewed the fabric to the top of the jute webbing.

Cricut Maker Sew Valentine Bunting Banner

To assemble the bunting, I used 2 yards of a wired fabric ribbon. Find the center point of the ribbon and start arranging each bunting 2 inches apart. The bunting could be sewn to the ribbon or hot glued. This could be a sewing or no sew project of course!


Bunting Banner Supplies Needed:

2 yards of ribbon

3.5 inch Jute Webbing1.5 yards – 3.5 inch Red Jute Webbing at Stitches Quilting Online Store


Lost and Found Red Polka Riley Blake FabricLost and Found Red Circles Riley Blake Fabricsparkle lost found red damaskHalf a yard each – Riley Blake My Minds Eye Lost and Fabric Fabric at Stitches Quilting Online Store


 Half a yard – Roclon Osnaberg Natural Fabric at Stitches Quilting Online Store


Please share what you have made with this Fabric Bunting Tutorial in our Cricut Maker Quilt and Sew Facebook Group.  If you are not already a member, its is completely FREE.  We would love to have you join us!  Let’s inspire each other and create together.   Comment below with ideas or questions you might have, we are here to help.

To make sure you don’t miss out on any other tutorials, be sure to subscribe to the Stitches Quilting Newsletter and let’s get social on Facebook or Instagram! Can’t wait to see you soon!

Wishing you lots of love!  XOXO, Deanna

Deanna Wall Stitches Quilting Stitching Through Life

This is a sponsored conversation written by me on behalf of Cricut. The opinions and text are all genuinely mine.


 f

Posted on

Cyber Monday Quilt Fabric Week Long Sale

Cyber Monday Quilt Fabric Sale Week Long Sale

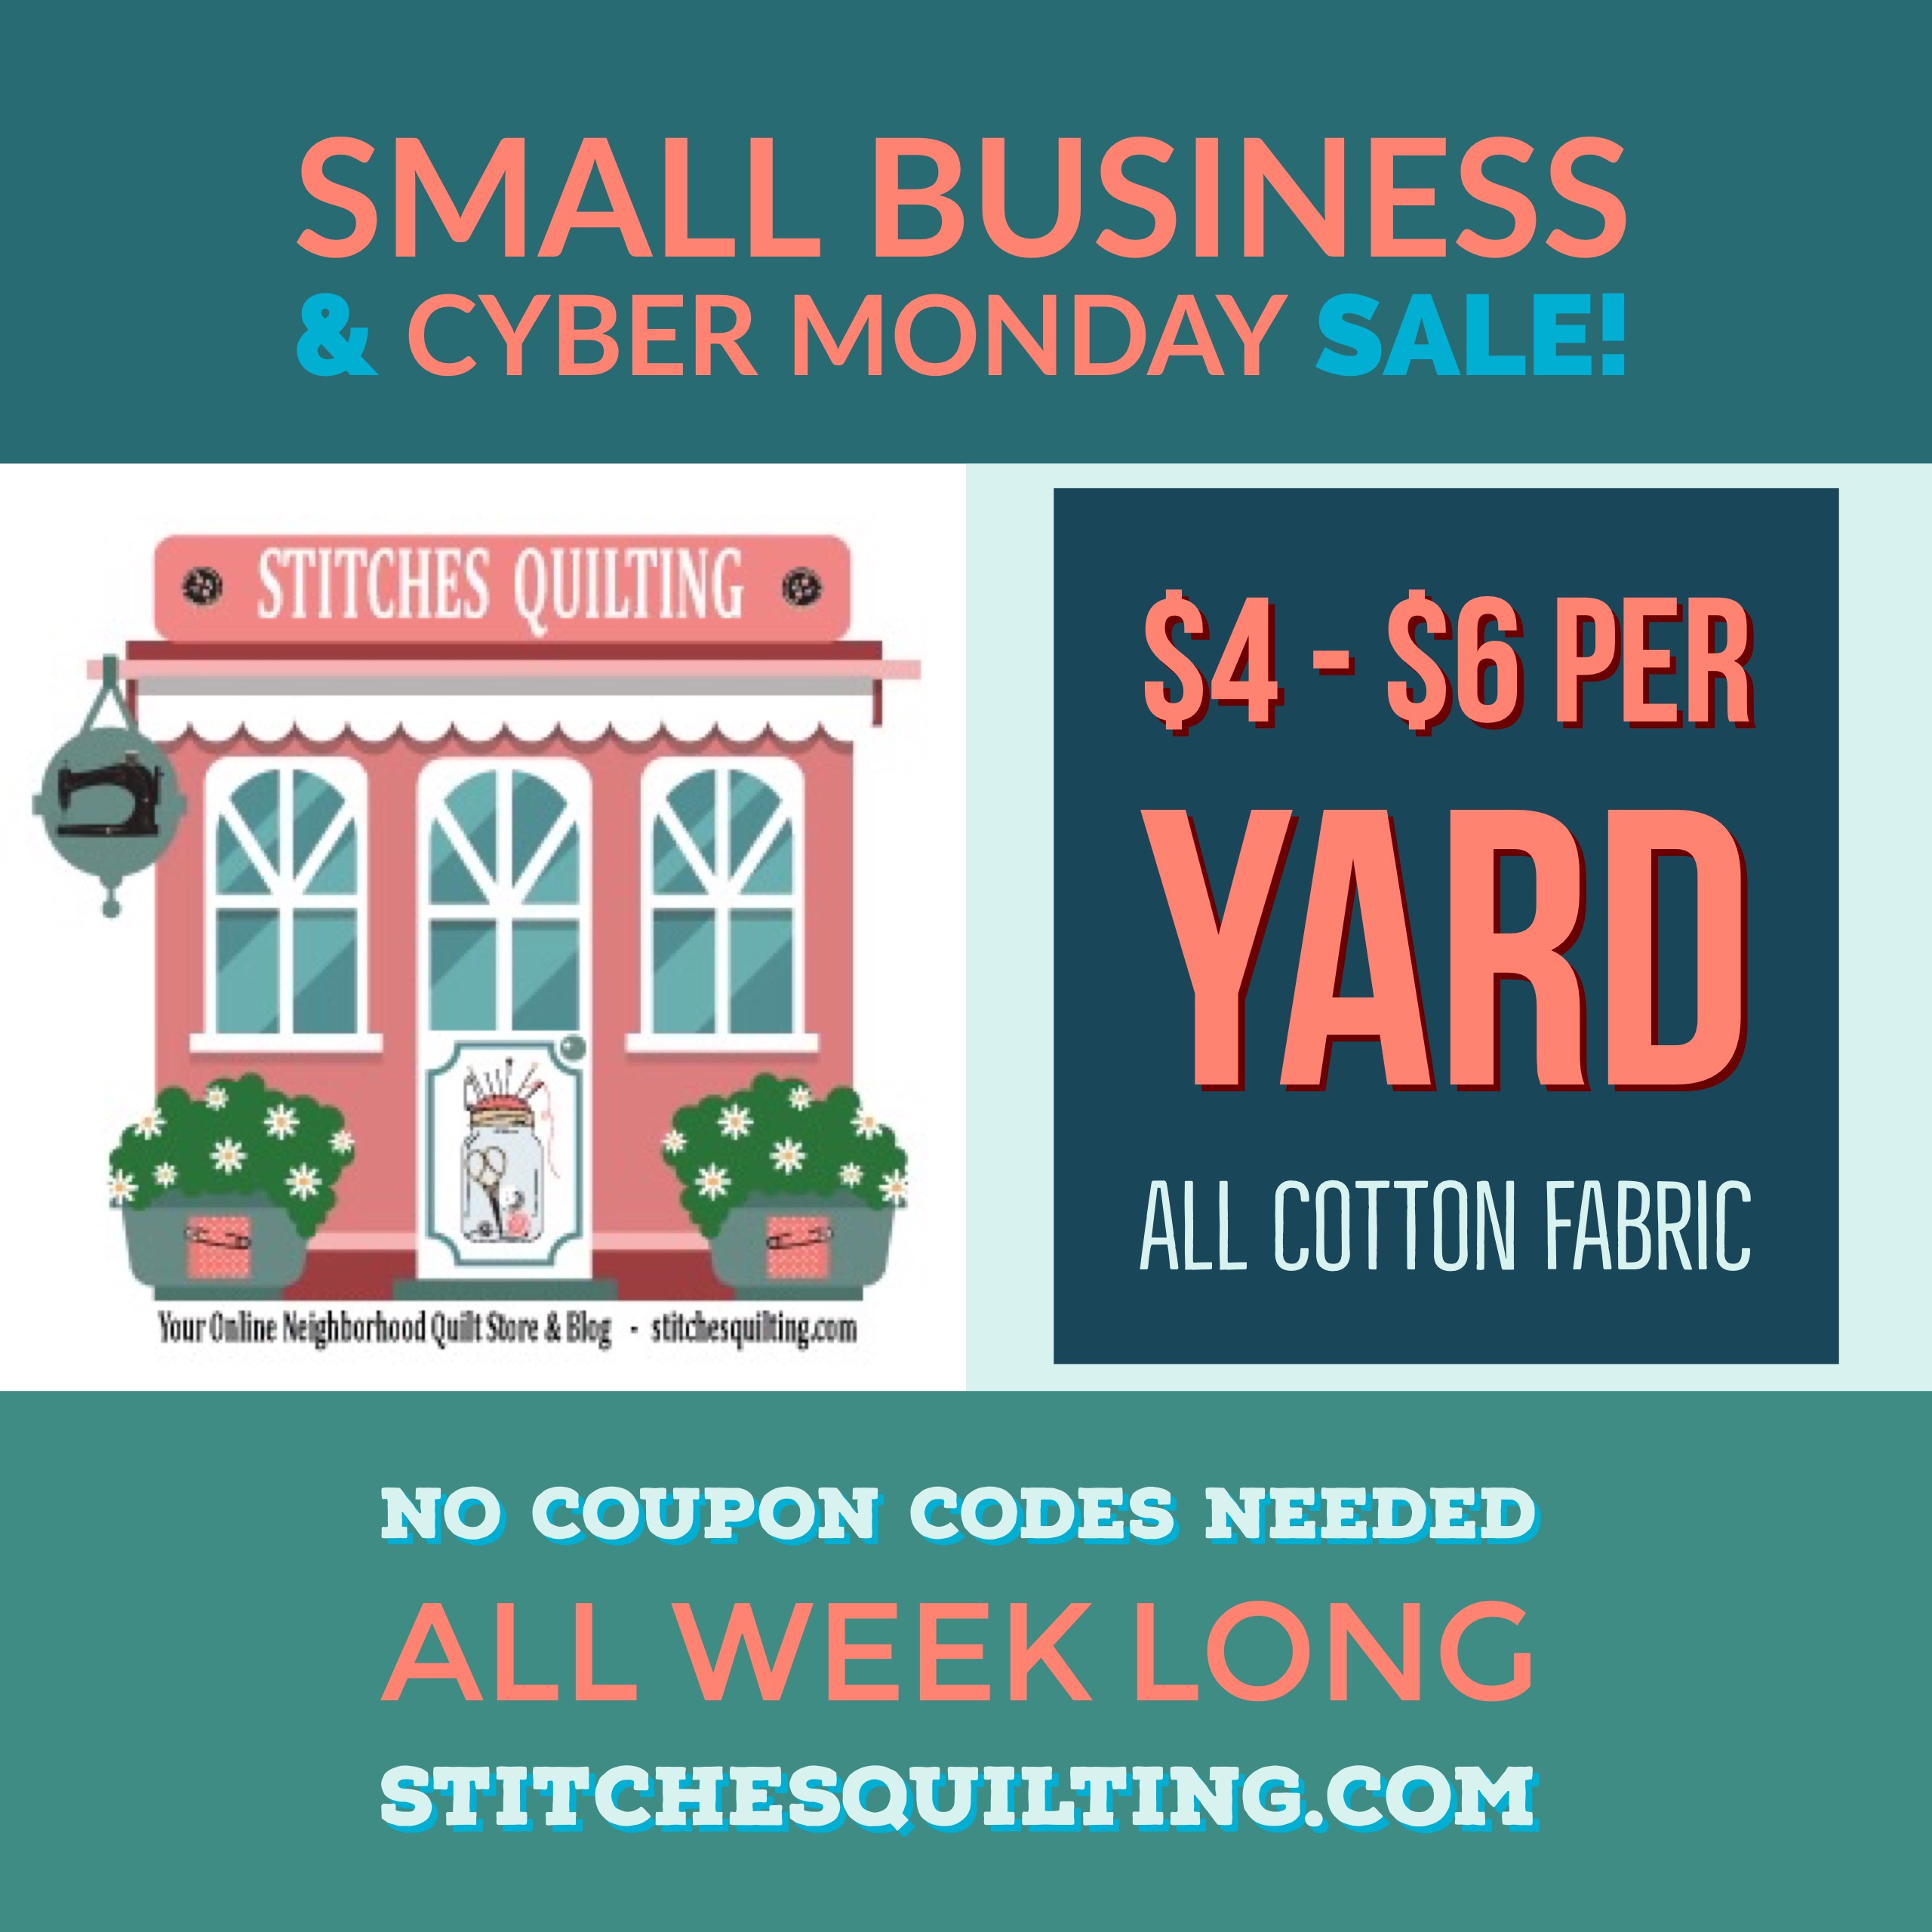
It’s a Small Business Saturday and Cyber Monday Week Long Fabric Sale!  No Coupon Codes are needed as all sale prices are LIVE in the store right now!  All quilting cotton fabrics are $4.00 to $6.00 per yard!  No really and seriously!  Best SALE ever eh?

Can’t wait to see what everyone purchases!  Let’s not break the bank quilting and sewing!

Other coupon codes cannot be combined during this sale.

Cyber Monday Quilt Fabric Sale Week Long Sale

XOXO,

Deanna Wall Stitches Quilting Stitching Through Life