Posted on

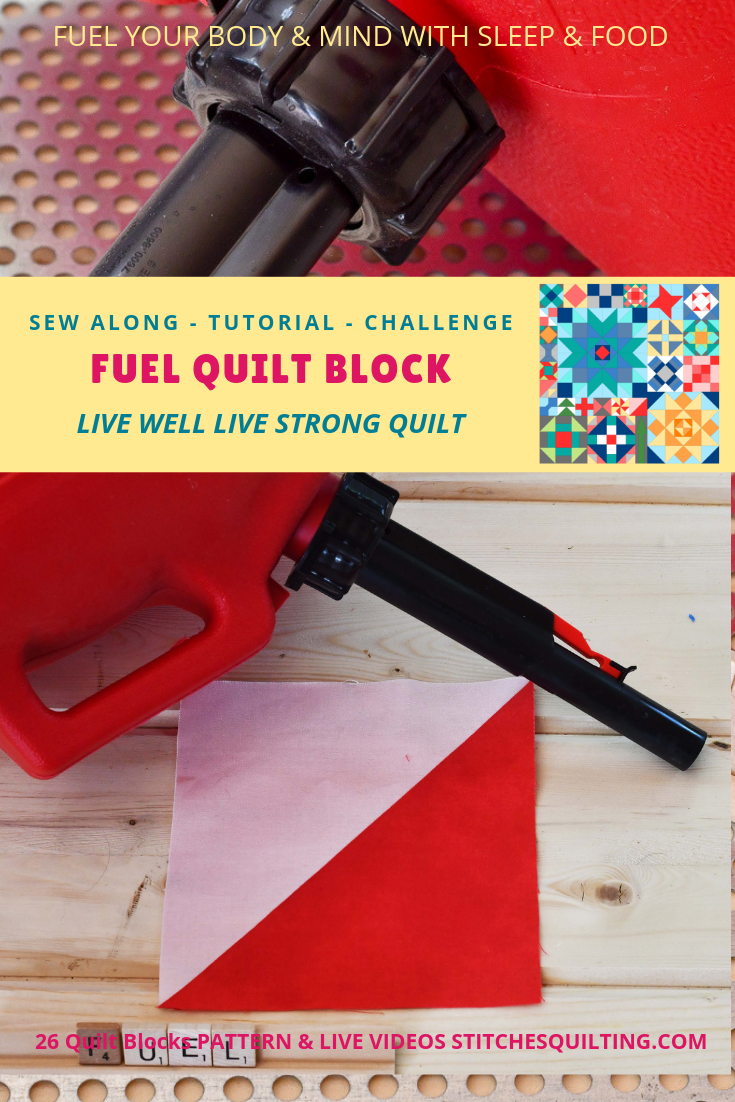
Fuel Quilt Block – Live Well Live Strong Quilt

Join Us! Fuel Quilt Block - Live Well Live Strong Quilt Sew Along - 26 Quilt Blocks with 26 Live Weekly Videos

Fuel Quilt Block – Live Well Live Strong Quilt

Fuel Your Body & Mind with Adequate Sleep, Food, Water & Positive Environment

How could adequate fuel for your body spark joy?  Let’s talk about it!

Spark Joy In Your Life - Live Well Live Strong Quilt Sew Along

The Fuel Quilt Block is the first week on our Live Well Live Strong Quilt Sew Along!  It is so exciting to finally be here with all of you on this journey!

What fuel do you bring in to your body? Freedom Challenge Quilt Block for the Live Well Live Strong Quilt available exclusively at Stitches Quilting.

How we fuel our bodies makes a difference in how we feel.  The half square triangle in this block is simple like the principle of adequately fueling our bodies.  It’s easy to get distracted in life; we need to slow down and think about what we put in our bodies so we can do what we want to do.

Fuel Quilt Block LIve Well Live Strong Spark Joy In Your Life

Garbage in garbage out right… certainly affects how we feel and how are bodies work.  But… let’s not think about the negative…  Let’s fill our lives with things that spark joy!

Green Pepper - Let's Spark Joy

Now here is just a simple green pepper.  What is in your refrigerator and pantry?  Are they full of things that would give you adequate energy?  A green pepper may not ordinarily spark a lot of joy but if I close my eyes and think about smelling then nibbling on a crisp cold slice of a green pepper things I might feel a bit differently.  Imagine the nutrients and how this green pepper is going to fuel my body.  I can look at consuming this green pepper a little differently if I consider the benefits right?  You may have a different relationship with green peppers.  I don’t ordinarily crave green peppers but this imaginary can be used with anything we can fuel our bodies with.  I envision my body stronger after enjoying that delicious green pepper.  I envision a better me.  

Fuel Quilt Block Worksheet Live Well Live Strong Quilt Lets Spark Joy

Use the Fuel Live Well Live Strong Quilt worksheet to provoke thoughts.   On the Fuel Worksheet, jot down items on the quilt block triangles that would ideally fuel your body.  Then on the gray scaled square, jot down things that do not ideally fuel your body.  This is your personal worksheet and you shouldn’t have comparisons to anyone else.  This is about you and an aide to help us become our best selves.  

The next time you go grocery shopping look at what is in your basket.  Will it bring to your body or family what is truly needed?  Remember fueling your body isn’t just about food.  What about water?  sleep?  circulation?  breathing?

I have a sweet son with special needs.  Every time we visited one of his doctors, the first question she had for us was, “How is he sleeping?”.  His doctor wouldn’t treat anything without first fixing sleep.  Lack of sleep has been used as a torture method.  Lack of adequate sleep can impair us to be our best selves.

Luke Hanging Out and Happy

What about water?  Our bodies are 80% water.  Are we drinking enough water?  I’m not and need to improve.  To make water consumption easier for me, I carry around a water bottle filled with ice so I can sip throughout the day.  I’m grateful grateful for the opportunity this week to focus on my water input.

Glass of Water Live Well Live Strong

Fuel Possible Challenges could include:

    1. Drink 8 or X glasses of water
    2. Eat a fruit & vegetable each day 
    3. Organize balanced meals & snacks
    4. Get 8 or X hours of sleep
    5. Improve sleep patterns
  1.  

Customize your own personal challenge to fuel your body adequately.  I might get motivated to clean my refrigerator and pantry!   Take tiny steps towards a good thing and reward yourself with a quiet moment closing your eyes to feel good about yourself including your body & mind.

Share a photo of your completed Fuel Quilt Block on Facebook or Instagram.  On Instagram share your photo and use the hashtag #livewelllivestrongquilt and tag me @stitchesquilting. On Facebook join the Everyone Can Quilt Group and share your photo in there with the #livewelllivestrongquilt.  If you purchased the LWLS Quilt Workshop & Course then there is a private Facebook group to share your photo in.   

If you feel comfortable share a photo that represents a positive step in the Fuel Challenge.  Let’s inspire each other!  I think I’ll share a photo of 8 safety pin representing 8 glasses of water I drank with some clothespins representing how many fruits and vegetables I’ve enjoyed this week! 

Live Well Live Strong Quilt Summary

Remember this is just about you and possibly lifting each other to a better space.  The Live Well Live Strong Quilt is not about negative vibes.  Be kind and positive with yourself.  Be as generous to yourself as you are to others.  Share your thoughts by emailing me or posting on social media.  All of you truly inspire me to be a better person and even the smallest of your comments encourages me to be my best person possible.  

Next week’s block is all about Leisure!  If you haven’t yet, purchase your Live Well Live Strong Quilt Pattern!

Have to add a bit of leisure to our lives. Leisure Challenge quilt block from the Live Well Live Strong Quilt available exclusively at Stitches Quilting


Many happy wishes for a week filled with adequate fuel.  Live Well Live Strong!  XOXO!

Deanna Wall Stitches Quilting Tutorials
Live Well Live Strong Quilt

Learn more about the LWLS Sew Along 

Next Week is the Leisure pinwheel quilt block week & worksheet!
Posted on

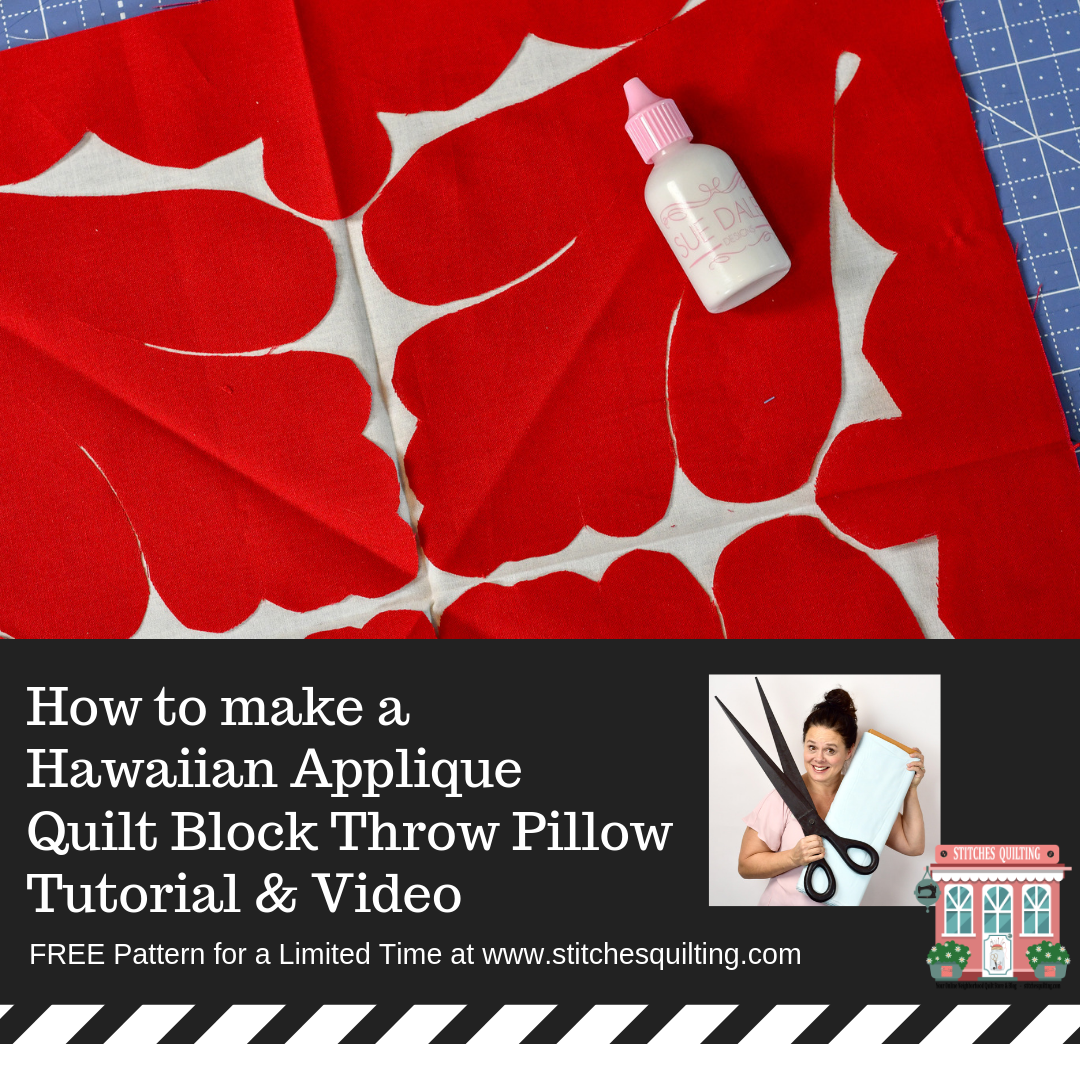
Hawaiian Quilt Block Tutorial Free Pattern

EASY FREE Pattern Hawaiian Quilt Block Tutorial and Video

Hawaiian Quilt Block Tutorial Free Pattern

Hawaiian Quilt Block Tutorial Free Pattern is finally available!   I’m EXCITED to share this!

Quilting on the Beach Retreat

FIRST THOUGH… !  I will be an instructor in Hawaii on the Big Island at Quilting on the Beach February 2 – 9, 2019!  I will be teaching the Live Well Live Strong Quilt all day February 4th!  I hope you can come and enjoy the spirit of quilting in Hawaii along with numerous other classes offered!  If you can’t join me in Hawaii, we will have a virtual sew along around the globe that will start February 1, so purchase and download your pattern NOW!

Live Well Live Strong Quilt Pattern

The Quilting on the Beach features six days of classes (with multiple offerings to choose from each day), quilting-themed bus tours, evening events and lectures, a luau, a quilt show, a Show and Tell Dinner, and more. Our retreats are always “a-la-carte” so that you can customize your quilting experience in Kona, Hawaii.  Imagine – enjoying incredible quilting classes and more in paradise!!!

Have you been curious about Hawaiian Quilting?  Let me share a few things that I have learned!

Hawaiian Hotel with Quilts on Display

Quilting was introduced to the Hawaiian people in the 1820’s when missionaries visited the island.  It was at this time that Cotton fabric was introduced to the Hawaiian people.

Hawaiian Red Applique Quilt on Display

Hawaiian natives used their customs and nature to inspire their quilt designs.  Quilts tended to have symmetrical medallion centers that would be appliqued from a whole cloth to a background of a whole cloth.  Solid bright fabrics are very traditional as the quilt shown above with the red and white.

Hawaiian Yellow Flower for quilt inspiration

You can see how the nature is reflected in their applique patterns & designs.

Enjoying a Quilty Sunset in Hawaii

Hawaii inspires me all the way from the nature, culture and quilting.  Here I am enjoying a Hawaiian sunset while reading about Hawaiian quilting.  Think of Hawaiian Quilting as a folded paper snowflake that will last forever and become an heirloom.

Hawaiian Applique Supplies Needed

You can see supplies I used to make a Hawaiian Applique Throw Pillow in the photo above.  I recommend starting with a small project when learning the applique technique.  Above you will see Gingher scissors that are necessary to cut through 8 layers of fabric accurately at once.  A stapler can be used to hold your fabric layers securely together.  Pencil and the 1/8 pattern is used to trace the pattern to the fabric.  Of course an iron and pins are needed too. Optionally, we used Sue Daley Glue too.  Download your free pattern HERE.  Print off the triangular shaped pattern and cut it out.

Hawaiian Applique Pillow Fold Fabric in Eighths

You will be working with 16 inch squares of fabric.  A red one for the top of the quilted pillow applique and white 16 inch square for the background of the pillow.  The pattern we are using is a 1/8 quilt pattern.  We will fold our white and red fabric into 1/8ths.  We fold our background fabric so we have confidence we are laying out our red fabric correctly.

Hawaiian Applique Place Cut Fabric on Background

We fold our red fabric into a 1/8th triangle.  The pattern that we printed off is now cut out and possibly traced to a thicker piece of cardstock.  Using a pencil trace the design to the fabric paying attention to the fold lines.  You can pin or staple your fabric together in preparation to cut out with very sharp scissors.  We are using Gingher Scissors for this project as it will maintain a good consistent cut through all folded eight layers of the fabric.  We are using Sue Daley glue to apply our fabrics together.

Hawaiian Applieque Pin or Glue down pattern

Unfold your cut out design, then pin or glue to the white background fabric leaving a space to turn your applique edge.

You will learn a tremendous amount of information from Karen (that runs Quilting on the Beach Retreat) at the BRAND NEW Hawaiian Quilt Museum!

To learn how needle turn hand applique used to finish your Hawaiian quilt block watch this live video below for additional instructions.


Aloha!  and Lots of Love!  Please join me in Hawaii! I would love to play with all of YOU!

Deanna Wall Stitches Quilting Stitching Through LifeDeanna Wall Stitches Quilting TutorialsStitches Quilting Online Store

Posted on

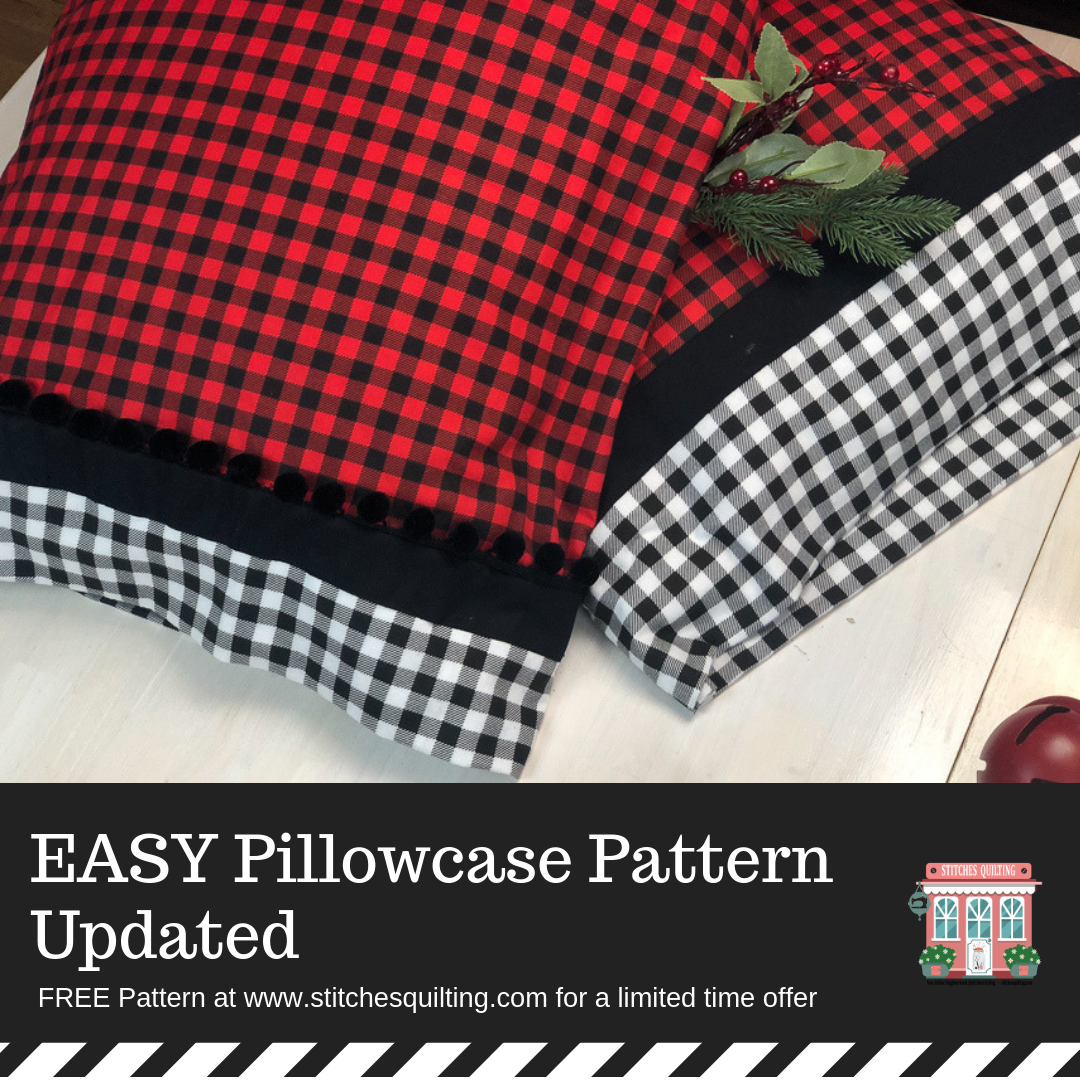
Easy Pillowcase Tutorial & Pattern UPDATED

Easy Pillowcase Pattern Tutorial Updaed

Easy Pillowcase Tutorial & Pattern UPDATED

Easy Pillowcase Pattern - Cover Page 1

Cut Your Fabrics

Easy Pillowcase Pattern & Tutorial - Cut Your Fabric Page 2

Press Your Fabric

Easy Pillowcase Pattern & Tutorial - Press your Fabric then Layer Page 3

Layer your Easy Pillowcase in a PBJ then stitch it as a burrito!

Easy Pillowcase Pattern & Tutorial - Stitch down the raw edges

Pull your excess Pillowcase fabric from you burrito.

Easy Pillowcase Pattern & Tutorial - Pull Loose Fabric from Burrito, Press and TRIM Page 5

Stitch around your pillowcase with wrong sides together to make your French Seam.

Easy Pillowcase Pattern & Tutorial - Pin & Stitch around Pillowcase Wrong Sides Facing Each Other Page 6

Carefully press your pillowcase again for your final stitch!

Easy Pillowcase Pattern & Tutorial - Press & Stitch with right sides of fabric facing each other for a French Seam Page 7


Enjoy your PILLOWCASE!

Easy Pillowcase Pattern & Tutorial - Press & Stitch with right sides of fabric facing each other for a French Seam Page 8


Coming Fall 2018 - EasyPress™ 2, Raspberry - 6 

Deanna Wall Stitches Quilting Stitching Through LifeDeanna Wall Stitches Quilting TutorialsStitches Quilting Online Neighborhood Quilt Store & Blog

Posted on

EASY No Binding Quilted Cookie Sheet Hot Pad

EASY NO BINDING Quilted Cookie Sheet Hot Pad ICON

EASY No Binding Quilted Cookie Sheet Hot Pad

Cut your fabric for your EASY No Binding Quilted Cookie Sheet Hot Pad.  There are two different hot pad size to select from.  There is a Wide Short Version or a Thin Long Version.  It is up to YOU!  Doesn’t it feel good to have possibilities?

Make the Handles for your EASY No Binding Quilted Cookie Sheet Hot Pad

Easy No Binding 3 Quilted Cookie Sheet Handles

Quilt the handles of your EASY no binding Cookie Sheet Hot Pad

Page 4 Add Batting and Quilt Handles

Layer then Quilt the Base of your Easy No Binding Cookie Sheet Hot Pad

Easy No Binding 5 Quilted Cookie Sheet How to Layer Main

Position and Layer your handles to the quilted base of your EASY Quilted Cookie Sheet Hot Pad.

Easy No Binding 6 Quilted Cookie Sheet Layer to Sew

LEAVE a three inch opening as you stitch around the edges of your EASY no binding method quilted cookie sheet Hot Pad.Page 7 Leave a 3 inch Opening

Turn inside out through your 3 inch opening your EASY no binding Quilted Cookie Sheet Hot Pad

Page 8 Turn Inside OUt

Stitch a finishing stitch along the sides.

Easy No Binding 9 Quilted Cookie Sheet More Information

Deanna Wall Stitches Quilting Stitching Through LifeDeanna Wall Stitches Quilting TutorialsStitches Quilting Online Neighborhood Quilt Store & Blog

Posted on

Quilted Cookie Sheet Hot Pad Tutorial

Quilted Cookie Sheet Hot Pad Tutorial & FREE Pattern

Make your very own practical Quilted Cookie Sheet Hot Pad for getting large items out of your oven.

Download your Quilted Cookie Sheet Hot Pad Pattern HERE

Quilted Cookie Sheet Hot Pad Pattern Page 1 Cover Material Needed and Cutting Instructions for your Quilted Cookie Sheet Hot Pad Quilted Cookie Sheet Hot Pad Page 2 Cut Your Fabric Stitch your fabrics together and quilt your handles for your Cookie Sheet Hot Pad

Quilted Cookie Sheet Hot Pad Page 3 Stitch Your Handles Quilt the Cookie Sheet Hot Pad Handles with matchstick quilting Quilted Cookie Sheet Hot Pad Page 4 Add Batting Quilt Layer your fabrics together for the 11 x 26 inch rectangle section of your Quilted Cookie Sheet Hot Pad Quilted Cookie Sheet Hot Pad Page 5 Layer the Hot Pad Add your handles to your Quilted Cookie Sheet Hot Pad and then bind your Hot Pad Quilted Cookie Sheet Hot Pad Page 6 Add Your Handles Be sure to follow Stitches Quilting for additional patterns and tutorials Quilted Cookie Sheet Hot Pad Pattern Video &Quilted Cookie Sheet Hot Pad Pattern Video & Blog Post Instructions Blog Post Instructions

One of our next pattern coming out in March 2019 will be the cross back long Apron! Quilted Cookie Sheet Hot Pad Page 8 Apron Cross Back The Quilted Cookie Sheet Hot Pad is great for getting large items out of the oven.  The Hot Pad is versatile in being a trivet or table decor too.
Be sure to join our Everyone Can Quilt Group to share pictures of what you make! What fabric combinations would you use for your hot pad?


Deanna Wall Stitches Quilting Stitching Through Life Deanna Wall Stitches Quilting TutorialsStitches Quilting Online Neighborhood Quilt Store & Blog

Posted on

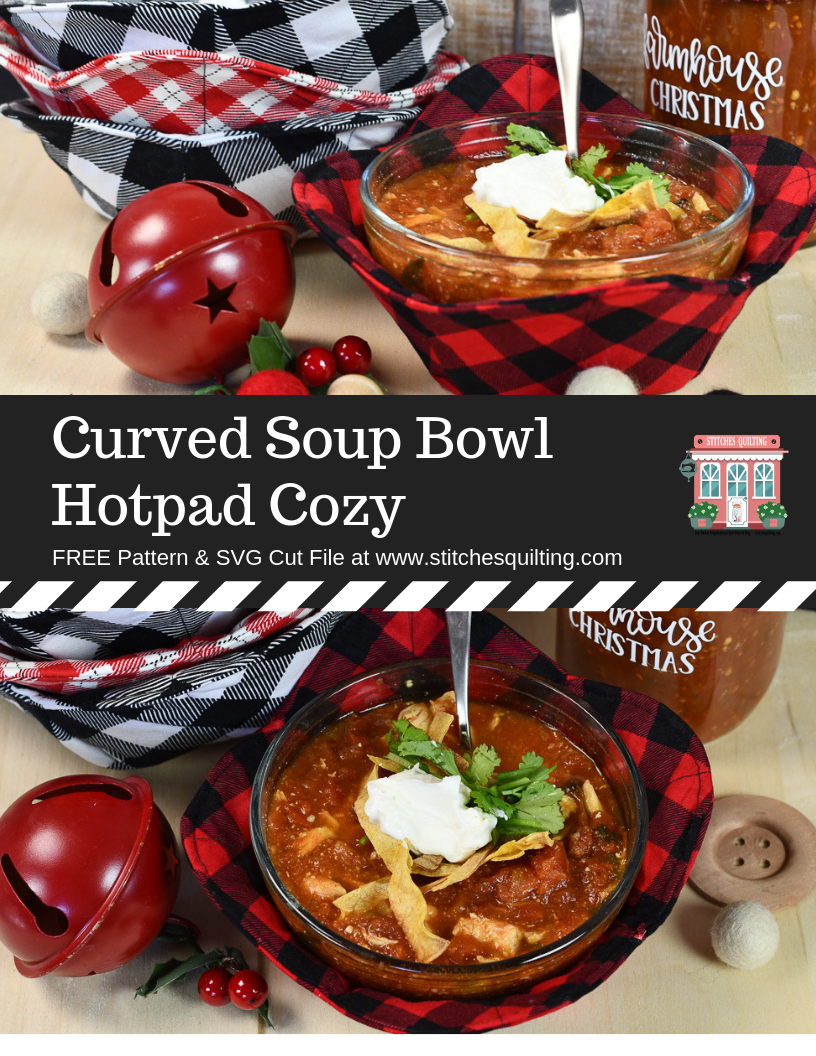
Curved Soup Bowl Hot Pad Cozy Tutorial

Curved Soup Bowl Hotpad Cozy Cover

Curved Soup Bowl Hot Pad Cozy Tutorial

Download your PATTERN HERE!

Let’s make some Curved Soup Bowl Hot Pad Cozies!  Are you ready!

Curved Soup Bowl Hotpad Cozy Page 2 Cut Fabric Squares

Let’s get our 10 inch square cut!  Easy Peasy!

Curved Soup Bowl Hotpad Cozy Page 3 Stitch Your X

Stitch your “X” on your fabric and batting!

Curved Soup Bowl Hotpad Cozy Page 4 Tapered Markings

Draw those tapered lines!  I am a sharpie marker girl!  You can you any pen you want.

Curved Soup Bowl Hotpad Cozy Page 5 Stitch Tapered Markings

Stitch those marked tapered line and trim.


Curved Soup Bowl Hotpad Cozy Page 6 Mark Your Curved Edges

Find a curved item you would like your bowl shaped as and mark one side of the bowl cozy.

Curved Soup Bowl Hotpad Cozy Page 7 Stitch Blue Curved Lines

Stitch on your curved line leaving a 2 inch opening to turn your bowl inside out.

Curved Soup Bowl Hotpad Cozy Page 8 Stitch & Turn Inside Out

Be sure to Download your FREE Pattern for the Curved Soup Bowl Hot Pad Cozy

Show us what you make by following us on Facebook, Instagram and YouTube Social Media.  Lots more patterns and giveaways coming your way!

Join our Everyone Can Quilt Facebook Group to share pictures of what you make and ask questions!

Happy Stitching – Can’t wait to see you ONLINE!

Deanna Wall Stitches Quilting Stitching Through Life

Deanna Wall Stitches Quilting TutorialsStitches Quilting Online Neighborhood Quilt Store & Blog

Posted on

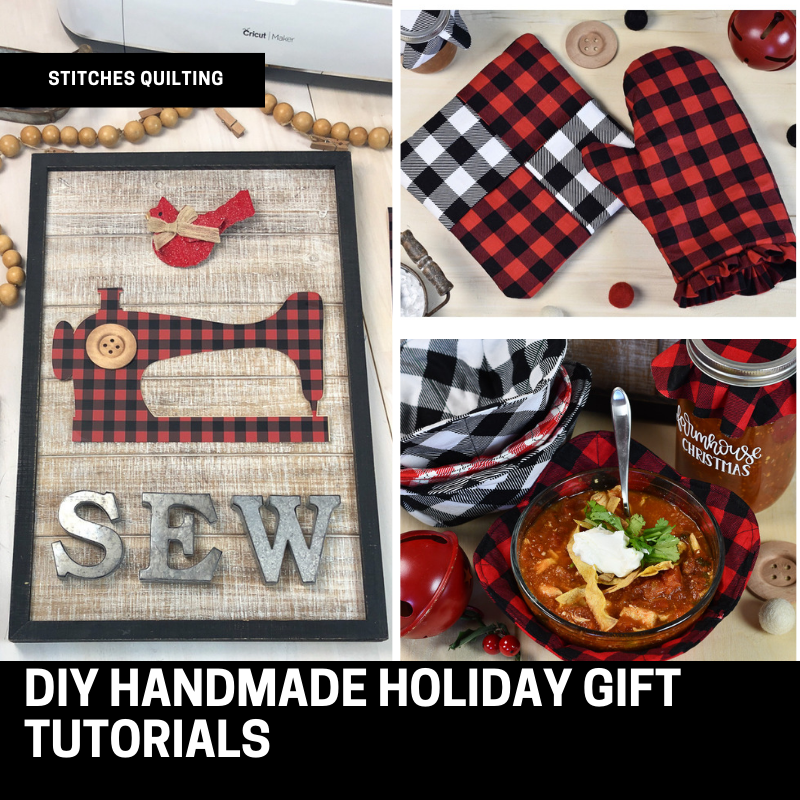
DIY Handmade Holiday Gifts Tutorial

Make your own DIY HANDMADE HOLIDAY GIFT TUTORIALS for friends and family

DIY Handmade Holiday Gifts Tutorial

Making Handmade Holiday Gifts makes me excited for Holidays!  Creating Holiday gifts with the Cricut Maker just gives a professional look and cut!  

Soup Bowl Cozy – fabric sewing

Cricut Maker Buffalo Plaid Rounded Soup Cozies (2)

Curved edges on the quilted cozy soup bowls softens their look.   They are so handy to make a set and stack on top of each other.  

Cricut Maker Buffalo Plaid Rounded Soup CoziesFor the free Curved Soup Bowl Cozies subscribe below!  Nest together and stitch on the blue line!  


Download Your Curved Soup Bowl Hotpad Cozy Pattern PDF

Enjoy a 9 page pdf pattern download with step by step instructions for the Curved Soup Bowl Hotpad Pattern


Materials needed:  2 - 10 inch fabric squares AND 2 - 10 inch pieces of batting.  {Use all cotton materials for a microwave safe version.  Increase insulation by adding a layer of Pellon Insul-fleece available in the Stitches Quilting online store! )

Soup Bowl Cozy Hot Pad Materials needed 2 -10 inch square of fabric and batting


Or.... have the Cricut Maker in Cricut cut out exact dimensions for you from this FREE Cricut Community file!  hmmmmm... so many possibilities. 

Soup Bowl Cricut Rounded Cozy Hot Pad


Especially fun for making a bunch of these soup bowl cosies as a DIY handmade holiday gift for neighbors, friends or family!  

If you don't cut out your soup fabric bowls on the Cricut Maker then use this handy guide from a 10 inch squares of fabric!  

  1.  Stitch an "X" on each 10 inch fabric square with a piece of batting behind it.Soup Bowl Hot Pad Cozy Stitch an X from point to point
  2. After stitching your "X" fold your fabric square in half.  Using a ruler, mark two dots 1 inch from the fold and 2 inches from the top of the batting side.  Draw a line meeting the two dots. Soup Bowl Hot Pad Cozy Tapered Markings
  3. Repeat this step on all four sides of your fabric squares.   This will be a stitching line to taper your bowl.  Remember one inch from the fold and two inches from the top.  
  4. Stitch on the diagonal lines you drew on the batting side.  
  5. Trim the excess fabric.
  6. Curve your square corners with a bowl to mark your stitching line.   Use a bowl to trace the edges of your quilted 10 inch squares or download your pattern here!Soup Bowl Rounded Hot Pad Cozy Instructions
  7. Nest your tapered bowls together with right sides together.  
  8. Stitch on your blue curved lines with right sides together on the straight edge of the curve.Soup Bowl Rounded Hot Pad Stitch Line
  9. Leave a two inch opening on the "straightest" edge of the curve.
  10. Trim the excess fabric from the blue stitching line.  
  11. Turn inside out through the opening.
  12. Top stitch the opening closed then all the way around the top of the Hot Pad Soup Bowl Cozy
  13. Enjoy your Rounded Soup Bowl Cozy Hot Pad with some hot soup or gift this awesome Handmade Soup Bowl Cozy!

CLICK HERE FOR THE COMPLETE Soup Bowl Hot Pad Cozy Tutorial!  


Ruffled Buffalo Plaid Hot Pad Hand Mitt -  Cricut Simplicity Sewing Pattern 

Cricut Maker Buffalo Plaid Ruffled Hot Pad Handmade Gift Standing Up

Love the trendy ruffled edge for the wrist on this Handmade DIY Buffalo Plaid Hot Pad Gift.  

Cricut Maker Buffalo Plaid Ruffled Hot Pad Handmade Holiday Gift with cookies

Check out the Simplicity Hot Pad Pattern available in Cricut Design Space.  

Cricut Maker Buffalo Plaid Ruffled Hot Pad Fabric Cut

Buffalo Plaid Fabric can be purchased from Stitches Quilting online fabric store CLICK HERE.  

Red and Black Plaid Fabrics

EASY Square Hotpads Layered - fabric sewing

Cricut Maker Buffalo Plaid Handmade Gift

Materials Needed:  Easy to make square hot pad made from 6 - 10 inch square pieces of fabric and 2 - 10 inch square pieces of batting. 

Cricut Maker Buffalo Plaid Hot Pads Supplies Needed for Holiday Gifts

  1.  Can you see the order of the fabrics laid out?  Start with a white or muslin square that will not be seen.  Stack your batting 10 inch layer and add a Pellon Insul-fleece Layer for heat resistance if you would like.  Layer with a red square of  buffalo plaid fabric and then layer 4 Folded in half 10 inch squares overlapping staggered on top with the raw edges facing outwards.  

Handmade Holiday EASY Layered Hot Pad

2. Let's review the top layer.  Fold four 10 inch squares into a rectangle.

Handmade Holiday EASY Layered Hot Pad

3.  Match the two red buffalo folded 10 inch fabric squares side to side with folded edges matching each other in the center and raw edges to the outside.  

Handmade Holiday EASY Layered Hot Pad

4.  Overlap, weave and stagger the two black and white folded 10 inch fabric squares through the red buffalo squares in a pattern like closing a cardboard box.  

5.  Stack all your layers in order and stitch around all four sides of the Hot Pad. 

Handmade Holiday EASY Layered Quilted Hot Pad

6.  Peek through your four weaved top layers to turn inside out!  Voila and no need to close!  


Let Us Sew Wooden Snowflake  - Cricut Iron On & Wood Cutting

Let Us Sew DIY Wooden Snowflake Holiday Decor


Check out your local dollar store for raw wooden items to paint.  This wooden snowflake is easy to cut out with your Cricut Maker and the knife blade.  Quickly access this Cricut black iron-on cut file for free in the Cricut Community Design Space!  I love using iron-on with my wood projects!  It looks seamless and beyond professional!  Wouldn't a "sewy or quilty" friend love this snowflake? 

Let Us Sew DIY Wooden Snowflake Holiday Decor

I love using the Cricut Easy Press 2 when ironing on the wood as I can select the perfect temperature and time!  Click here to access the online Cricut Interactive Guide to determine the perfect temperature and time to apply your iron on.  


Farmhouse Christmas Canning Jar - vinyl

Farmhouse Christmas Canning DIY Holiday Gift

The "Farmhouse Christmas" vinyl cut file is free with Cricut Design Space Access Account.  The white vinyl is striking against this homemade canned jar of salsa.  Talk about the perfect holiday gift to crack open and smell garden grown tomatoes!  The canning jar buffalo plaid fabric accents the charm perfectly.  You can cut out all your fabric circles on a Cricut Maker with the Rotary Cutting Blade.  

Farmhouse Christmas Canning DIY Holiday Gift

Compare the two photos above!  The white vinyl just pops the charm on this DIY Handmade Holiday Gift.  I cut the white vinyl and used clear transfer tape to apply the vinyl on the glass jar.  

Tree Ball Jar Sipping Cup - vinyl

Christmas Tree Holiday Ball Jar Straw Mug

Apply green Christmas Tree vinyl on a clear ball jar with a striped straw for some extra holiday fun!  

Fabric Gift Baskets - fabric sewing

Cricut Maker Simplicity Fabric Basket Handmade Holiday gift

Did you know Cricut Design Space has preloaded Simplicity sewing patterns?  The complete instructions for the pattern are loaded for you to access digitally or print off for convenience.  These fabric baskets are made by cutting out rectangular squares of fabric and medium weight stabilizer on the Cricut Maker with your rotary blade. 

Holly Jolly Fabric Holiday Basket Grommets

After stitching these together, it felt awesome to add the black metal grommets with a little bit of hammering.  The beauty of these fabric baskets is that you use the metal grommets to fold the baskets outwards to make a larger box or inwards for a smaller box.  Happy boxing baskets!

Farmhouse Holiday Tee Towels - iron on

Cricut Tee Towels Pine Cone Black Trucks and Fabric

I love the variety of tee towels you can find nowadays!  It is as slick as can be to cut out with gold an iron on pine cone element for a holiday accent.  The pinecone is available for free in the Cricut Design Space Access Account.  

Cricut Tee Towels with Black Truck Iron On

The pick up truck silhouette is available in Cricut Community to access here!  I drove them in a row and applied them on the tee towel with the Cricut Easy Press 2 using the perfect time and temperature settings.  

Cricut Tee Towels with Printed Iron On Winter Green

Printed Iron On sheets are fun to use for DIY Handmade Holiday Gifts!  I love the variety of printed iron on materials available at my local craft store on online purchase.  

Cricut Gold Foil Pine Cone on Buffalo Plaid Tee Towel Cricut Easy Press 2

Using the Cricut Easy Press Interactive Quick Reference Guide online,  I ironed on the Gold Pine Cone at 340 degrees for 30 seconds in the cricut Easy Press Mat.  It felt like precision with a polished finished gift!  


Holly Jolly Classic Mugs - vinyl

Cricut Maker Holly Jolly Vinyl Mugs Completed

There is nothing as classy as some Holly Jolly goodness on these dollar store mugs.  The simple black and white is very trendy

Cricut Maker Holly and Jolly Mugs to apply vinyl

Cut out the vinyl on your Cricut and apply with ease to your mugs using transfer tape!

Farmhouse Sew Wooden Signage - iron on knife blade wood

Sewing Machine Wooden Sign Buffalo Plaid

The Cricut Design Space Community file is available here!  I LOVE the combination of materials here with the wood and metal.  The buffalo plaid printed iron on rocks this sign!  

Sewing Machine Wooden Cricut Maker Sign

Cutting out the wooden sewing machine using your Knife Blade with the Cricut Maker is phenomenal!  I used the same digital file to cut out the iron on!  

Cricut Maker cutting wood and Buffalo Plaid Iron On Face Down on Mat

Embroidery Hoop Decor - iron on project

Embroidery Hoop DIY Handmade Truck Holiday Gift

Embroidery Hoop Decor is all the rage now!  Red plaid Buffalo fabric makes this project sing with your favorite images to cut out!  But imagine the possibilities of all sizes for wall decor to Christmas tree ornaments!  

Holiday Quilted Throw Pillow - Sewing Fabric

Holiday Pillow with Handmade Red PomPoms

A quilted holiday pillow is lots of fun with the Christmas fabrics from Stitches Quilting!  Simple is classy and clean with 16 - 5 inch squares sewn together.  The red quilted stitching a half inch from the seams makes all the difference with this snuggly pillow.  Want to make handmade pom poms that fit perfectly for your project?  Be sure to sign up for the Stitches Quilting newsletter to get our next published post with all the details.  

Learn how to make this Quilted Tribal Holiday Throw HERE!  

Please share ideas for more Handmade DIY Holiday gifts below!  Tag me in your Facebook, Instagram or Twitter posts so I can see what you are making.  You inspire me!  

Join our Cricut Maker Quilt & Sew Facebook Group and follow us on Facebook, Instagram and YouTube to follow live instructional videos on these projects with giveaways too!

Download Your Curved Soup Bowl Hotpad Cozy Pattern PDF

Enjoy a 9 page pdf pattern download with step by step instructions for the Curved Soup Bowl Hotpad Pattern


Cricut Maker Machine

Happy Holiday Sewing!


Deanna Wall Stitches Quilting Stitching Through Life

Deanna Wall Stitches Quilting

This is a sponsored conversation written by me on behalf of Cricut. The opinions and text are all sincerely mine.


DIY Sewing Quilting HANDMADE HOLIDAY GIFT TUTORIALS Hot Pads, with Buffalo Plaid, Vintage Trucks, Vinyl, Iron On, Wood, Metal & Fabric Combined, Fabric Baskets

Posted on

Cricut Maker vs. Air Explore 2

Cricut Maker vs. Air Explore 2 Which Machine is Right for You?

Cricut Maker vs. Air Explore 2

Which machine is right for YOU? – Cricut Maker vs. Air Explore 2

A Cricut Machine opens up a world of possibilities!  The projects I daydream about, I’m able to create with a polished look by using Cricut!  So which machine is right for you?  It depends on what you want to create and most importantly what you think you will create in the future.  

Cricut MAKER vs AIR EXPLORE 2 Which Machine for YOU


Think of the Cricut Maker like an iPhone

Think of the Cricut Maker like an iPhone

Your smart or iPhone updates the firmware and apps all the time!  The Cricut Maker is built with few buttons so the machine is updated constantly along with the Design Space Software App.  

Digital vs. Dial Pressure Settings

Don’t limit yourself to the Dial Pressure Settings jump into digital pressure setting for an unlimited amount of materials.  


Adaptive Tool System 


With the brass gear in the Cricut Maker the cutting tool is able to turn and pivot while lifting up.  Instead of dragging cuts, now the cut are precise!  Cricut is able to update the machine with new adaptive tools and abilities.  

Cricut Adaptive Tools


Cricut Adaptive Tools explained Rotary Blade Knife Blade and Scoring Wheel


Adaptive tools that are available include the Rotary Blade, Knife Blade and Scoring Wheel.  

Sewing & Quilting Patterns

Cricut Sewing & Quilting Patterns

There are 100’s of sewing and quilting patterns available in Cricut Design Space.  What is even better that you can upload your own patterns too!

Cutting Fabric 

Cricut Maker Cutting Fabric

I have personally cut a huge amount of fabric types with my Cricut Maker!  I can attest to its abilities and accuracy!

Cricut MAKER vs AIR EXPLORE 2 Which Machine for YOU?

Some items that I have made with my Cricut Maker!  

Things You Can Make with a Cricut Maker


Deanna Wall Stitches Quilting Stitching Through LifeDeanna Wall Stitches QuiltingStitches Quilting Online Neighborhood Store

This is a sponsored conversation written by me on behalf of Cricut. The opinions and text are all mine.

Posted on

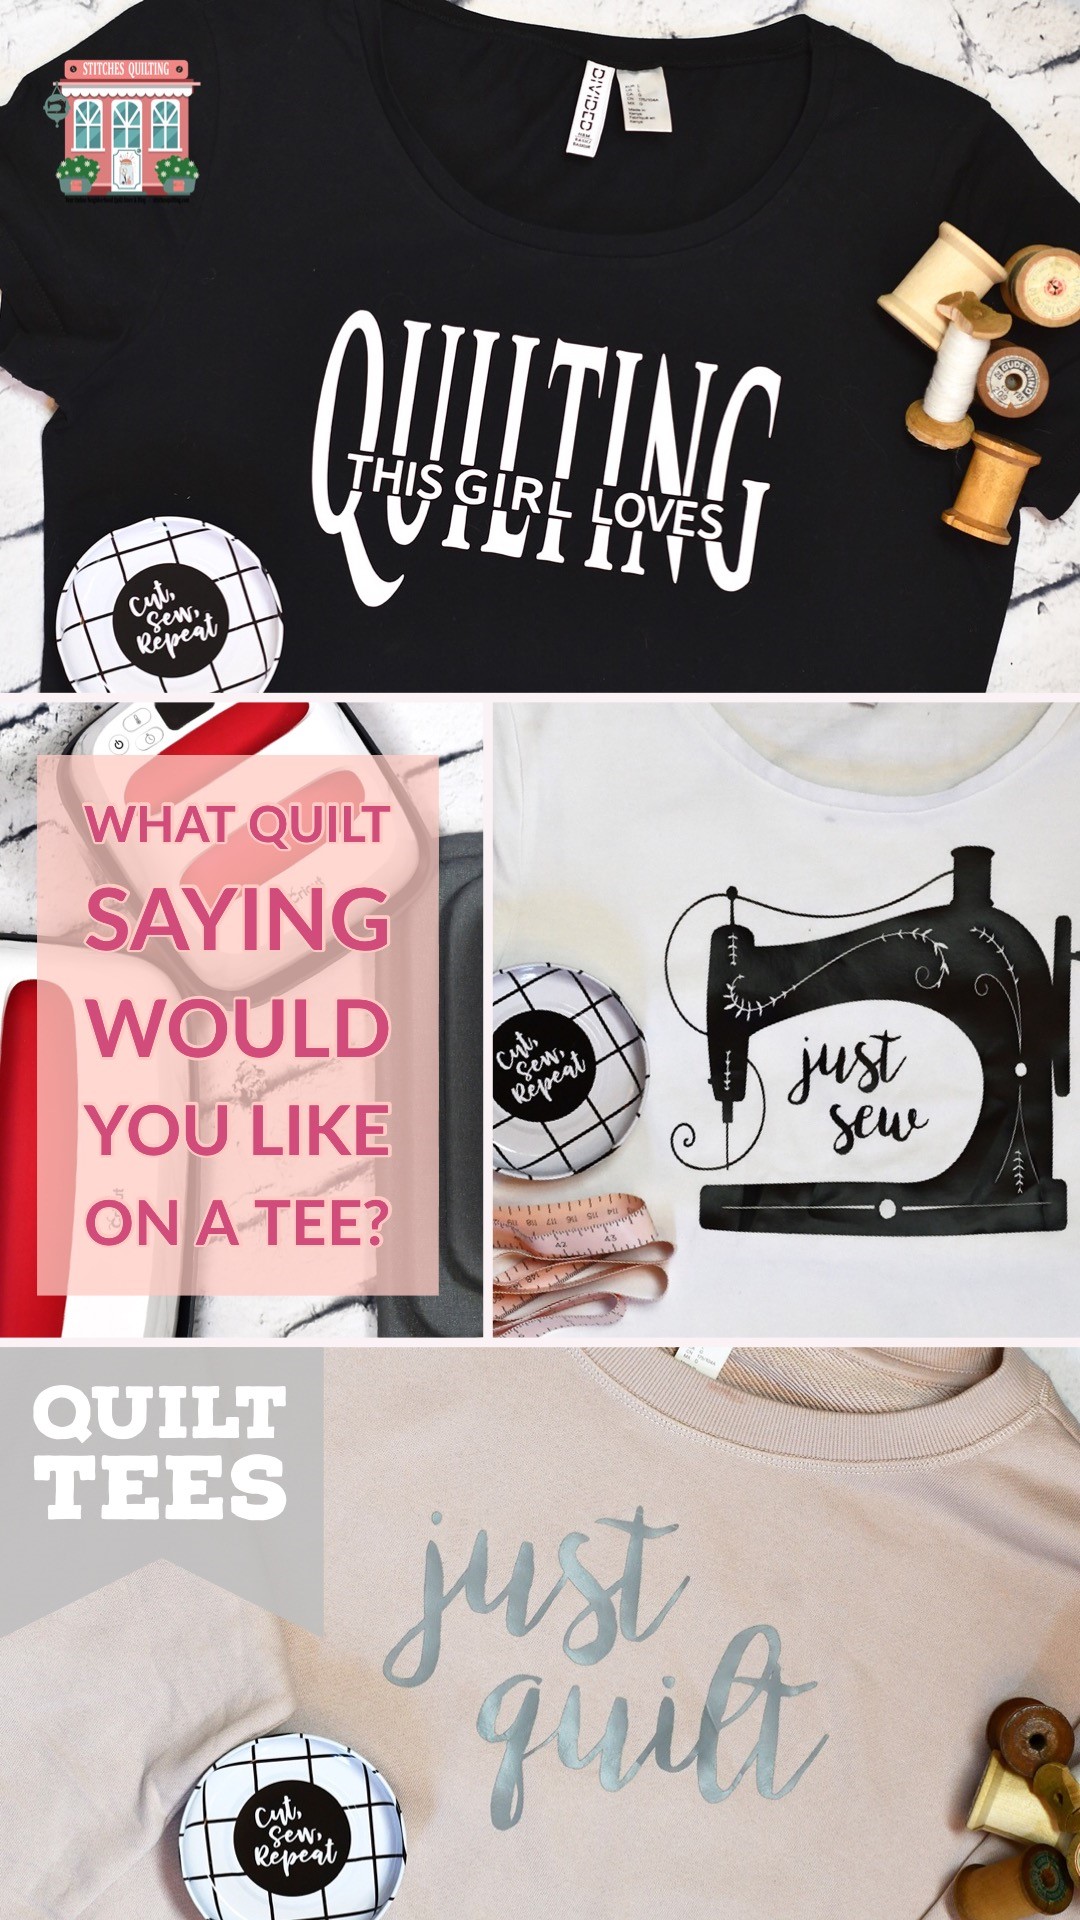
Trendsetting DIY Quilting Tees with Cricut EasyPress 2 and Quilt Tips

What Quilt Saying Would You Like On A Tee - Use the Cricut Maker & Easy Press to make any one you want!

Trendsetting DIY Quilting Tees with Cricut EasyPress 2 and Quilt Tips

I’ve always wanted a Quilting Tee – but never found one that I really liked.   Created my own Trendsetting DIY Quilting Tees using the Cricut EasyPress 2!   What fun it was too!

Just Quilt Sweatshirt Supplies Needed-2

Grab some of your favorite basic clothing pieces!  At H&M, I found some modern shaped sweatshirts and t-shirts with trendy colors.  Gather together the design you would like to use along with the color of iron on to coordinate with your clothing article.  Click here to make the “Just Quilt” Graphic tee in the Cricut Community!  

Just Quilt Sweatshirt Ready to Easy Press On

The Cricut Maker cuts out the iron on perfectly leaving a clear carrier sheet to transfer to the sweatshirt.  The gray “just quilt” graphic is ready now to iron on to the blush colored sweatshirt.  That is where the Cricut EasyPress 2 comes in handy!  Cricut has an interactive quick reference guide to know how much heat to use for how long on whatever material you are transferring to.

Cricut Easy Press Interactive Quick Reference Guide


You can see how I used the Cricut interactive quick reference quide online to select that I was using iron on material, sweatshirt & the Cricut Pressing Mat.  With the Cricut EasyPress 2 you set the temperature and time while following their handy tips.  If you follow the instructions exactly then it is difficult to get it wrong.

Hot Iron with uneven heat plate Easy Press 2 Even Heat Hot Plate


As a quilter, I really appreciate the Cricut EasyPress 2 and the even heat plate (Image courtesy Cricut).  An regular household iron plate has many different temperatures but the Cricut EasyPress 2 has a very consistent heat plate.  You can feel the difference when pressing a quilt top flat.  The quilt top just melts like butter into perfect smoothness as you glide the Cricut EasyPress across it.

Press Your Quilt Top with the Cricut EasyPress 2

Want your quilt blocks flat?  Well the Cricut EasyPress comes in handy for that too!  I use it with or without starch.

Press your Quilt Block Flat with the Cricut EasyPress 2


The Cricut Pressing Mats are so fine to use and come in three different sizes.  I love how portable they are right next to my sewing machine as I stitch away.

Cricut Pressing Mats are so convenient!

Binding… oh sweet binding…  The best part of a quilt is the binding, because it means you are almost done!   Pressing binding with the EasyPress is as sleek as sleek can get.  Just fold your binding in half, slip it under the EasyPress and slide right through.  I don’t feel like I’m stretching my fabric into a completely different shape using the EasyPress.  Remember as quilters we “press” not “iron” our fabrics to distort them right?

Press Quilt Binding easily with the Cricut EasyPress 2 web

The insulated safety base keeps my sewing room safe to store the Cricut EasyPress hot or cool.  It’s a relief to know I won’t knock it over or easily burn myself in tight creative sewing spaces.

Safe place to store your Cricut EasyPress when hot or cool in the insulated safety base.

Well I’m enjoying sporting these new Quilting Tees and Sweatshirt as I’m stitching away!  I can’t wait to design and make more!  Take a creative spin in Cricut’s Design Space that is free to use with some quilting phrases.  What would you like to see on the next Quilting Tee?  Cricut Design Space is convenient to use on either my iPhone, iPad or LapTop, then connect via bluetooth to the Cricut Maker.

Just Sew Sewing Machine tshirt Supplies Needed-2

Now remember these playful designs can be used on pillows, tote bags and sewing room decor…. wait till you see what I am making next!  With Cricut and my sewing machine everyday is a great day to wake up and create!

What Quilt Saying Would You Like On A Tee - Use the Cricut Maker & Easy Press to make any one you want!

Be sure to check out my bonus videos and additional blog posts taking you step by step creating these Graphic Quilting Tees!  Oh…. the possibilities!

All the BEST!  XOXO,

Deanna Wall Stitches Quilting Stitching Through LifeDeanna Wall Stitches Quilting

Stitches Quilting Online Neighborhood Quilt Store & Blog

This is a sponsored conversation written by me on behalf of Cricut. The opinions and text are all mine.

Check out the Cricut Maker!
Shop new arrivals from Cricut!
 AND Cricut EasyPress 2

Shop new arrivals from Cricut!

The Cricut Bright Bad is so useful for your wedding out your iron on, but also invaluable for applique or embroidery!
Shop the Cricut BrightPad today!

Posted on

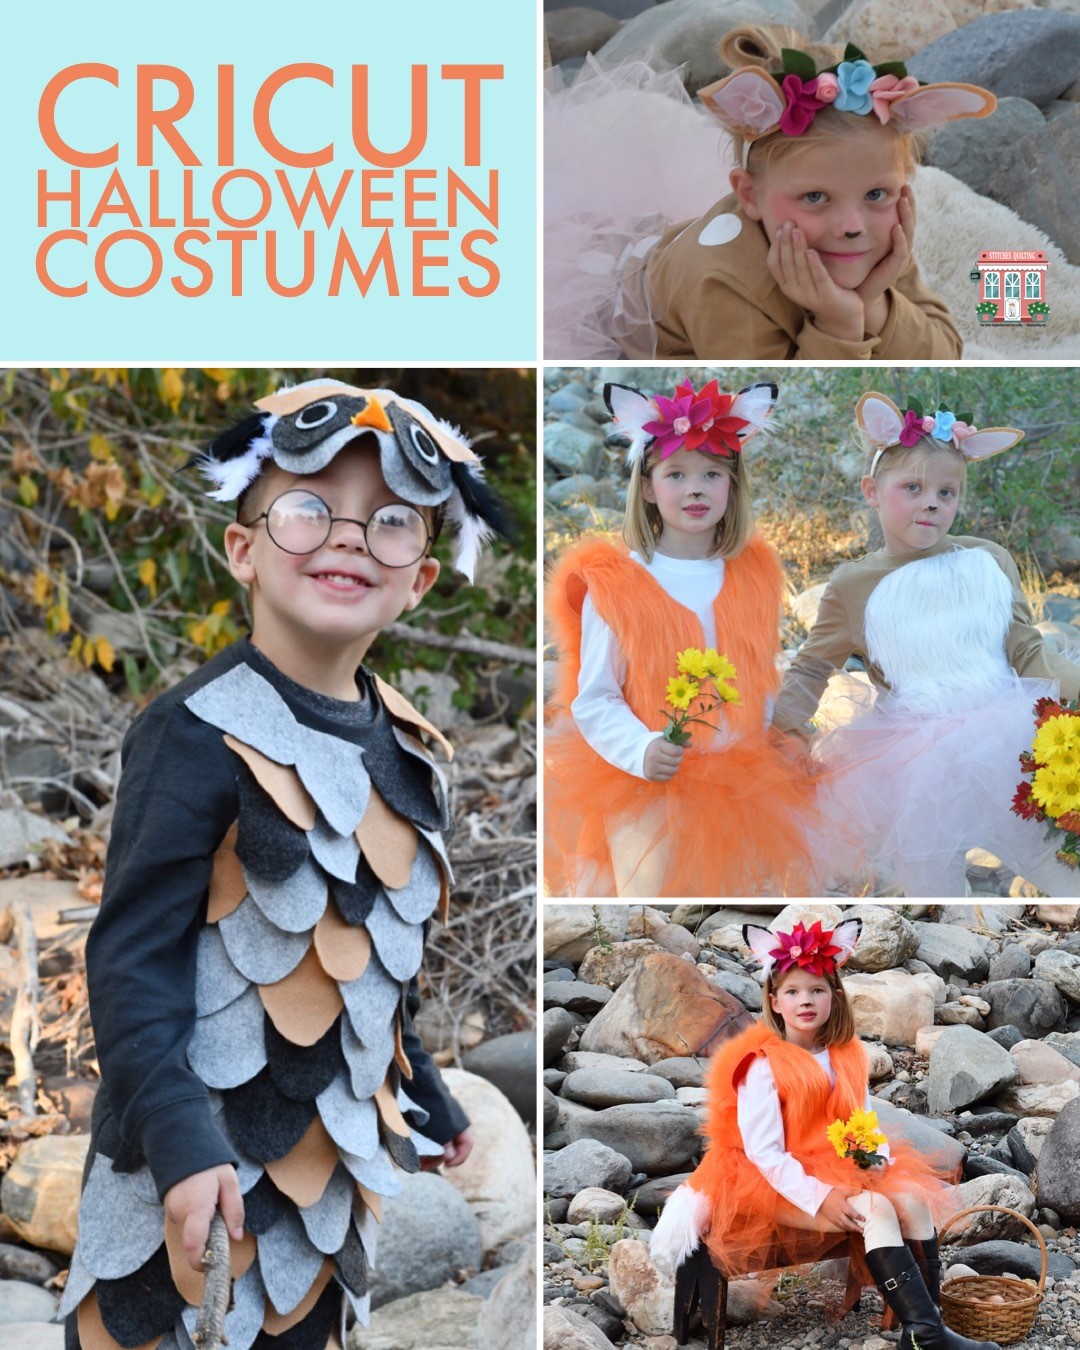
DIY Woodland Fox Fawn Owl Costume with Cricut

EASY! All you need is some felt & a glue gun! DIY Cricut Halloween Costumes Hack

DIY Woodland Fox Fawn Owl Costume with Cricut

Easily create your own DIY Woodland Fox, Fawn or Owl Costume with Cricut!  These costumes went together so quickly and inexpensively too!

Easy Quick DIY Fawn Costume Pottery Barn Hack

This Fawn DIY Easy Woodland Costume is going to create a smile on your littles face!  Can you notice the iron on white spots on the Fawn’s back?

Our Fox is just enchanting with the stuffed fur tail, toile skirt and fur vest.  All fabric purchased at Joann Fabric Store!

Felt colorful flowers accented by white fur make this headpiece endearing.

Our Owl looks wise and curious!  This DIY Owl Woodland costume has the perfect amount of expression without overbearing the personality of your little!

DIY HACK Owl Costume Supplies Needed for Cricut Maker

Supplies Needed for the Owl costume as we made it include everything pictured above and a head band from Joann Fabric Store to hot glue.

These Woodland Costumes were made with the Cricut Maker web

Using the Cricut Maker with the new rotary cutting blade makes cutting out these Acrylic Felt Fabrics for DIY costumes a breeze!

Building Owl Woodland Costume by hot gluing Cricut cut felt feathers to a long sleeved shirt

Start out first by purchasing some long sleeved shirts to build your desired costume on.  The Woodland Owl costume we purchased a matching sweatpant with the long sleeved shirt.  The Fawn costume used a tan long sleeved shirt and the Fox costume used a white long sleeved shirt.  After cutting out the Owl Feathers on the Cricut Maker you then hot glue the accents to the shirts, these costumes come together quickly!

Owl Costume Cricut Community DIY Instructions & SVG Files to Make

Get cutting right away on the Owl DIY Costume with all the Cut files in the Cricut Community click here.

Fawn Costume Cricut Community DIY Instructions & SVG Files to Make

Jump over to the Cricut Community to have access to cut everything you need to make the DIY Fawn Deer Costume with the Cricut Maker click here!

Fox Costume Cricut Community DIY Instructions & SVG Files to Make

Interested in your little being the enchanting Fox costume then click here to visit the Cricut Community because I have shared all of my cut files with you!  Please share what you make by using the #stitchesquilting hashtag on Instagram or tag me with @stitchesquilting on Facebook or Instagram.

DIY Hack Fawn Costume Supplies Needed

The Fawn Costume supplies needed are in the picture above!

Assemble the Fawn Headband web

Use a hot glue gun to assemble the Fawn Headband.

DIY Hack Fawn Headband Costume Cricut

Our Fawn Woodland Animal Headband finished up like the image above.  BAM – the power of the Cricut Maker!  Remember you can cut all these files out for yourself by following the link above!

How to Make a DIY Fox Costume Headband

The Fox and Fawn Ear are wrapped around the back of the headband underneath to be hot glued on.

DIY Hack Fox Headband Cricut

Fox Headband completed and embellished!

DIY Hack Fox Costume Supplies Needed from Joann Fabric

Fox Tail supplies needed and can be purchased at Joann Fabric Store

Sewing the Furry Fox Tail DIY Cricut Costume web

Sew the orange fur and white fur together to make the fox tail.  We brushed ours after stitching the fur to pull the fur out of the seam.

DIY Hack Fox Costume Halloween

The Fox costume looks like above when completed.

DIY Hack Fox Costume Furry Tail

Fox Tail completed and stuffed!

DIY EASY Fox Costume to Cut with the Cricut web

The Fox costume is just dreamy!

Close up of the Fawn headband, but remember you can customize yours to be any color or type of flower the cut file has options for you!

Woodland Fox and Fawn Costumes DIY Cricut Easy web

The Fox and Fawn costumes are just lovely!

DIY Cricut Owl Costume Wise Book Reading 5469 web

Gotta love our wise little Owl getting ready to read!

Deanna Wall Stitches Quilting Stitching Through LifeDeanna Wall Stitches QuiltingStitches Quilting Online Neighborhood Quilt Store & Blog

This is a sponsored conversation written by me on behalf of Cricut. The opinions and text are all mine.