Posted on 2 Comments

Healthcare Hero – A World of Hearts Quilt Along

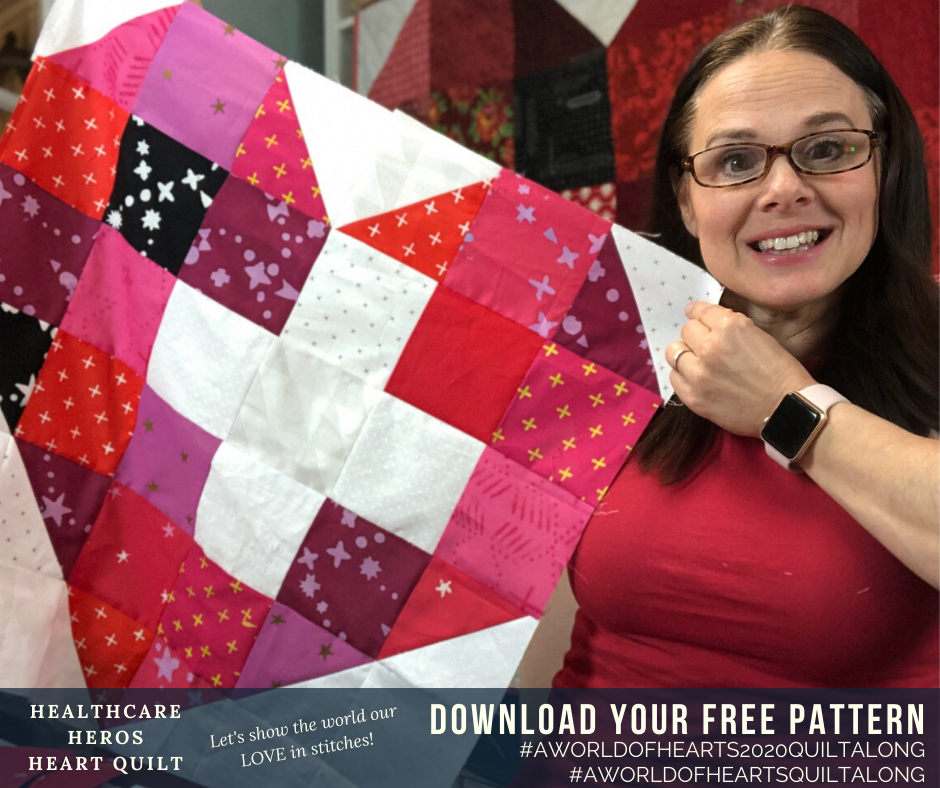
Healthcare Heros Heart Quilt - Free Pattern A World of Hearts - Let's show the world our LOVE in stitches

Calling all quilters & sewists to show the world our love in stitches! Let’s have a quilt along with a small 24 inch heart quilt to hang in our windows!

Now that we have been in quarantine with CoVid-19, have you seen the hearts popping up in windows? The hearts in the windows are a sign to our community that we are all in this together while sending love out to the world.

Check out the #aworldofhearts2020 or #aworldofheartsquiltalong hashtag on Instagram or Twitter.

So…. Let’s start our own movement and hang quilted hearts in our windows to let everyone know that even though times are tricky that we love the world and wish everyone well! Check out Liz Boyce’s windows filled with love in Canada!

A World of Hearts Quilt in window sharing love out into the world

Download your free pattern to make your very own “Healthcare Hero – A World of Hearts Quilt”. The pattern offers quilt sizes of 24 x 24 inches or 57 x 57 inches along with a bonus options to put a medical plus sign in the heart to show your love for healthcare front line workers.

Download FREE Healthcare Hero – A World of Hearts Quilt Pattern

Enjoy a 11 page pdf download pattern with step out instructions.

A child's fascination with hearts in the window.  Make a quilt to cheer up your neighborhood.  A World of Hearts Quilt Along 2020 with granddaughter Ellie

Children love to find positive things hanging in windows along with adults too! Let's spread some cheer and love around our neighborhoods.

It feels great to have a fast sewing project! Perfect to make for a seasoned or new quilter with video tutorials to guide you through the steps.

A World of Hearts Quarantine Quilt Along

Add a cross in your quilted heart to honor our first responders working so hard right now! Hang it in your window or give it as a gift to someone that you know that is working hard to heal our world right now.

Use the hashtag #aworldofheartsquiltalong or #aworldofhearts2020quiltalong to share with others on social media!

A World of Hearts Quilt Pattern 6 Time to quilt your quilt

Let's talk about supplies! You probably already have lots of fabric laying around that you can use for this 24 x 24 inch or 59 x 59 inch quilt!

You will need a variety of fabrics that you have around your home right now!

  • Variety of fabric laying around your home right now
  • Rotary Cutter
  • Rotary Cutting Mat
  • Sewing Machine
  • Scissors
  • Pins
  • Pattern - Download the FREE pattern

A World of Hearts FREE Quilt Pattern to Adorn your home with LOVE

Check out how I added a quilt label to the World of Hearts Quilt. Have you labeled your quilts? Make it easy and just use a sharpie marker and set the ink with your iron.

Check out how I added a quilt label and quilt hanger on the back of the A World of Hearts Quilt. Cut 2 ten inch squares, fold them into a triangle and tuck them in the top corner of your quilt in the binding. These flap then can be use with a hanger slipped in them to hang in your window or on your front door.

Look at how many A World of Heart Quilts Donna Beaulieu made! Everyone is sharing the love around as gifts too.

We can make a First Responder Quilted Pillow! Just change the size of the square you are working with to 2.5 inches! I made this 16 inch quilted pillow by sashing the heart quilt block with 3 inch strips of white fabric. Then I quilted it with a matchstick quilting effect, but added random wavy lines every so often so everything doesn't look exactly perfect! Doesn't it look just spendid? The envelope pillow took me about 2 hours to make from start to finish. It felt so GOOD to have a quick sew and a finished project!

Now don't forget that you can hand embroider a message on the bottom left and right corner of your heart. These scripture embroidery patterns are available with the pattern.

Download FREE Healthcare Hero - A World of Hearts Quilt Pattern

Enjoy a 11 page pdf download pattern with step out instructions.

Join the Everyone Can Quilt Facebook Group! It's a friendly online quilting group.

Join the Everyone Can Quilt Facebook Group to see quilts that others are making around the world. On Instagram follow me @stitchesquilting or Twitter @stitchesquitin and use the #aworldofheartsquiltalong #aworldofhearts2020 to share your heart quilt with everyone! I can wait to see what you make please tag me!

Don't forget to download your pattern and watch the video tutorials!

A World of Hearts Quilt Pattern

Download your FREE "A World of Hearts" Quilt Pattern HERE!

Deanna, Owner of Stitches Quilting
Deanna Wall Stitches Quilting Tutorials
Posted on 1 Comment

Positive Plus Sign Quilt Block – Live Well Live Strong Quilt

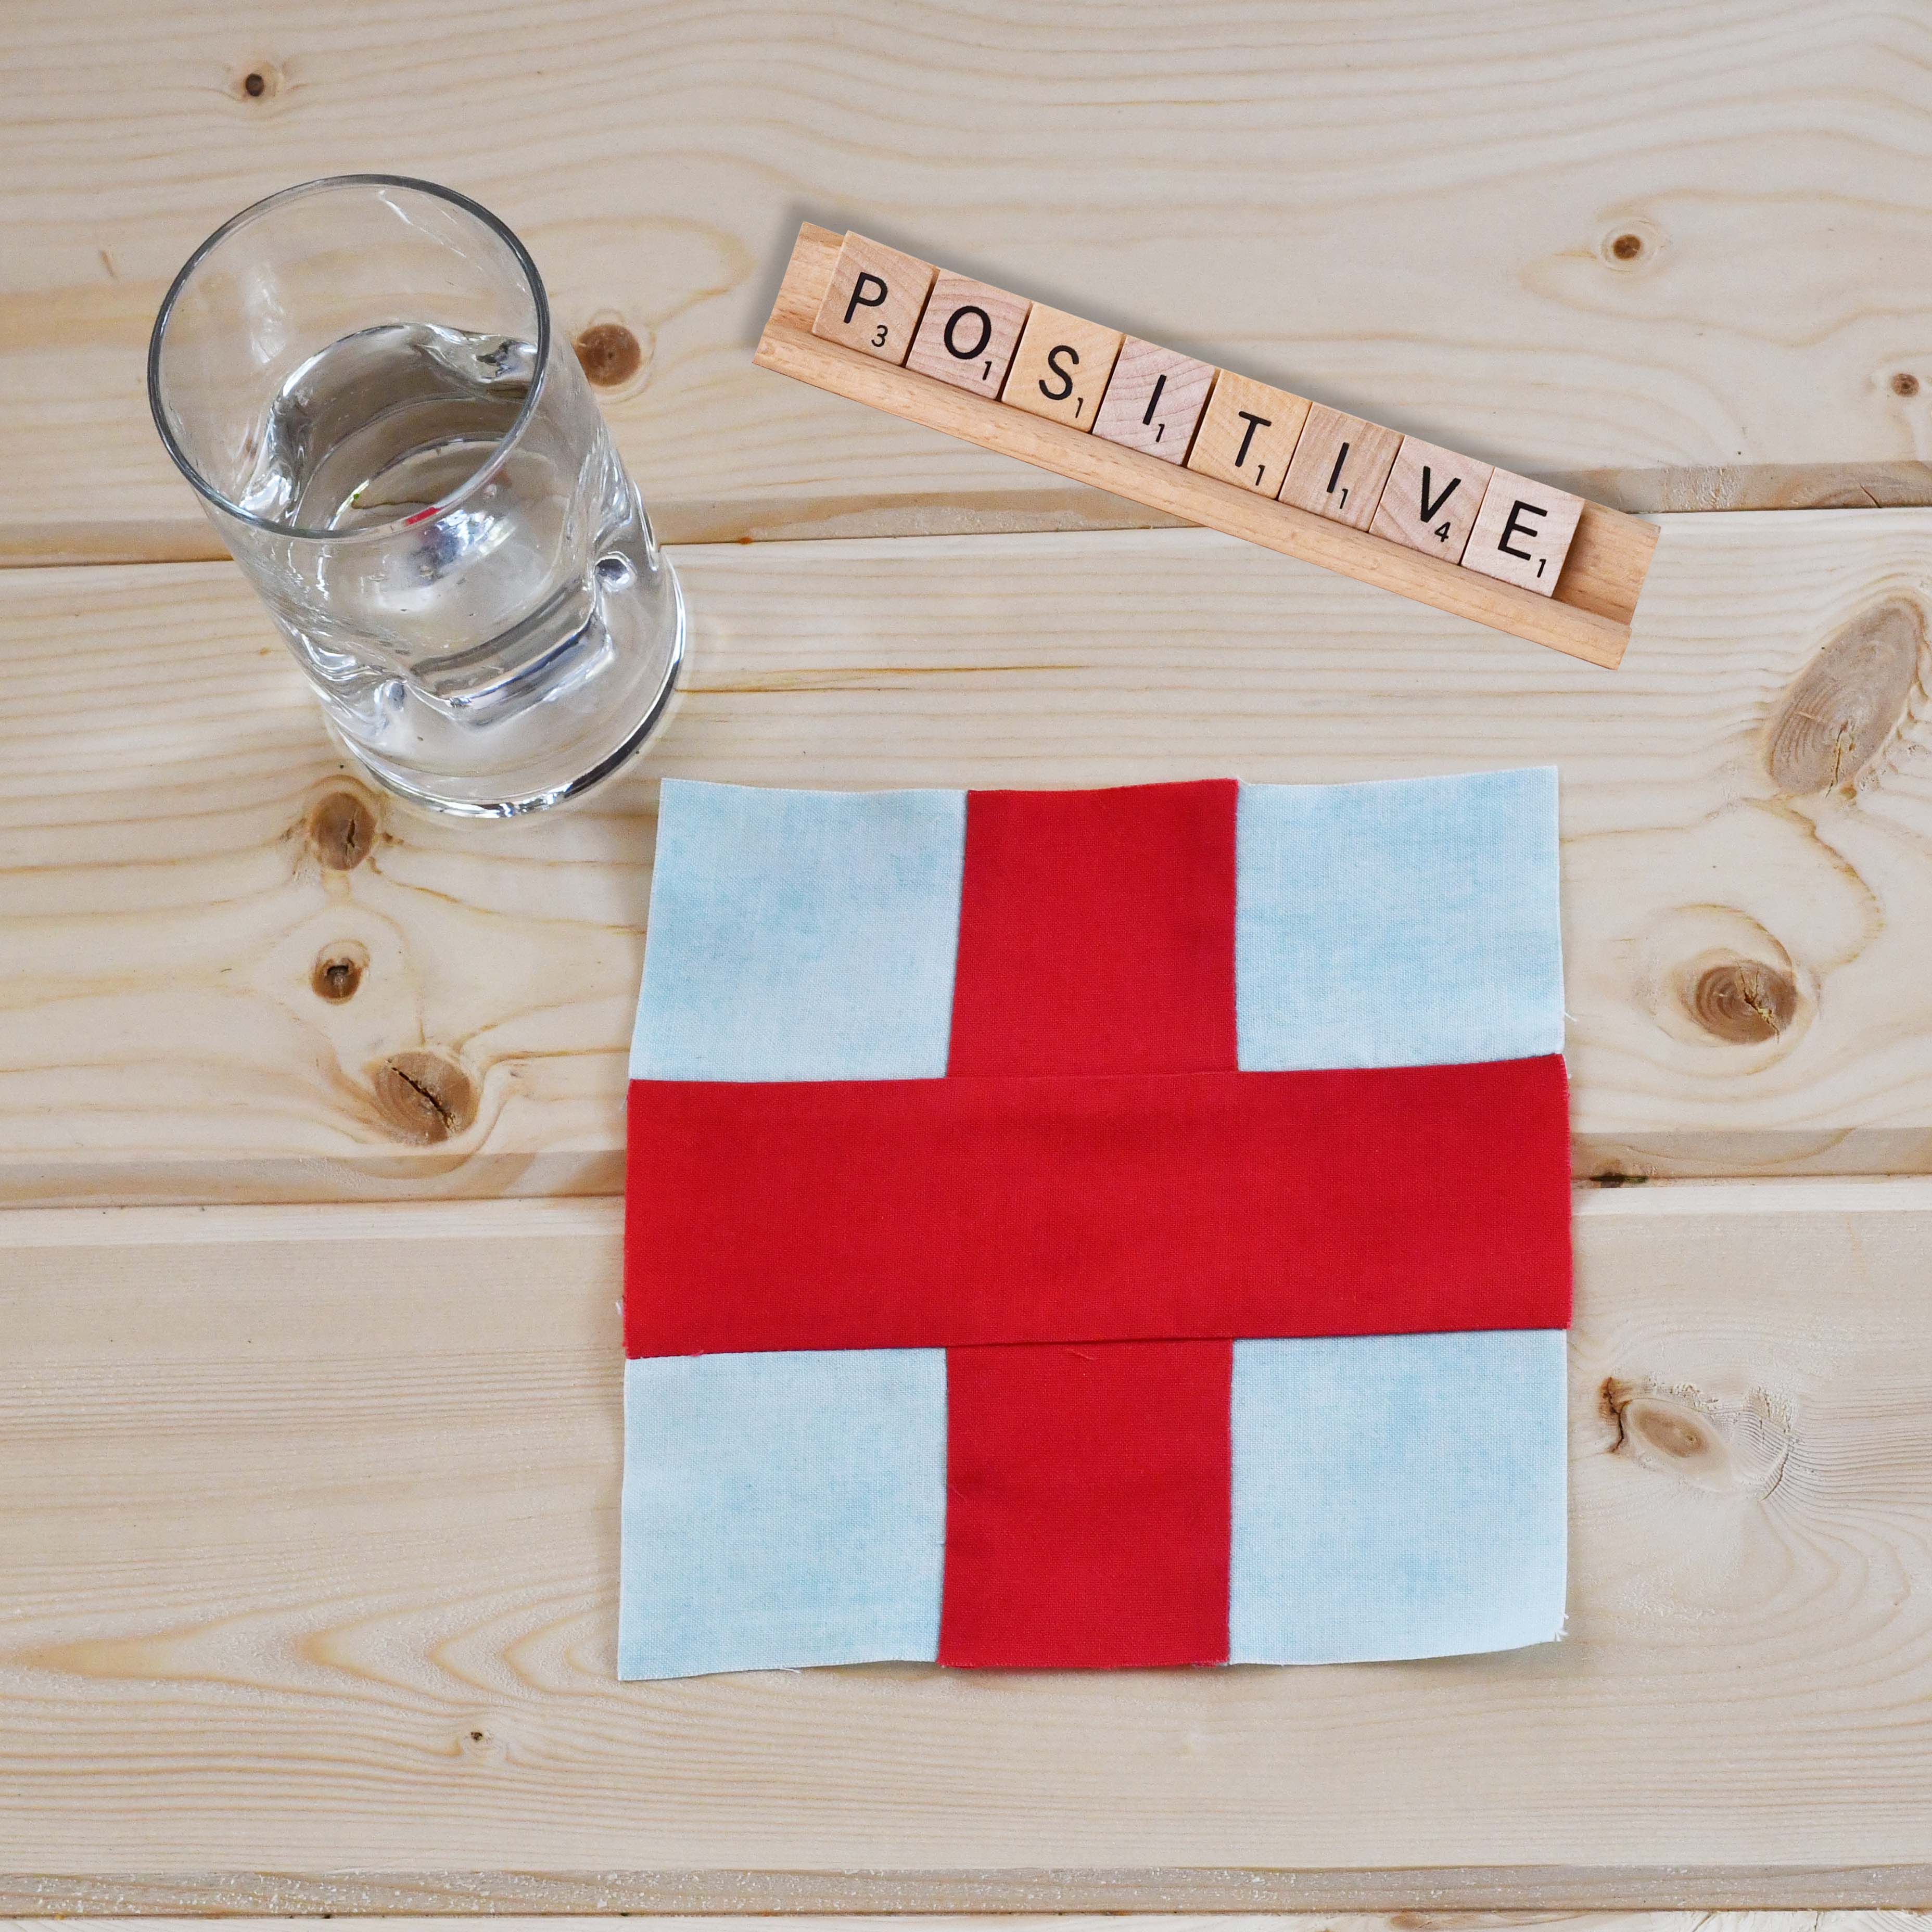
Positive Live Well Live Strong Quilt Block web

Positive Plus Sign Quilt Block – Live Well Live Strong Quilt

Negativity is a luxury that I can not afford. Deanna Wall

How could being positive spark joy in your life?  Let’s talk about it!

Spark Joy In Your Life - Live Well Live Strong Quilt Sew Along

Sign up for the Live Well Live Strong Workshop Course RIGHT HERE

The Positive Quilt Block is the fourth week on our Live Well Live Strong Quilt Sew Along!  It is exciting to finally be here with all of you on this journey!  I loved designing the positive quilt block to be a plus sign quilt block! 

Join Us! Positive Quilt Block - Live Well Live Strong Quilt Sew Along - 26 Quilt Blocks with 26 Live Weekly Videos

“Your positive action combined with positive thinking results in success.”  Shiv Khera Positive is important, right?

Positive Quilt Block from the Live Well Live Strong Quilt

Use this worksheet to provoke thoughts….   On the Positive Worksheet, scribble on the plus sign quilt block positive activities you would like to do.  Then on the gray scaled square, scribble things that are barriers that interfere with being positive.  This is your personal worksheet…  I’ve written down several Positive exercises you can try out.  This is about us becoming our best selves.  There are many benefits to being Positive in our lives.  I know I feel calmer, energetic, confident, accepting, and less stressed.  I feel compassionate towards myself & others!

There are many Positive exercises that you can do.  On the worksheet below, I’m introducing you a couple of my favorites.  Is your brain trained to process things in a positive or negative way. Then don’t allow negativity to drain your bank.   Remember to cultivate a positive kind self talk to get you through the day. Then of course a Gratitude Journal, to thoughtfully examine how you are feeling and evaluate what you are grateful for.

Download your Positive Worksheets below and work through the exercises as you focus on making your Positive Plus Sign Quilt Block this next week!

Download Your Positive Quilt Block Worksheet PDF

Spark Joy in Your Life – Download the Positive Quilt Block Worksheet from the Live Well Live Strong Quilt Sew Along!

If you haven't yet, you can join in anytime on the Live Well Live Strong Quilt Sew Along!  Get your downloadable pattern right now.

Sign up for the Live Well Live Strong Workshop Course RIGHT HERE

Flip a negative into a positive

Can you flip a negative situation into a positive one? It takes time to practice but eventually it becomes natural. I have a special needs son but the positive is that I have become a deeper richer patient individual. I was divorced but I learn self sufficiency and eventually remarried. Being married to Cory for the last 17 years, I don't mind his snoring as it is a noise of comfort and rhythm that all is well. I'm seriously grateful to pick up his dirty socks too.

Whats on your control panel

One really important thing occurred to be as I have been studying how I use a positive nature in my life. Expectations can cause negative emotions and feelings. Sometimes we have unrealistic expectations too. We need to focus on what we can control in our life. An example of this could be Thanksgiving Dinner with lots of family and friends. You worked so hard cleaning the house, cooking masterful dishes awaiting the arrival of your guests. But.... later in the day there is some kind of family disturbance or unkind things said. Negative emotions build into the night and next day putting the house back in regular order. One might have all sorts of feelings, but were the expectations that it would be a perfect Thanksgiving unrealistic. Most families when coming together in one room on one day have difficulties. Me... well I'd just be grateful that I could offer some form of warmth to loved ones and relieved that no one stuffed turkey and mashed potatoes into my sewing machine. Hehe... So... we need to examine what we are in control of... we can not control others and how they interact with each other. We can hopefully control that the pie or turkey doesn't get burnt but really that can go bad too. Seriously download and print off the worksheet to consider what you are in control of. If there is something festering in you, examine what you can control. Do what you can and then let it go. For example, if I have a loved one with an addiction. I can't control it, I can love them and not enable them. But really really love them with healthy firm boundaries set. That's all I can do... I have to release it and give it to a higher power that the actions I am taking are what I can do. This doesn't mean that I won't mourn or be sad by the situation at times. But I can privately carry that burden, process it in healthy ways and then do what I can control and feel good about myself and my love for my family members..... Okay! That was a REALLY LONG paragraph..... I don't write long paragraphs and I'm sure I lost a bunch of you. I think I'll have to rewrite this...

Positive Possible Challenges could include:

  1. Don't allow a stranger to frustrate you.
  2. .Practice kind nurturing self talk.
  3. Let go of something you can't control.
  4. Keep a gratitude journal for 5 days.
  5. Do something kind for another.
  6. Be easy on yourself.

Or customize your own personal challenge.  Let's not overwhelm ourselves.  Take tiny steps towards a good thing and reward yourself with a quiet moment closing your eyes to feel good about yourself including your body & mind.

Join us for the live video of each LIve Well Live Strong Quilt Block Tutorials

Share a photo of your completed Positive Plus Sign Quilt Block on Facebook or Instagram https://www.instagram.com/stitchesquilting/ and use the hashtag #livewelllivestrongquilt.  If you feel comfortable share a photo that represents a positive step in a Positive Challenge.  Let's inspire each other!  Oh my... positive and I have become good friends.

Live Well Live Strong Quilt Summary

Remember this is just about you and all of us possibly lifting each other to a better space.  AND....  the Live Well Live Strong Quilt is not about being negative.  Be kind and positive with yourself.  Be as generous to yourself as you are to others.  Share your thoughts!  Remember this week of being positive will give you energy! I always need more energy.

Next week's block is all about Freedom with a Flying Geese Quilt Block!  If you haven't yet, purchase your Live Well Live Strong Quilt Pattern!

Positive Live Well Live Strong Quilt Block web

Many happy wishes for a week filled with positivity  Live Well Live Strong!  XOXO!

Deanna Wall Stitches Quilting Tutorials
Live Well Live Strong Quilt

Sign up for the Live Well Live Strong Workshop Course RIGHT HERE

Next Week Freedom Quilt Block Week & Worksheet coming soon!

Posted on

Leisure Quilt Block – Live Well Live Strong Quilt

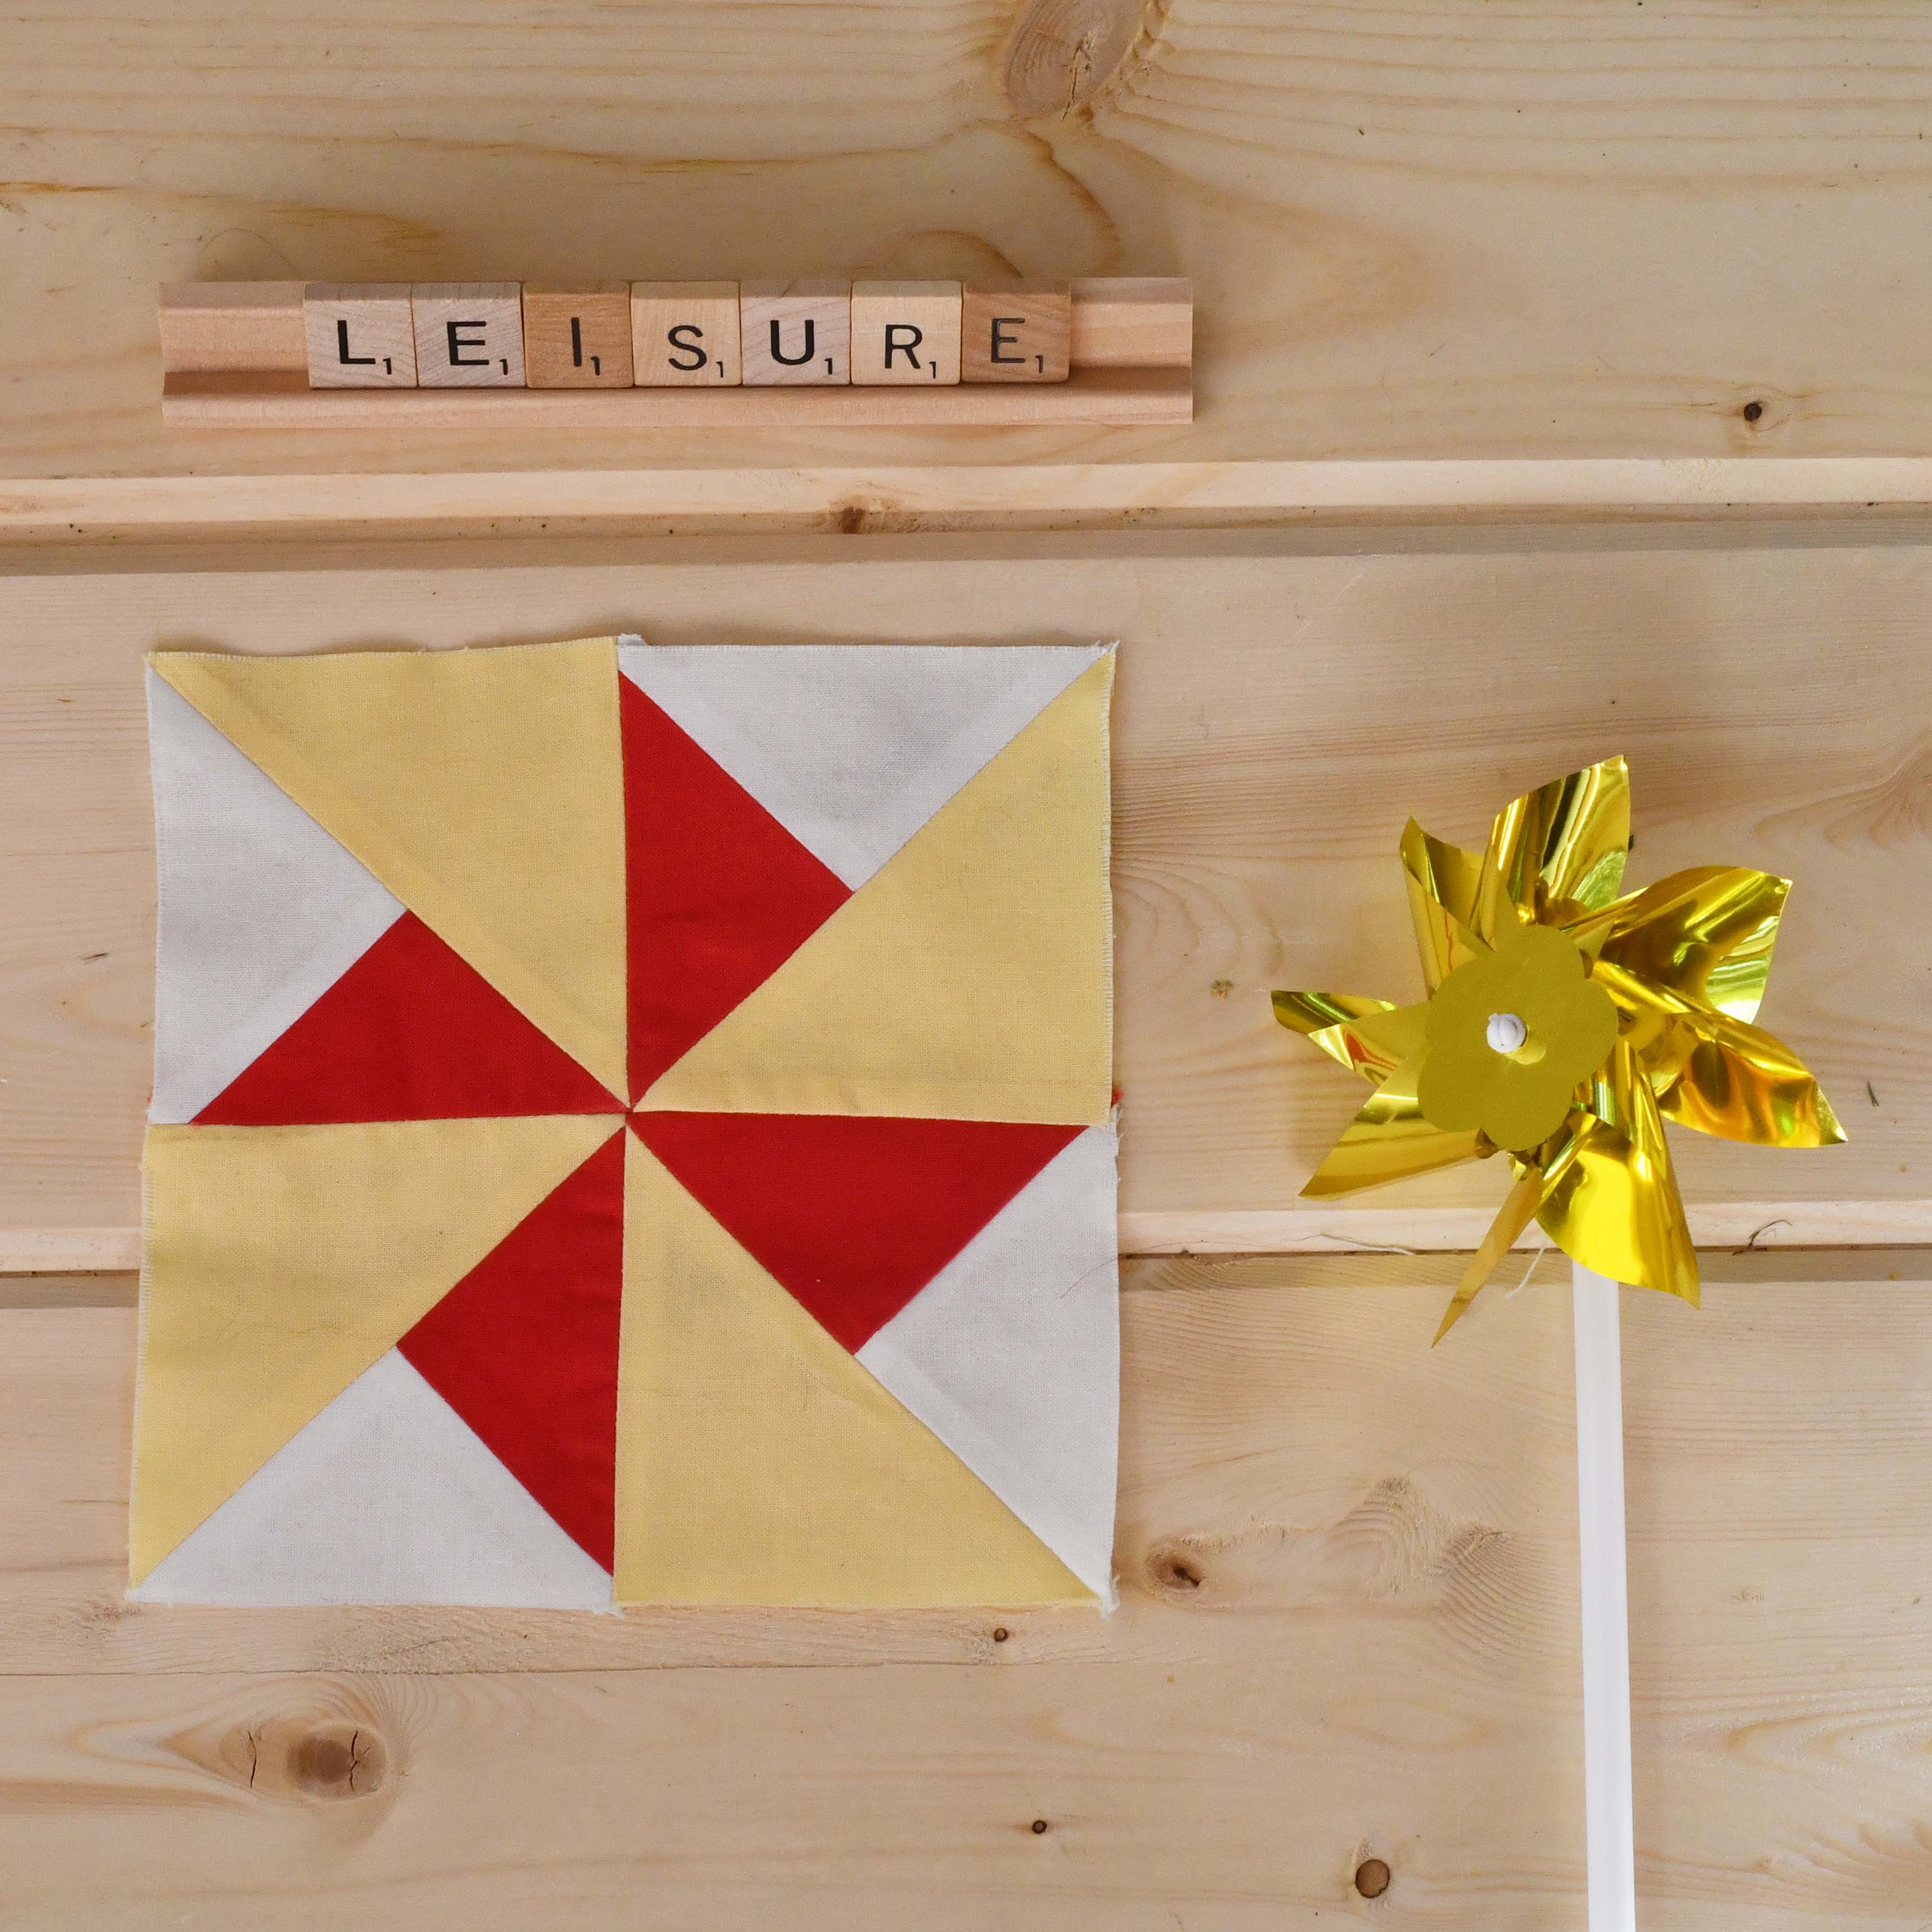
Have to add a bit of leisure to our lives. Leisure Challenge quilt block from the Live Well Live Strong Quilt available exclusively at Stitches Quilting

Leisure Quilt Block – Live Well Live Strong Quilt

Leisure gives our bodies a reboot of energy to clearly focus on what we truly need.

How could leisure spark joy in your life?  Let’s talk about it!

Spark Joy In Your Life - Live Well Live Strong Quilt Sew Along

The Leisure Quilt Block is the second week on our Live Well Live Strong Quilt Sew Along!  It is so exciting to finally be here with all of you on this journey!  I loved designing the leisure quilt block to be a pinwheel quilt block!  I think its perfect!  Do you have memories as a child blowing into a pinwheel?  How did you feel?  I felt amazement and joy!  But… I can’t say I’ve picked up many pinwheels as an adult to amuse me.

Join Us! Leisure Quilt Block - Live Well Live Strong Quilt Sew Along - 26 Quilt Blocks with 26 Live Weekly Videos

Leisure can be an energy source in our lives!  Yes really Leisure!  Have you ever gone on a vacation and returned home invigorated ready to live life to its fullest?  Well don’t deprive yourself of the mini reboot that small amounts of leisure can provide.

Leisure Pin Wheel Quilt Block with the Live Well Live Strong Quilt

How do you picture leisure as a child?  I picture myself swinging on a swing with pig tails in my hair.  I can feel the wind blowing through my hair rocking back and forth in the swing to maintain momentum.  It feels wonderful… I can imagine myself jumping off the swing running with enthusiasm to my next adventure.  How do you picture Leisure as a child?

Quilt Girl Swinging Quilt Market 2017 1600

I don’t have a picture of me swinging but here is a picture with my childhood enthusiasm on a chimney.

1970 Deanna Wall Clarion Chimney

Think back to what you enjoyed as a child.  What are some Leisure activities you can enjoy now?  You know…  I might be carpooling kids around but have a quiet moment in my car to enjoy a game of solitaire on my phone.  Do I savor that moment of solitaire as leisure?  Maybe or maybe not.  There are different types of leisure.  Active versus Passive leisure, such as I could take a walk in my neighborhood or read a book.  Social or solo leisure might look like attending a quilt guild meeting or quilting at home.  There are many types of leisure… more than just going on a vacation.  So let’s indulge in mini reboots of leisure to energize ourselves.

Leisure Worksheet Live Well Live Strong Quilt Page 1

Use this worksheet to provoke thoughts….   On the Leisure Worksheet, scribble on the quilt block triangles leisurely activities you would like to do.  Then on the gray scaled square, scribble things that are barriers and interfere with leisure.  This is your personal worksheet…  No comparisons to anyone else.  This is about you and me helping to become our best selves.  Then on the side of the worksheet write thoughts about how adequate leisure will spark joy in your life.

Leisure Worksheet Live Well Live Strong Quilt Page 2

I’m a really hard worker and love to work.  I get joy from it.  A barrier for me to feel leisure is that I’m being lazy!  Okay, Deanna!  What can I do about that?  I know it exists right?  Well I can funnel into my brain positive self talk that says, “Deanna you deserve a break and need to experience leisure today.”  There are benefits of leisure like decreased anxiety, calm countenance and wellness.  Nourishment of self is one of the best preventive medicines.

But let’s remember that the word leisure is a NOUN.  It is a state of being.  Do you sometimes do something that could be categorized as leisure but don’t give yourself permission to enter that leisure state?  I do and you know I’m missing out BIG TIME!

Leisure Possible Challenges could include:

    1. 10 minutes each day for Leisure
    1. Choose a Leisure state of mind 
    1. Plan mini boots of leisure as an energy source
    1. Plan a leisure activity in your week
  1. Include active leisure in your week
  2. Plan a vacation or day activity
  3. Plan you own personal challenge

Or customize your own personal challenge.  Let’s not overwhelm ourselves.  Take tiny steps towards a good thing and reward yourself with a quiet moment closing your eyes to feel good about yourself including your body & mind.

A baby was born and a grandma was born. Grandma Deanna with Baby Ellie

Share a photo of your completed Leisure Quilt Block on Facebook or Instagram.  And if you feel comfortable share a photo that represents a positive step in a Leisure Challenge.  Let’s inspire each other!  You have seen lots of my social media posts this week of enjoying time with my new grand daughter.  Oh my… leisure and I have become good friends.

Live Well Live Strong Quilt Summary

Remember this is just about you and all of us possibly lifting each other to a better space.  AND….  the Live Well Live Strong Quilt is not about being negative.  Be kind and positive with yourself.  Be as generous to yourself.  Share your thoughts!  Remember this week that Leisure is the opposite of excessive seriousness!

Next week’s block is all about Mindful!  If you haven’t yet, purchase your Live Well Live Strong Quilt Pattern!

Mindful Hour Glass Quilt Block from the Live Well Live Strong Quilt

Many happy wishes for a well fueled week!  Live Well Live Strong!  XOXO!


Many happy wishes for a week filled with Healing  Live Well Live Strong!  XOXO!

Deanna Wall Stitches Quilting Tutorials
Live Well Live Strong Quilt

Learn more about the LWLS Sew Along 

Live Well Live Strong Quilt Sew Along 26 Quilt Blocks about Womens Health & Wellness

Fuel Half Square Triangle Quilt Block Week & Worksheets

What fuel do you bring in to your body? Freedom Challenge Quilt Block for the Live Well Live Strong Quilt available exclusively at Stitches Quilting.

Leisure Pinwheel Quilt Block Week & Worksheets

Have to add a bit of leisure to our lives. Leisure Challenge quilt block from the Live Well Live Strong Quilt available exclusively at Stitches Quilting

Mindful Hourglass Quilt Block Week & Worksheets

Mindful Hour Glass Quilt Block from the Live Well Live Strong Quilt

Next Week Self Reliance Quilt Block Week & Worksheet coming soon!

Posted on

Its a Baby Girl Arrow Quilt with Cricut

Baby Arrow Quilt Tutorial & Pattern with Cricut

It’s a Baby Girl Arrow Quilt with Cricut

We’re on the eve of expecting our first grandchild!  Soooooo…. I just had to make a Baby Girl Arrow Quilt!

Fabric for the Baby Girl Arrow Quilt with Cricut

First step:  Shopping with Mom to three quilt stores!  I loved learning Ashley’s vision for Baby Ellie’s nursery!

Beautiful Ashley momma to Ellie photograph by Sally June Photography in Salt Lake City, Utah.

What could be more fun than shopping with my daughter in law for fabric!  I loved how Ashley selected fabrics from different designers and brands combining a real delicate touch of peaches, pinks, eucalyptus greens and whites.  Photo by Sally June Photography find her on Instagram!

Cutting Fabric in the shape of diamonds for a baby girl quilt!

Second step:  Pick Ashley’s brain to design a quilt that matches the style she envisions!  Ashley likes the shape of diamonds that then transition into arrow….  Soooo off to Cricut Design Space I go!

Playing around with diamonds to make arrows for a quilt in Cricut Design Space

Step Three:  Playing around with diamonds to make arrows for a quilt in Cricut Design Space!  The Cricut Design Space Quilt file is free here:  

Sewing together diamonds into an Arrow Baby Quilt with the Cricut

Step Four:  Can you see the vision?  But wait….  we skipped a step – Let’s go back to cut the diamonds out with the Cricut Rotary Blade for Baby Ellie!

Cutting diamond shaped fabric for a baby arrow quilt with the Cricut. Quilting with Cricut!

You could say I “Cricut” cut Ashley’s seven most favorite fabrics in the shape of diamonds for Baby Ellie.  Quilting with Cricut to welcome Baby Ellie into the world!  She is coming really soon – in fact due in 4 days!  Thank goodness this Cricut cuts fabric fast and accurate!  Accurate is important to try to stitch theses diamonds together quickly!  Love using the tiny rotary cutting blade in the Cricut cutting machine.  See additional step by step Cricut Design Space layout images below.

Two diamond shapes put together make an arrow head for a baby arrow quilt.

You can see by placing together two diamond shaped fabrics on point it looks like an arrow head.

Offsetting the Baby Arrow Head with a Polka Dot Quilt Fabric.

For the design of this quilt we are offsetting the Arrow Head Quilt Blocks with background polka dot fabric.   The background fabric will subtly help the arrow heads to pop from the quilt design.

How to sew the Baby Arrow Head Quilt together.

It may not feel right but you have to separate the arrow heads and sew together the diamond blocks in a long row.  After stitching two long rows you can then put the arrow heads back together.

Sew together two offset diamonds for an Arrow Baby Quilt. Do you see the little 1/4 inch "dog ears" that allow you to sew them into a straight line?

Sew together two offset diamonds for an Arrow Baby Quilt.  Do you see the little 1/4 inch “dog ears” that allow you to sew them into a straight line?

Take your squares over to your sewing machine to stitch together for your Baby Arrow Quilt

Take your squares over to your sewing machine to stitch together for your Baby Arrow Quilt.  I love keeping my Cricut Maker next to my sewing machine!  It cuts fabric out as I sew it together!

Sewing together long rows of diamonds for a Baby Arrow Quilt cut out by the Cricut Maker with the Rotary Cutting BladeSewing together long rows of diamonds for a Baby Arrow Quilt!

Now its time to sew together the long rows of diamonds together making the Baby Arrow Quilt. Quilting with Cricut.

Piece the rest of the quilt top together!  You will have five rows of arrows horizontally and 10 rows of arrows vertically.

How to quilt a Baby Arrows Quilt cut out with the Cricut. Quilting with Cricut.

Now time to brain storm how to quilt the quilt!  What suggestions do you have?  This is the rocking swivling reclining chair to comfort baby in Ellie’s nursery!  After stitching together this quilt top, it’s time to quilt the layers!  Ohhhhh…  I can’t wait to see this baby girl with my son Nick and his beautiful wife Ashley!  It’s going to be a brand new family!   I think I spy some darling baby shoes on the dresser waiting paitently for a Baby Ellie!

New baby shoes made with the Cricut! I can't believe I might be able to put cobbler on my crafting ability list!

New baby shoes made with the Cricut! I can’t believe I might be able to put cobbler on my crafting ability list!  This is a Simplicity Pattern available in Cricut Design Space.  I can’t wait to share how I made these shoes!

I can't believe the power of the Cricut Rotary Cutting Blade! I can make shoes with some felt, fabric and the Cricut. Sewing with Cricut. I think these shoes are just enchanting!

I also made a darling baby onesie using another Simplicity Pattern in Cricut Design Space!  Ohhhh the power of the Cricut Rotary Blade, fabric, felt and wonder under!  I feel like a super hero with the ease of the Cricut!  I don’t think I would have ever tried to make a pair of shoes without the handy Cricut next to my sewing machine!  My partner in creativity!

Baby Onesie made with the Cricut Rotary Blade with Simplicity Pattern in Cricut Design Space

Baby Onesie made with the Cricut Rotary Blade with Simplicity Pattern in Cricut Design Space.  Accented the white baby onesie with roses.

Subscribe to Sttitches Quilting -Deanna Wall to get all the upcoming tips on these projects!  Follow Stitches Quilting -Deanna Wall for Live Videos on Facebook, Instagram and YouTube Tutorials!  I’m SEW excited to be sewing things for Baby Ellie and have tons of new projects coming for you along with all the details of our Boho Floral Baby Shower I hosted with lots of Cricut Creations to decorate the nursery and have some fun at the baby shower!

Quilting with Cricut:  Additional Tips and Tricks for Cricut Design Space and the Baby Arrow Quilt:

Change all your cutting mats from the default 12 x 12 size to 12 x 24 inch size.

Move Diamond to another Cricut Cutting Mat

After you open the Baby Arrow Quilt in Cricut Design Space, click on the three small dots in the left hand corner of the diamond.  Select “Move to Another Mat”.

In Cricut Design Space Select which cutting mat you want to move the design to

Select which mat you want to move the diamond to.  You can arrange 8 diamonds on one 12 x 24 inch Fabric Grip Mat.

Cut a 9 x 22 inch strip of fabric to place on your Fabric Grip Mat

Now you only have to cut a 9 x 22 inch piece of fabric to cut 8 diamonds.  That’s just half a fat quarter or work with a 1/4 yard of fabric on each mat.  Pretty convenient eh?

Quilting with Cricut

It’s amazing how you can use Cricut Design Space basic shapes to design quilts.  Using Cricut Deisgn Space is FREE – all you do is create a free account with an email address.  You can access it on your computer, laptop, smart phone or iPad.  It was easy to design the Baby Arrow Quilt and then color and arrange the quilt blocks as a vision board.  Try it out and let me know what you think!  It’s a great way to experiment using Cricut Design Space intuitive features.  Quilting is easy to do – especially with the Cricut cutting out your fabric.  It’s usually just straight lines.

I have lots of free tutorials on how to use the Cricut on my website and social media channels along with free patterns with SVG files.

I’ll post pictures of Baby Ellie as soon as she arrives!  Along with pictures of the quilted quilt and all the other goodies I’m making!  Can’t wait to share with all of YOU!  Any suggestions?

Join our Facebook Cricut Maker Quilt & Sew Group!  I’d love to see what you are making and be inspired by you!  I’m also available to ask any quilting or sewing questions using Cricut!

Happy Stitching!

Deanna Wall Stitches Quilting Stitching Through LifeDeanna Wall Stitches Quilting TutorialsStitches Quilting Online Neighborhood Quilt Store & Blog


This is a sponsored conversation written by me on behalf of Cricut. The opinions and text are all mine.

Posted on

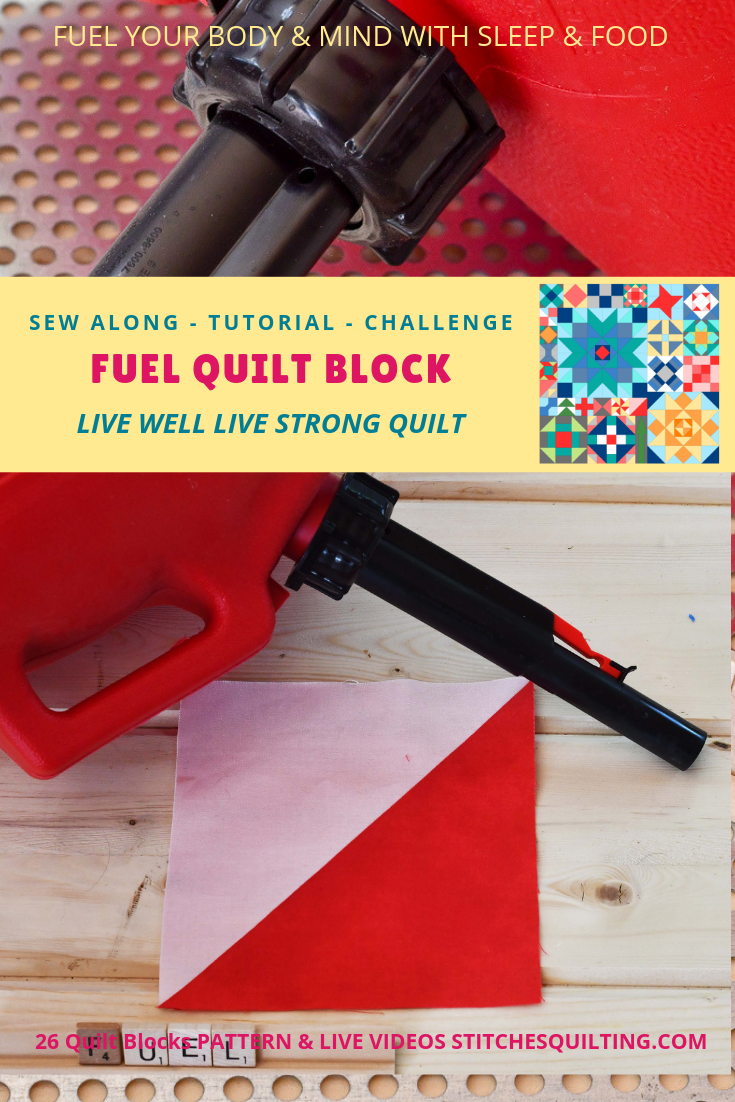
Fuel Quilt Block – Live Well Live Strong Quilt

Join Us! Fuel Quilt Block - Live Well Live Strong Quilt Sew Along - 26 Quilt Blocks with 26 Live Weekly Videos

Fuel Quilt Block – Live Well Live Strong Quilt

Fuel Your Body & Mind with Adequate Sleep, Food, Water & Positive Environment

How could adequate fuel for your body spark joy?  Let’s talk about it!

Spark Joy In Your Life - Live Well Live Strong Quilt Sew Along

The Fuel Quilt Block is the first week on our Live Well Live Strong Quilt Sew Along!  It is so exciting to finally be here with all of you on this journey!

What fuel do you bring in to your body? Freedom Challenge Quilt Block for the Live Well Live Strong Quilt available exclusively at Stitches Quilting.

How we fuel our bodies makes a difference in how we feel.  The half square triangle in this block is simple like the principle of adequately fueling our bodies.  It’s easy to get distracted in life; we need to slow down and think about what we put in our bodies so we can do what we want to do.

Fuel Quilt Block LIve Well Live Strong Spark Joy In Your Life

Garbage in garbage out right… certainly affects how we feel and how are bodies work.  But… let’s not think about the negative…  Let’s fill our lives with things that spark joy!

Green Pepper - Let's Spark Joy

Now here is just a simple green pepper.  What is in your refrigerator and pantry?  Are they full of things that would give you adequate energy?  A green pepper may not ordinarily spark a lot of joy but if I close my eyes and think about smelling then nibbling on a crisp cold slice of a green pepper things I might feel a bit differently.  Imagine the nutrients and how this green pepper is going to fuel my body.  I can look at consuming this green pepper a little differently if I consider the benefits right?  You may have a different relationship with green peppers.  I don’t ordinarily crave green peppers but this imaginary can be used with anything we can fuel our bodies with.  I envision my body stronger after enjoying that delicious green pepper.  I envision a better me.  

Fuel Quilt Block Worksheet Live Well Live Strong Quilt Lets Spark Joy

Use the Fuel Live Well Live Strong Quilt worksheet to provoke thoughts.   On the Fuel Worksheet, jot down items on the quilt block triangles that would ideally fuel your body.  Then on the gray scaled square, jot down things that do not ideally fuel your body.  This is your personal worksheet and you shouldn’t have comparisons to anyone else.  This is about you and an aide to help us become our best selves.  

The next time you go grocery shopping look at what is in your basket.  Will it bring to your body or family what is truly needed?  Remember fueling your body isn’t just about food.  What about water?  sleep?  circulation?  breathing?

I have a sweet son with special needs.  Every time we visited one of his doctors, the first question she had for us was, “How is he sleeping?”.  His doctor wouldn’t treat anything without first fixing sleep.  Lack of sleep has been used as a torture method.  Lack of adequate sleep can impair us to be our best selves.

Luke Hanging Out and Happy

What about water?  Our bodies are 80% water.  Are we drinking enough water?  I’m not and need to improve.  To make water consumption easier for me, I carry around a water bottle filled with ice so I can sip throughout the day.  I’m grateful grateful for the opportunity this week to focus on my water input.

Glass of Water Live Well Live Strong

Fuel Possible Challenges could include:

    1. Drink 8 or X glasses of water
    2. Eat a fruit & vegetable each day 
    3. Organize balanced meals & snacks
    4. Get 8 or X hours of sleep
    5. Improve sleep patterns
  1.  

Customize your own personal challenge to fuel your body adequately.  I might get motivated to clean my refrigerator and pantry!   Take tiny steps towards a good thing and reward yourself with a quiet moment closing your eyes to feel good about yourself including your body & mind.

Share a photo of your completed Fuel Quilt Block on Facebook or Instagram.  On Instagram share your photo and use the hashtag #livewelllivestrongquilt and tag me @stitchesquilting. On Facebook join the Everyone Can Quilt Group and share your photo in there with the #livewelllivestrongquilt.  If you purchased the LWLS Quilt Workshop & Course then there is a private Facebook group to share your photo in.   

If you feel comfortable share a photo that represents a positive step in the Fuel Challenge.  Let’s inspire each other!  I think I’ll share a photo of 8 safety pin representing 8 glasses of water I drank with some clothespins representing how many fruits and vegetables I’ve enjoyed this week! 

Live Well Live Strong Quilt Summary

Remember this is just about you and possibly lifting each other to a better space.  The Live Well Live Strong Quilt is not about negative vibes.  Be kind and positive with yourself.  Be as generous to yourself as you are to others.  Share your thoughts by emailing me or posting on social media.  All of you truly inspire me to be a better person and even the smallest of your comments encourages me to be my best person possible.  

Next week’s block is all about Leisure!  If you haven’t yet, purchase your Live Well Live Strong Quilt Pattern!

Have to add a bit of leisure to our lives. Leisure Challenge quilt block from the Live Well Live Strong Quilt available exclusively at Stitches Quilting


Many happy wishes for a week filled with adequate fuel.  Live Well Live Strong!  XOXO!

Deanna Wall Stitches Quilting Tutorials
Live Well Live Strong Quilt

Learn more about the LWLS Sew Along 

Next Week is the Leisure pinwheel quilt block week & worksheet!

Posted on

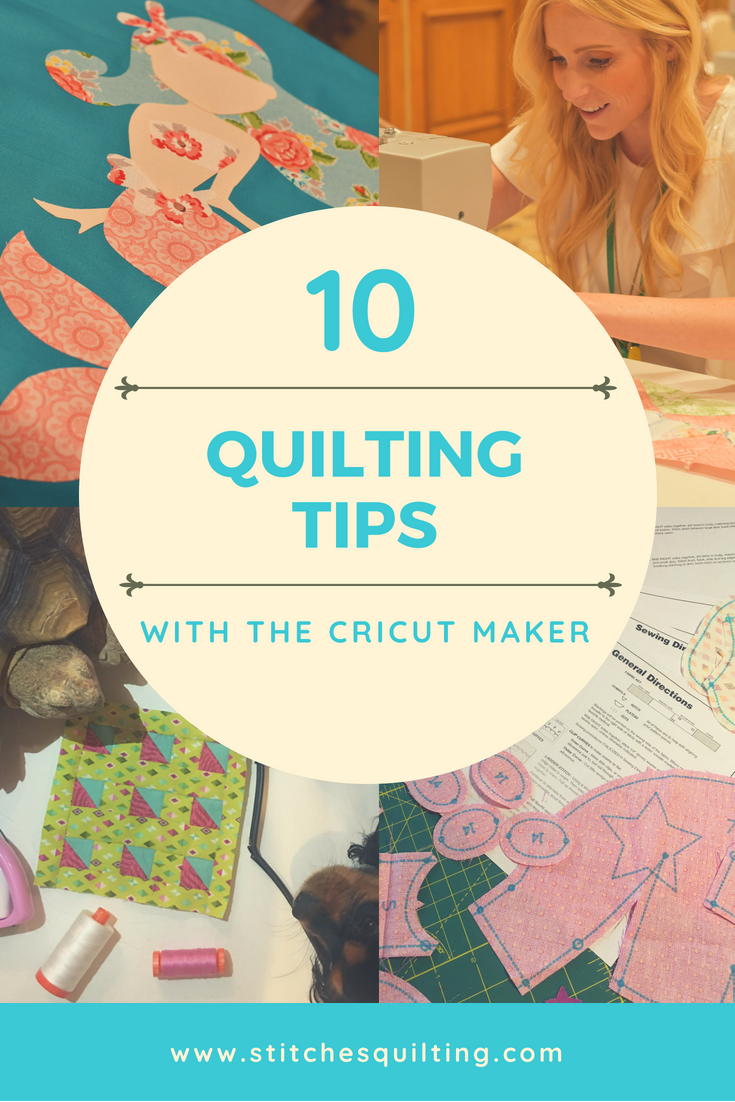
10 Ways the Cricut Maker Can Help With Quilting! Your New Bestfriend!

10 Quilting Tips with the Cricut Maker - Your New Best Friend

10 Ways the Cricut Maker Can Help With Quilting! Your New Bestfriend!


10 Ways the Cricut Maker Can Help With Quilting! Your New Bestfriend!

  1. ACCURACY 

The Cricut Maker accurately cut out shapes to any quilt blocks.

All Cut with the Cricut Maker Tula Pink City Sampler

This is especially critical when making a 6 inch square block with 29 pieces.  With any cutting error the block will not square up to fit into your quilt.  Even my puppy and tortoise can see that this is one squared up block!  Thank you Cricut Maker for the accurate cutting!

All Cut with the Cricut Maker Tula Pink City Sampler 24 piece quilt block

  1. Quilting Will Be Enjoyable

Easily stitch your quilt block together after cutting your blocks out with the Cricut Maker

Enjoy stitching your quilt pieces together with the accurate cutting!

Cricut Maker Cutting Out Quilt Pieces

Design your quilt blocks like a pro and with ease.

Make Pressing Easy with the NEW Cricut Easy Press!

The new Cricut EasyPress make pressing your blocks a breeze!

Cricut Maker Machine

3.  Eliminate your need to purchase specialty rulers.

Strip Quilting with Joanns Quilting Fabric

The Cricut Maker can cut out any shape you can dream of!  No need to purchase all those specialty rulers!

With perfectly cut quilt pieces your blocks stitch together with perfect points matching.

With perfectly cut quilt pieces your blocks stitch together with perfect points matching.

4.  Love applique because your applique will love the Cricut Maker

Perfectly Cut Out Applique Shapes

Perfectly Cut Out Applique Shapes with the Cricut Maker and no need to spend hours tracing shapes from a pattern to fabric and cut them out.  Can your cut lines be this smooth?  I can’t cut this sweetly especially without cramping up my hands.

5.  Easily Cut Large Quantities of Fabric While Doing Other Things

Cut out large quantities of blocks with your Cricut Maker while you sew!

Cut out large quantities of blocks with your Cricut Maker while you sew!   Set your sewing machine right next to your Cricut Maker so you can sew blocks together as your blocks are cut out.

6.  Save some money and time by cutting English Paper Piecing shapes & fabric out with your Cricut Maker

Cut all your English Paper Piecing templates and fabric with the Cricut Maker

Stop buying all those precut templates!  Instead cut all your English Paper Piecing templates and fabric with the Cricut Maker

7.  Tried of cutting out tedious patterns while getting lost in the mess?

Are you tired of cutting out patterns? Use the Cricut Maker to cut out your fabric!

Are you tired of cutting out patterns? Use the Cricut Maker to cut out your fabric! Stop taping together pdf patterns too.

Check out all the amazing pre-loaded patterns in Cricut Design Space!

8.  Use the Cricut washable blue marking pen so the Cricut Maker marks everything for you.

Who wouldn't want the Cricut Washable Blue Fabric Pen to mark your stitching lines and sewing markings?

Who wouldn’t want the Cricut Maker Washable Blue Fabric Pen to mark your stitching lines and sewing markings?

9.  Embellish your quilting projects with details you can’t get any other place.

Cricut I-Spy Quilt Sparkle Iron On

Add the I-Spy words to a quilt with Cricut Sparkle Iron On

Create a delicate face with Cricuts Foil Iron On.  I couldn’t possibly draw or embroider something so lovely!

10.   After making your quilt accessorize it with customized projects for your loved one!

Accessorize a Jungle quilt with lots of Jungle Fever Extravaganza Fun

Accessorize a Jungle quilt with lots of Jungle Fever Extravaganza0 Cricut Fun!

Accessorize your Summer Fun Quilted Pillow with Cricut Projects.

Accessorize your Summer Quilted Pillow with a Summer Fun Bag and Drink Holder!

Christmas in July

I’ve certainly enjoyed the Cricut Maker becoming my new best friend as I quilt and sew away!

Deanna Wall Stitches Quilting Stitching Through LifeSlow and Steady Fabric Tula Pink Deanna Wall Stitches QuiltingStitches Quilting Online Neighborhood Store


This is a sponsored conversation written by me on behalf of Cricut. The opinions and text are all authentically mine.

Posted on 2 Comments

Use Quilt Markers to Sew Quilt Blocks Accurate

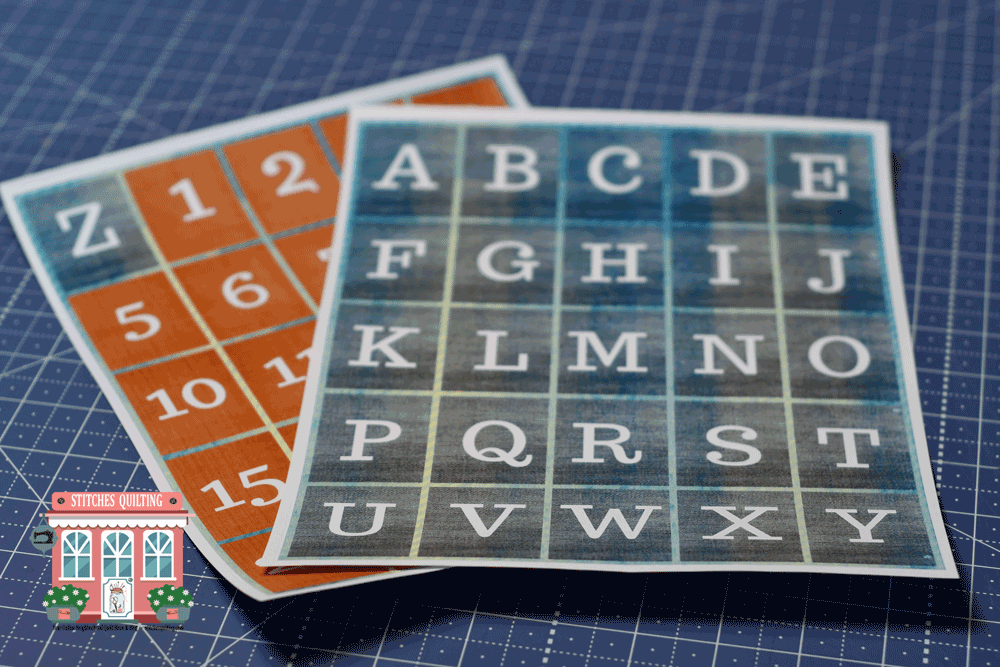
Quilting Markers Numbers and Letters Printed Off

Use Quilt Markers to Sew Your Quilt Blocks Together

Use Quilt Markers to Sew Your Quilt Blocks Together!  These Quilt Markers are the best tool to remember which pattern you want to sew your quilt blocks together.

Quilt Markers being used on the layout of this quilt

In the Stitches Quilting Free Download you can find 26 Letters and 24 Numbers to keep your blocks and rows organized.

Quilt Markers cut out and ready to use by Stitches Quilting Free Download PDF


Quilt Markers Download includes 26 Letters and 24 Alphabets

Stacking Quilt Blocks Use Quilt Markers Free Download with 24 Numbers 26 Letters from Stitches Quilting

Alphabet Quilt Markers are being use to designate the rows of the quilt with Numeral Quilt Marker being used to mark the order of the quilt blocks.

Quilt Markers Alphabet for Rows and Numbers for Blocks

When you need to start stacking up your row to safety pin the quilt markers to the top or set them in place.

Use Quilt Markers to Stack Rows Up and stay organized for piecing


After all the rows are stacked up with alphabet letters, you are ready to start piecing your quilt.  I will at this time carry everything over to my sewing machine for piecing the yellow sashing strips and blue setting squares to the quilt blocks.

Tired of Mixing Up Quilt Blocks to Stitch Together? Use Quilt Markers to everything organized Free Download by Stitches Quilting

Hope this helps with your piecing!  If definitely helps ME!  Let me know what you think?  Can’t wait to hear from you!

Deanna Wall Stitches Quilting Stitching Through LifeSlow and Steady Fabric Tula Pink Deanna Wall Stitches Quilting

Posted on

You Are Loved Heart Quilt

You-Are-Loved-Heart-Quilt-Kit-Close-Up

You Are Loved Heart Quilt


This is the layout of the You Are Loved Quilt Pattern.  Recognize the half square triangles and full squares in the pattern below.

You Are Loved Heart Quilt Digital Pattern

Here is everything that will be included in your quilt kit.

What items will be in your kit of You Are Loved Heart Quilt Pattern

Let’s make those half square triangles

How to Make You Are Loved Half Square Triangle Quilt Block

Arrange your blocks and rows of squares.  Take a photograph on your smart phone.  Use the photograph as a reference as you are stitching your blocks into rows at a 1/4 inch seam allowance.  Join your rows together by carefully pinning and nesting your seams together.

How to lay out your You Are Loved Heart Quilt pattern

Remember you want to place your black word search block towards the center of your quilt.  Use embroidery floss with a chenille or large eye needle to circle the positive words on your word search block.

Crossword Puzzle embroidery floss You Are Loved Heart Quilt pattern

Press your quilt top carefully and then join us for the next live video to learn how to quilt your You Are Loved quilt on your domestic sewing machine!  Where to find the video tutorials for You Are Loved Heart Quilt Pattern

Be sure to check out our Live Well Live Strong Quilt Sew Along about Women’s Health & Wellness!


Please follow on social media so you do not miss out on any of the tutorials.  We work hard to bring you great content!

Deanna Wall Stitches Quilting Stitching Through LifeDeanna Wall Stitches QuiltingStitches Quilting Online Neighborhood Quilt Store & Blog

Posted on 1 Comment

Onpoint Square Layer Cake Quilt Tutorial Free Pattern

On Point 10 Inch Layer Cake Quilt Complete Tutorial Gingham Girls Fabric Amy Smart Quilt designed by Stitches Quilting Deanna Wall

On Point Square Layer Cake Quilt

Selecting you fabric for your On Point Square Layer Cake Quilt.

You will need a Gingham Girls 10 inch square Layer Cake and 2 – Solid White Fabric 10 inch square Layer Cakes to make this 68 x 95 inch twin size quilt.

On Point 10 Inch Layer Cake Quilt Fabric Needs Gingham Girls Amy Smart by Stitches Quilting
On Point Layer Cake Quilt needs the Gingham Girls Quilt Kit in either the 10 inch Layer Cake size or 5 inch charm pack size.

Buy Now at Stitches Quilting

On Point 5 inch Square Charm Pack Quilt Kit
On Point 10 inch Layer Cake or 5 inch Square Charm Pack Quilt Kit for Gingham Girls Fabric Collection by Amy Smart in Stock at Stitches Quilting

Cut Your 10 inch Layer Cake to the Correct Size of Triangles Needed for On Point 10 Inch Layer Cake Quilt Pattern
Cut Your 10 inch Layer Cake to the Correct Size of Triangles Needed for On Point 10 Inch Layer Cake Quilt Pattern.  Save those 2 inch strips that you cut from your layer cake to use in your next quilt.

Stitch the Top and Bottom Triangle on the Square. Then sew the Left and Right Triangle on the Square.

How to sew together an square to be on point with triangles. First sew the top and bottom triangles to the square block of fabric.

How to sew together an square to be on point with triangles. First sew the left C and right D triangles to the square block of fabric.

Square Up Your Onpoint Square Quilt Block with a 1/4 inch seam tutorial
Square Up Your Onpoint Square Quilt Block with a 1/4 inch seam.

How to modify the Twin Size On Point 10 inch Layer Cake Square Quilt to a Baby Size using 5 inch charm packs.

Using a precut quilt but not using precut fabrics use this guide to cut your fabrics.

Build your quilt by sewing your quilt rows together one by one and matching your quarter inch seam.

Sew your rows together to build your quilt top into one piece matching your block points.

Add a border to your quilt top with these step by step instructions.

Buy Now at Stitches Quilting

On Point 5 inch Square Charm Pack Quilt Kit
On Point 10 inch Layer Cake or  5 inch Square Charm Pack Quilt Kit

If you have any questions, please ask below.  I’m creating this quilt with complete tutorial online Live with Facebook, YouTube and Instagram.  You can turn on following and live post notifications on each platform so you don’t miss out.  Be sure to follow Stitches Quilting Deanna Wall online because we just love to cheer you on and YOU motivate us to keep creating too!   Can’t wait to see what you create!  Please post pictures online and tag Stitches Quilting!

Deanna Wall Stitches Quilting Stitching Through LifeDeanna Wall Stitches QuiltingStitches Quilting Online Neighborhood Quilt Store & Blog

Posted on 1 Comment

12 Hacks Every Quilter Should Know

12 Quilting Hacks Every Quilter Should Know

12 Hacks Every Quilter Should Know

12 Hacks Every Quilter Should Know

12 Hacks Every Quilter Should Know – Summarized for you!

1a Quilt Hack - Piece with Neutral Thread and Use Large Spool of Thread
1a Quilt Hack – Piece with Neutral Thread and Use Large Spool of Thread

Stitches-Quilting-Memorial-Day-Quilt-Fabric-Sale

1b Quilt Hack - Use a larger spool of thread
1b Quilt Hack – Use a larger spool of thread

1c Quilt Hack - Wide Mouth Jar Behind Machine for Large Thread
1c Quilt Hack – Wide Mouth Jar Behind Machine for Large Thread

For MORE quilt hacks tips & instruction be sure to follow Deanna’s Live Video Tutorials on Facebook or YouTube.  Interact and sew along with Deanna as she takes you from the beginning of a quilt all the way through to layering and quilting the quilt on your domestic machine.

How to Follow Your Favorite Facebook pages groups

Follow Stitches Quilting Deanna Wall on You Tube

2a Quilt Hack -Fabric Everywhere

2b Quilt Hack - Use Comic Boards to Fold Fabric
2b Quilt Hack – Use Comic Boards to Fold Fabric

2c Quilt Hack - Fold Fabric Around a Comic Board
2c Quilt Hack – Fold Fabric Around a Comic Board

Stitches-Quilting-Memorial-Day-Quilt-Fabric-Sale

2d Quilt Hack -Use Comic Boards to Fold and Store Fabric

3a Quilt Hack - Press Blocks Don't Iron Them
3a Quilt Hack – Press Blocks Don’t Iron Them

3b Quilt Hack - Use Spray Fabric Starch Press Block
3b Quilt Hack – Use Spray Fabric Starch Press Block

3c Quilt Hack - Place Square Ruler over Quilt Block after Pressing
3c Quilt Hack – Place Square Ruler over Quilt Block after Pressing

3d Quilt Hack - Weight the Ruler with the End of the Iron while the Quilt Block Cools
3d Quilt Hack – Weight the Ruler with the End of the Iron while the Quilt Block Cools

4a Quilt Hack - Measure Quarter Inch Seam Allowance with Ruler
4a Quilt Hack – Measure Quarter Inch Seam Allowance with Ruler

Build your quilting skills with our Women’s Health Quilt Along and stitch together the Live Well Live Strong Quilt.  Weekly Live Video Tutorials, Blog Posts, Tips, Hacks & Inspiration.

4c Quilt Hack - Place Blue Painters tape at the Quarter Inch Seam Allowance as Guide
4c Quilt Hack – Place Blue Painters tape at the Quarter Inch Seam Allowance as Guide

5a Quilt Hack - Use a Quarter Inch Seam Quilt Foot for Piecing Use a Walking Foot for Binding and Quilting
5a Quilt Hack – Use a Quarter Inch Seam Quilt Foot for Piecing Use a Walking Foot for Binding and Quilting

6a Quilt Hack - Use Cookie Sheets to Sort Quilt Block Pieces with Flannel Fabric Under so They Don't Slip
6a Quilt Hack – Use Cookie Sheets to Sort Quilt Block Pieces with Flannel Fabric Under so They Don’t Slip

Build your quilting skills with our Women’s Health Quilt Along and stitch together the Live Well Live Strong Quilt.  Weekly Live Video Tutorials, Blog Posts, Tips, Hacks & Inspiration.

Stitches-Quilting-Memorial-Day-Quilt-Fabric-Sale

7a Quilt Hack - Arrange Quilt Block Pieces on a Felt Design Board from Foam Core so the Pieces Stay Put
7a Quilt Hack – Arrange Quilt Block Pieces on a Felt Design Board from Foam Core so the Pieces Stay Put

7b Quilt Hack - Quilt Block Arranged on a Felt Design Board Don't Fall Off
7b Quilt Hack – Quilt Block Arranged on a Felt Design Board Don’t Fall Off

Quilt Block Design Board Hack Tutorial

8a Quilt Hack - Use Washble Elmer Glue Stick to Hold Your Binding in Place
8a Quilt Hack – Use Washable Elmer Glue Stick to Hold Your Binding in Place

8b Quilt Hack - Rub a bit of Elmers Washable Glue Stick to baste binding in place for stitching down
8b Quilt Hack – Rub a bit of Elmer’s Washable Glue Stick to baste binding in place for stitching down

8c Quilt Hack - Use Clover Wonder Clips to Hold Binding in place
8c Quilt Hack – Use Clover Wonder Clips to Hold Binding in place

Build your quilting skills with our Women’s Health Quilt Along and stitch together the Live Well Live Strong Quilt.  Weekly Live Video Tutorials, Blog Posts, Tips, Hacks & Inspiration.

9a Quilt Hack - Print off ABCs 123s on Cardstock to Use as Quilt piece identifiers to keep similar shapes sorted
9a Quilt Hack – Print off ABCs 123’s on card stock to Use as Quilt piece identifiers to keep similar shapes sorted

Use Quilt Markers to Sew Quilt Blocks Accurate

9b Quilt Hack - Label Quilt Block Pieces with ABCs 123s and clamps
9b Quilt Hack – Label Quilt Block Pieces with ABCs 123’s and clamps

10a Quilt Hack - Clean Your Sewing Machine Don't Use Canned Spray Air
10a Quilt Hack – Clean Your Sewing Machine Don’t Use Canned Spray Air

10b Quilt Hack - Use a clean paint brush to Clean You Sewing Machine
10b Quilt Hack – Use a clean paint brush to Clean You Sewing Machine

10c Quilt Hacks - Use a Retractor to Get Lint Out of your Sewing Machine
10c Quilt Hacks – Use a Re-tractor to Get Lint Out of your Sewing Machine

Build your quilting skills with our Women’s Health Quilt Along and stitch together the Live Well Live Strong Quilt.  Weekly Live Video Tutorials, Blog Posts, Tips, Hacks & Inspiration.

10d Quilt Hack - Use the Cleaning Brush that came with your Sewing Machine
10d Quilt Hack – Use the Cleaning Brush that came with your Sewing Machine

10e Quilt Hack - Use a Pipe Cleaner to Clean Your Sewing Machine
10e Quilt Hack – Use a Pipe Cleaner to Clean Your Sewing Machine

10f Quilt Hack - Use a Q-tip to Clean Your Sewing Machine
10f Quilt Hack – Use a Q-tip to Clean Your Sewing Machine

11a Quilt Hack - Press your seam allowances to set seams
11a Quilt Hack – Press your seam allowances to set seams

11b Quilt Hack - Press your seam allowances to set seams
11b Quilt Hack – Press your seam allowances to set seams

12a Quilt Hack - Press Seam Allowances to the Dark Side from the back of your quilt block second
12a Quilt Hack – Press Seam Allowances to the Dark Side from the back of your quilt block second

12b Quilt Hack - Press Your Quilt Blocks up and down instead of Ironing
12b Quilt Hack – Press Your Quilt Blocks up and down instead of Ironing

13a Quilt Hack - Sew Long Strips Together
13a Quilt Hack – Sew Long Strips Together

12b Quilt Hack - Sew Sets of Strips Together
12b Quilt Hack – Sew Sets of Strips Together

12c Quilt Hack - Cut Strip Sets Into Quilt Blocks
12c Quilt Hack – Cut Strip Sets Into Quilt Blocks

12d Quilt Hack - Arrange Quilt Blocks into Patterns to Sew Together
12d Quilt Hack – Arrange Quilt Blocks into Patterns to Sew Together

13a Quilt Hack - Use Sew In Interfacig to trace Applique Designs
13a Quilt Hack – Use Sew In Interfacing to trace Applique Designs

13b Quilt Hack - Use a Shape to Trace the Applique Design
13b Quilt Hack – Use a Shape to Trace the Applique Design

13c Quilt Hack - Lay the Interfacing to the Right Side of Your Fabric then Stitch on the Trace Line
13c Quilt Hack – Lay the Interfacing to the Right Side of Your Fabric then Stitch on the Trace Line

13d Quilt Hack - After Stitching Trim the Excess Fabric about Quarter Inch from Shape Line
13d Quilt Hack – After Stitching Trim the Excess Fabric about Quarter Inch from Shape Line

13e Quilt Hack - Cut a Hole in the Interfacing to Turn it Inside Out
13e Quilt Hack – Cut a Hole in the Interfacing to Turn it Inside Out

13f Quilt Hack - The Center of the Interfacing has a small hole to turn inside out
13f Quilt Hack – The Center of the Interfacing has a small hole to turn inside out

13g Quilt Hack - Turn Inside Out so Right Side of Fabric is Showing
13g Quilt Hack – Turn Inside Out so Right Side of Fabric is Showing

Build your quilting skills with our Women’s Health Quilt Along and stitch together the Live Well Live Strong Quilt.  Weekly Live Video Tutorials, Blog Posts, Tips, Hacks & Inspiration.

13h Quilt Hack - Use a Point to Point Turner to smooth the edges of your applique
13h Quilt Hack – Use a Point to Point Turner to smooth the edges of your applique

13h Quilt Hack - Place your Pressed Applique Shape into Place then machine or hand stitch
13h Quilt Hack – Place your Pressed Applique Shape into Place then machine or hand stitch

Build your quilting skills with our Women’s Health Quilt Along and stitch together the Live Well Live Strong Quilt.  Weekly Live Video Tutorials, Blog Posts, Tips, Hacks & Inspiration.

What Quilt Hacks or Tips did you find useful?  What other Quilting Hacks or Tips can you recommend?  We need more!

Deanna Wall Stitches Quilting Stitching Through Life

Slow and Steady Fabric Tula Pink Deanna Wall Stitches Quilting